• Skip to primary navigation
  • Skip to main content
  • Motherhood
    • Mom Life Hacks
    • Pregnancy Life
  • Routines
    • Baby Routines
    • Toddler Routines
  • Family Travel
    • Disney Planning
    • Free Family Vacation Planning
  • Contact
    • About

Mastering Mom Life

Routines for littles made easy!

Family Travel (old)

4 Key Steps to be a Successful & Sane Work at Home Mom

Mom Life

4 Steps to Become a Successful And Same Work at Home Mom

If you are a stay at home mom wondering if you can eventually be a work at home mom then this article is definitely for you! If being a work at home mom is something that you dream of doing one day or even someday in the near future, you’re definitely going to want to know the key steps to be a successful and sane work at home mom.

Is it even possible to be a great stay at home but also an amazing work at home mom? Absolutely! These key steps will help you thrive in your work while continuing to be a successful, and most importantly SANE, mom- making you an amazing work at home mom!

4 Steps to Become a Successful And Same Work at Home Mom


Being a work at home mom doesn’t mean that you neglect your “stay at home mom” duties. “Work at home mom” has a lot of different definitions to different people. Some people think of a mother who is uninvolved in her children’s lives and just focuses on working. Some people think of a mother who is trying to juggle her kids and her daily tasks and is overwhelmed and stressed out. But to me being a work at home mom means, simply put- I am able to complete work tasks while giving my full 100% as a stay at home mom.

Being a work at home mom is being able to be there for my baby 100%

No matter what you choose to do that would make you a work at home mom if you follow these key steps you can make sure that not only your job will be done efficiently, but that your household will be still running smoothly.

I love being a stay at home mom! Giving my baby the one on one teaching and attention she needs while being able to watch her grow right before my eyes are absolutely priceless. I put all of my focus on being there for my daughter as she was an infant so I can tend to her without any work distractions or overwhelming deadlines and schedules. But now that Baby L is a little older and entering her toddler stages, I thought it would be a really good idea to start a side hustle or a little job that I can do while I’m home. This blog has given the reason to say now I can transition to being a work at home mom!

Being a work at home mom is priceless

Even though it was hard to figure out how exactly to be a work at home mom, once I set limits and boundaries, gave myself the liberty to fail, and found the strength to not give up is when I found a system of steps that I needed to take in order to have my home and work life thrive!

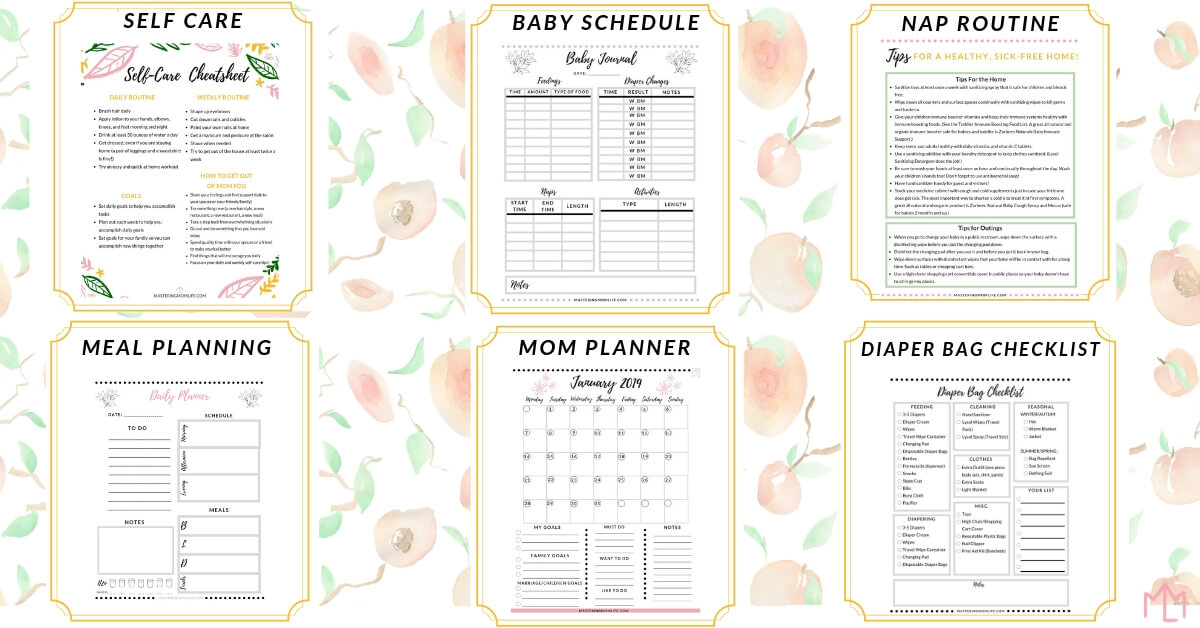
To further help you become a successful and sane work at home mom, I created a Work At Home Mom Planner for you! The planner is like  toolkit that has all of the resources I still use every day to help me be a successful work at home mom. This planner has helped me transition smoothly from just being a stay at home mom to a work at home mom because it has the tools and resources I used to put a system of order in place to help me do both of my jobs (being a mom and a work at home mom) efficiently and effectively! The toolkit has 4 different planner sheets and templates. Be sure to download it now!


4 Steps to be A Successful Work At Home Mom
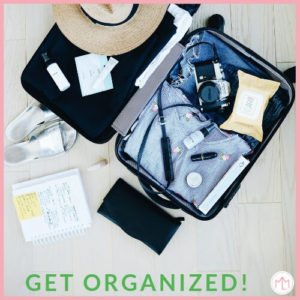
 

1. Be organized


The number one step that I had to take in order to be a successful work at home mom was to get organized. Being a stay at home mom is hard enough, with trying to track your daily tasks, tending to your baby, cooking dinner, running errands, and a million other things. Add to that list a whole other set of tasks that you need to do for your job and you have yourself a chaotic situation.

Don’t be discouraged by how much you may have to change in order to be a successful work at home mom. The first thing that you need to do to keep your sanity is to get organized. Have a dedicated planner, book or binder that is just for keeping track of your daily, weekly, and monthly tasks and deadlines.

To help me with this first step, I created my own templates and it has changed my life! I have specific planner sheets for my household tasks (that has a meal planner, to do list, and chore list). Then I have another planner sheet for all things work related (that has my deadlines, tasks, and goals).

I tried having my house tasks and work tasks on the same planner but it became really frustrating and stressful so once I decided to separate the planning sheets, everything started operating so smoothly. I use both planning sheets simultaneously and it easily compartmentalizes my tasks and helps me see clearly what I need to do and what I have already completed.

Successful work at home mom step 1: be organized


If you want to see and use the planning sheets I created to be sure to download the free Work at Home Mom Toolkit! I created the toolkit specifically for moms who wanted to start working at home and added all of the resources that I created and still use every day for you to have and use!

Each Sunday night I take an hour to plan my whole week using both my house and work planning sheets. I meal plan, prioritize my tasks and go over my schedule and appointments. (My planning sheets in the toolkit help you do this super easy!). I also planned which times I was going to try to work during each day. Was I waking up before my baby? Was I working late into the night? What times did I have during the day?

Doing this has helped me SO much because it reduces the need to have to plan things at the moment and allows me to fully out my effort into the task at hand instead of doing 10 things at the same time.

I STRONGLY suggest you use a system of organization! If you aren’t comfortable with using the system that I created, that perfectly fine! Use the need for a system of organization to create your own. Being organized will help you clearly plan and outline what you need to do and then allow you to see what you have completed and when.


Successful work at home mom step 2: Know your baby's schedule

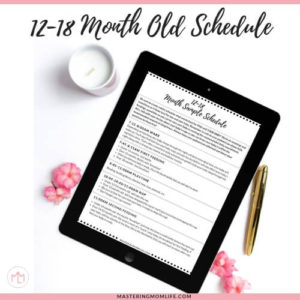
2. Know your baby’s schedule


Once you have a system of organization in place for yourself, the next step you want to take is to really establish and know your baby’s daily schedule. As a work at home mom, your first job will still be being a mom. My first priority when I started to be a work at home mom was to tend to my baby to know that when I work, she will be well taken care of and content.

To be a successful work at home mom you first want your home and children to be functioning at their best. For me, this was being able to know what my daughter needed and when. What really helped me was having my daughter on a schedule.

Having a schedule for your baby will help you know and anticipate their needs which will, in turn, allow you to plan around what you know they will need to be doing at a certain time of the day.

For example, knowing that my daughter naps for 2 hours from 12-2pm every day help me know that those 2 straight hours can be completely dedicated to my job and tasks. I look at my daily tasks and try to tackle each task during that time. If I didn’t know that my daughter napped like this then I would be losing those 2 valuable hours. Your baby’s schedule will consist of their wake times, play times, feeding times, and nap times.

A schedule will help you plan and accomplish so much during your day! I’ve written all about how to know your baby’s daily schedule and the importance of schedule in these posts:

The Importance of a Schedule for Your Baby

How to Start a Nap Schedule with Your Baby

Knowing Your Baby’s Full Feeding Schedule


Successful work at home mom step 3: Establish Independent Play

3. Establish independent play


After knowing your baby’s schedule, you will know when are the times that your baby play’s. Once my daughter started getting old enough for actual play time, I noticed from her schedule that she had 3 different play times (the morning after her wake time, the mid-afternoon after her second nap, and the early evening after her dinner).

Knowing her schedule and knowing these times helped me to plan a time during the day for me to work while she was awake. The question was, was she going to be able to not need the constant attention from me so I could work?

The answer to this question was simple: independent play. Having one playtime a day where she can play independently changed my day! It gave me the freedom to work and gave her the avenue she needed to learn how to play independently, which contributed so much to her growth and development!

4 Secrets to Be a Successful And Sane Work at Home Mom | Work at Home Mom Life | Work At Home Mom for Beginners | Work at Home Mom Routine | Free Planner Printable | Work at Home Mom Planner | Work at Home Mom Tips | Mom life | #momlife #workathomemom

I set up her independent playtime where I am sitting at the table and she is playing in the living room with her toys on her play mat so I am far enough that I am not sitting right next to her but close enough that I am in the same room and am watching her.

Since doing independent play time, I have been able to get work done for a consecutive 45 minutes and have seen her accomplish milestones that she wouldn’t have reached unless I gave her the opportunity to independently play! During this playtime, she has taught herself to take a book off of her shelf, “pretend to read them” and then put it back on the shelf. She takes toys out of her bin and plays with them and tries to stack blocks and fit toys together like a puzzle.

I can’t believe I didn’t establish independent play sooner! It was a win-win.

So, independent play has been a game changer because it helps my daughter in her growth and development and has allowed me to get some more work done during the day as well!


Successful Work at Home Mom Step 4: Involve your spouse and self care

4. Involve your spouse and focus on self-care


The last and most important step is to ask for help and involve your spouse. After all, you don’t want to do this alone! Being honest with your spouse and having him on board for you being a work at home mom will help you in so many ways. Having the support of your husband is priceless!

Have an initial conversation with your spouse about your goals and plans for your work and be honest about what you are going to need from him. Because you are still a stay at home mom now adding work to your already loaded plate, you want to make sure that he is in support of your new work adventure. Maybe there is something that you used to do that he can now start doing to give you a hand with all of the things that you have to get done around the house.

Holding Hands | Spending Time with Your Spouse

The most important thing is to not try to do everything by yourself. That is how you become overwhelmed, stressed out and eventually burnt out where now you feel like you are neglecting both your family and your job. If your spouse isn’t on board or can’t offer you help, reach out to a family member or a close friend that you can share your goals with and maybe they can agree to be there for you when you need help. The important thing is to NOT do it alone.

Being a work at home mom can be tough and overwhelming if you choose to try to conquer the world by yourself.

Another very important tip is to focus on self-care! It’s very easy to get so busy that you feel lost. You want to make sure that you are happy, healthy, and are creating healthy daily habits! That is why on my planner sheets I have a water intake section and a workout/exercise section. Try to do some sort of exercise or workout weekly that will help you feel good and better yourself. It doesn’t have to be a crazy workout routine- maybe you just want to go for a weekly walk with your baby to get out of the house and get some fresh air!

Create healthy habits and make sure to give yourself some much-needed attention and care.


Work At Home Mom Toolkit Post Image

Free Work at Home Mom Planner!

Don’t forget to download my free Work at Home Mom Toolkit! The toolkit has daily planner sheets and weekly planner sheets to help you focus on both your household and your job. It also has resources to help you with your baby’s daily schedule, including a create your own baby daily schedule template! My main goal is to help you and give you the tools and resources you need to successfully be a work at home mom!


I hope I was able to equip you with the steps to be able to be a successful (and sane!) work at home mom! It may not be easy but it can be life changing to be able to stay at home with your family while still providing for them!

4 Steps To Become a Successful and Sane Work At Home Mom | Stay at Home Mom | Mom advice | #newmom #momboss #wahm

As always, feel free to leave me a comment! Are there any other steps or tips that have helped you become a successful work at home mom??

Always With Love, Brianna

P.S. Don’t forget to save this post to your favorite Pinterest Board!

October 3, 2018 · Leave a Comment

Ultimate Tips for Flying with a Baby

Family Life, Family Travel

Ultimate Tips for Flying with a Baby

Are you and your family traveling and need to take a plane? That’s okay! At first, I was petrified to fly with my baby but after actually doing it, it was so much easier than I expected. The first flight with my daughter was when she was 11 months and then we took another trip when she was 17 months. Don’t get too overwhelmed with everything that can go wrong but instead focus on preparing for the trip the best that you can!

Hopefully, with the tips that I learned, I can help you plan and organize everything that you need while sharing awesome tips with you to make your trip stress free.

Best Tips for flying with a baby | Image of woman pushing stroller in parking lot


Flying with a baby is not easy but it does NOT have to be stressful! Having the right items with you, planning ahead, and being organized is key to making sure that your trip is not only successful but smooth- which are all in my ultimate tips for flying with a baby list!

Ultimate Tips for Flying with a Baby


I don’t want to just share my tips for flying with a baby, but I also want to share my awesome Traveling with a Baby: Airplane Checklist and Exclusive Tips Worksheet! This checklist will help you make sure you have everything you need to fly with your baby. I used this checklist twice and it helped me be sure that I didn’t forget anything. It also added to making those flights with my baby stress-free! Be sure to download my Traveling with a Baby: Airplane Checklist!


So now, let’s get down to the amazing tips!


Ultimate Tips for Flying with a Baby

Disclaimer: All opinions are my own based on my own experiences. Please consult your doctor and/or pediatrician before flying with your baby.

Mastering Mom life is a participant in the Amazon Services LLC Associates Program. As an Amazon Associate, I earn from qualifying purchases. Please view Mastering Mom Life’s Terms, Disclosure & Disclaimer Policy and Privacy Policy. I wholeheartedly believe in all of the products I recommend!  Thank you for supporting Mastering Mom Life!

Before booking your flight with your baby

Before Booking Your Flight


Decide whether you are lap sitting or buying a seat for your baby to use a car seat

In most airline policies, babies 2 and under are free if you are lap sitting. This means that you do not have to purchase a “seat” or separate ticket for your baby because it is free for your baby to sit on your lap. Most parents chose this option because let’s face it, free is an awesome thing! But if you think your baby is just going to uncomfortable or you think your baby will do better being in their own seat, then you can purchase a seat/separate ticket for them and use a car seat.

(If you do choose to lap seat, know that most airlines have a policy that you can check your baby’s stroller and car seat at the gate for free and you are permitted an item a personal item for the baby, such as their diaper bag.)


Try to choose a flight that works best with your baby’s schedule

Babies thrive off of schedules but just because your baby had a daily schedule doesn’t mean that you can’t take your baby out and go places. You want to be able to have your baby be flexible with their environment without sacrificing their schedule (feeding times, nap times, etc.). I always find it better to find a flight that works best for my baby’s schedule For example, I’ll book a flight around a time that I know that she will be napping, so she can nap on the flight. Or I book a flight where she will already be well rested and she will be awake and playing on my lap for the flight.

Be mindful of how much time it will actually take you to travel. If you have a really long flight, maybe it’s best to book it time that your baby will at least be sleeping for some of the trip. If you have a short trip, maybe you don’t mind if your baby is up the whole time. Do what works best for your baby and your family!


Get organized before your flight with your baby


Get Organized!


Make a packing list

It’s so important to have a packing list so you don’t get overwhelmed when you arrive at your destination and realize that you forgot everything that was important! Especially if you are packing for your family, you want to make sure you have a packing list so you can easily pack for each person. A couple of weeks before your trip start making a list of everything that you think you are going to need. Even if it’s just jotting down items on your dry erase board or a notepad.

(Access my free resource library to download a free family vacation packing list here!)


Start packing a couple of days before your trip (pack little by little to reduce overwhelm)

Use your packing list to start packing days before your actual trip. There’s no use of making a packing list and then not having enough time to actually use it. Packing a couple of days before will help you get a handle on everything you need to do and help reduce stress and overwhelm.

Are you traveling with your baby on a plane? Here are ultimate tips for flying with a baby! Including a free airplane checklist, family travel tips, and tips for flying! #travel #flyingwithbaby #baby

Preparing for Your Flight


Use a diaper book bag

I love using a diaper book bag because it frees up my hands! When you’re in the airport the last thing you need is to have another bag to hold. Having your diaper bag in the form of a bookbag will help you just sling the bag over your shoulder and quickly free up your arms to hold your baby or hold other bags.

I used this one: Mancro Diaper Bag Backpack: Organizer Backpack with stroller straps, changing pad, insulated pockets, and water resistant.


Use a stroller that you are comfortable with (preferably lightweight/ easy to travel with)

The worst thing you can do is use a stroller that you are not comfortable with, familiar with and is heavy and bulky. When you’re in the airport you’re going to need to fold up your stroller quickly, easily, and on command. Taking a stroller that you know how to use, how it folds, and that folds easily will save you a headache! I also love to use lightweight strollers because it’s easier for me to carry.


If you are taking a car seat to check at the gate, (most airlines don’t charge), use a car seat cover/bag

If you are taking a car seat to check at the gate (most airlines allow you to check a car seat for free), it’s best to buy a car seat cover/travel bag. I purchased mine from Amazon and it was low cost, easy to use, and did the job!

I purchased this one: JL Childress Gate Check Bag for Car Seats


If you are lap sitting: start to put your baby to sit on your lap a couple of weeks before as a “test run”

If this is the first time that you are lap sitting, I would recommend having your baby sit on your lap before the trip so they can get used to lap sitting. Especially if your baby does not lap sit or stay still a lot. Depending on how long your flight is, you might want to come up with ideas to keep your baby occupied and still. See how your baby responds. Each baby is different!


Pack toys/books to keep baby occupied. Maybe even download their favorite show or movie on a tablet?

When your baby is on the plane you’ll definitely want to keep them occupied for as long as possible. Either your baby will fall asleep, or be up. If your baby will be up for the flight, then make sure to bring your baby’s favorite books and toys. You might want to even consider downloading your little one’s favorite movie or show (if they have one) on a tablet or phone. I’m not quick to offer my baby “screen time” or “movie time” but I had a movie on my phone downloaded just in case if Baby L went full-on tantrum in the middle of our flight.

Preparing for the flight with your baby

Offer a bottle or a pacifier (something to suck) while the plane takes off and lands

Planes have a funny way of affecting your ears! The pressure from ascending and descending can be painful even for adults! To prevent your baby’s ears from pressure or “popping”, you can offer your baby something to suck during take-off and landing. This will help prevent pressure in their ears. I always give my daughter milk as we take-off (because she doesn’t use a pacifier anymore). But you can offer your baby a pacifier or a teething/soothing toy that they suck.


Be prepared for unexpected delays

The worst thing about flying is the possibility of flight delays or cancellations. I absolutely HATE running into delays or cancellations- especially with a baby (or children)! I’ve run into both a delay and a cancellation with my baby. The one thing that I learned the most from those 2 experiences is- be absolutely prepared for the unexpected. This means, pack extra snacks, have extra milk/formula with you, make sure to have the things on hand that can calm your baby (such as a pacifier, toy, or book).

Having your flight delayed or canceled is not fun. But when you are traveling with a baby the flight crew and airline attendants should be really good at accommodating your needs and baby’s wants. Make sure to speak up and ask questions!


Wait! Do you love free printables??

Free Mastering Mom Life Resource Library

Become part of the Mastering Mom Life Insider tribe and get instant, FREE, private access to my resource library filled with printables + worksheets to make mom life easier!


Pack enough snacks/milk

As I mentioned in the last tip, it’s so important to have enough snacks, food, and milk for your baby when you are flying. Be mindful of how long it may take you to get through security, arrive at your gate, board the plane, and then actually take off. Even if you feel like you packed enough, always keep an eye out for the stores in the terminal too that can have something that your baby may need.


Bring plenty of disinfectant wipes

There are A LOT of germs in airports. Actually, there are a lot of germs anywhere you go and in any public transportation you use but I feel like airports and airplanes tend to be really germy. I always travel with a lot of disinfectant wipes. I wipe down the seats we sit on, the area in the bathroom before I put the changing pad down, the armrests, and try to clean anything that my baby comes into contact with for a long period of time.

And you know what, it WORKS. Baby L had not been seriously sick since she’s been born except for a few 24-hour colds. Keeping your hands clean is important too! You don’t want to be neurotic but also want to be preventative.

I purchase these: Lysol Disinfectant Wipes On The Go Travel Size


If you can, travel with someone (or multiple people) for help

I’ve never traveled by airplane with a baby by myself but I do know people that have and were very successful. However, an extra set of hands goes a long way with helping!  If you can, try to travel with your spouse or a family member to make things easier. Maybe you’ll need a break or have to use the bathroom and need someone to stay with your baby.


Pack your diaper bag in an easy to use way where most things are accessible

You want to make sure your diaper bag is organized in a way that is easy to use and that everything is easy to find. Have wipes and diapers easily accessible in case you need to change your baby or you need to wipe something or clean something quickly.

Also, try to set up the area around your seat on the plane in a way that things are in reach an easily accessible. The worst thing is when your baby falls asleep and you can’t reach a tissue or something you need. I usually wipe down the seat and seat pockets and put everything in the seat pocket that I know I need easily.


Tips for Flying with a Baby |traveling with a baby | airplane checklist | mom life hacks | family travel tips | tips for flying | #travel #baby

Take care of yourself too!

It’s really easy to focus so much on taking care of the baby that you forget to take care of you! When you feel overwhelmed, take a break. Be sure to bring headphone and your favorite playlist or download your favorite movie to watch on the plane after baby falls asleep.


Don’t worry about being too loud or feel embarrassed

Trust me, I know you don’t want to be “that” mom on the plane that has a screaming baby. But sometimes things are completely out of our control. If something happens that makes you embarrassed, it’s ok. It’s perfectly normal! Just don’t worry yourself with being too loud or feeling embarrassed and it inhibits you from making the best decision as a parent.


Ask the airline staff/team for help and ask questions when needed

The airline staff are there to help and will answer your questions to the best of their ability. I’ve had some really awesome flight attendants who have helped me and given me items when I needed anything. If you have any questions or need something, make sure to ask the crew!


Ask about early/priority boarding

Most airlines have early/priority boarding for passengers traveling with babies, car seats, or strollers. This gives you an opportunity to board earlier and set up your seat and “station” with everything that you and your baby needs. The extra time to get yourself situated is wonderful!


Have a plan but be flexible!

Having a plan about what time you’re going to arrive at the airport, how long it will take you to get through security when your baby will sleep or eat, etc. is really great but it’s just as important to be flexible! Don’t be too hard on yourself if something doesn’t go as planned.


Tips For Flying with your baby checklist

Free Traveling with a Baby: Checklist and Exclusive Tips Worksheet!

For 20 more awesome tips, be sure to download the Traveling with a Baby: Airplane Checklist and Exclusive Tips! The worksheet is filled with exclusive tips that have helped me seamlessly travel with my baby. Focus on enjoying your trip and get ready for your flight stress-free by using my Airplane Checklist and Exclusive Tips!

Download the free checklist and cheatsheet now!

There you have it! I hope I was able to give you useful tips for flying with a baby! Have any other tips that have been really helpful?? Feel free to share them in the comments below!

Always With Love, Brianna

Pin this post to pinterest

You might like these posts too!

Master Eating Out with Your Baby


Tips for Taking Your One Year Old To Disney World | Disney with a Toddler | Disney Mom | Family Travel Tips | #disneyfamily #momlife #familytravel


September 27, 2018 · 2 Comments

Our Stay at Universal’s Cabana Bay Beach Resort (With a Baby!)

Family Life, Family Travel

Our Stay at Universal’s Cabana Bay Beach Resort

Our stay at Universal’s Cabana Bay Beach Resort in Orlando, Florida was absolutely amazing! My brother was visiting Universal Studios with his friends on a college graduation trip and he invited my husband so I decided to tag along with our daughter! It was our first time staying at Cabana Bay and we didn’t know what to expect but we were pleasantly surprised!

Planning where to stay is hard, especially when you are on a budget and traveling with your baby or children. I always like to look at the reviews of each hotel I am interested in staying. This helps me see which hotel will give us “more bang for our buck”.

Our Stay at Universal’s Cabana Bay Beach Resort

Along with our review of Cabana Bay, I also wanted to share with you the Ultimate Family Vacation Packing List that I used to pack for our trip! With this packing list, I was able to pack everything my family needed and we didn’t forget one single thing, which means that we didn’t have to purchase anything because we forgot something. Victory! In the Ultimate Family Vacation Packing List, I also include a bonus packing list of everything you need for your baby on your vacation too! That way, everyone in your family is all set! Don’t forget to download your copy of the Ultimate Family Vacation Packing List!


If you are thinking of staying at Universal’s Cabana Bay Beach Resort, I highly recommend it but take a look at our review of the hotel and see if it will work for your family!


Our Review of Universal’s Cabana Bay Beach Resort!


Rooms

Since we were coming with my daughter, who was only 16 months at the time, we decided to stay in a Family Suite. We were also traveling with some friends who had a standard room and those rooms were beautiful as well! The rooms are decorated really well within the theme of Cabana Bay Beach Resort, which is very circa 1950-60’s. The rooms were very clean too!

Cabana Bay Family Suite Entrance

Features of the Suite

  • Kitchenette: The kitchenette is when you enter the room and is a part of the living room space. The kitchenette had a sink, refrigerator (a little larger than a mini fridge but it did not have a freezer section), shelf storage above the sink, a microwave, a coffee maker, an island connected to the counter which included 2 bar stools.
  • Living room: The living room has a couch and 2 chairs, along with a tv and dresser of drawers. The couch is a pull-out couch too!
  • Partition: What I loved most about the suite was the partition between the kitchen/living room area and bedroom area. It was so ideal because we were traveling with my one year old daughter who sleeps in a dark room and is easily woken by me and my husband. Having the partition was like having 2 bedrooms because she was able to sleep in her crib in the living room area.
  • Split bathroom: Another amazing feature of the suite is the split bathrooms. There are 3 different sections of the bathroom: 1) a toilet, 2) a vanity and sink 3) a sink and tub. The main vanity and sink area are exposed and is in the bedroom area. The toilet has a separate door and the second sink/tub has another door.
  • 2 Tv’s: Because there is a separate living room area, there is a tv in the living room and one in the bedroom area.
  • Large closet: There is a large closet (can be considered a walk-in closet) in the bedroom area that has hangers, a safe, extra pillows and blankets, and a luggage holder.


How we arrange the room for our baby to sleep:

The biggest reason we chose to stay at Cabana Bay was because of the kid-friendly atmosphere and the price for the family suite. We knew we wanted a bigger room than a standard room because I needed to put my daughter down to sleep earlier than we were going to sleep. The Family Suite at Cabana Bay was absolutely amazing and was so spacious. They offer complimentary cribs so we were able to put the crib in the living room area, which was separated from the bedroom by a partition. This helped the room stay darker and quieter as my baby slept but gave my husband and I the freedom to stay up.

We arranged Baby L’s crib in the living room by placing her crib in between the TV dresser and couch. There was a huge empty space there where the crib fit perfectly. You can see the picture of the set up below. It also was great to have her in the living room area because we were able to use the bathroom and take showers without disturbing her because the bathroom is in the bedroom area.

Crib at Cabana Bay Beach Resort


Pools:

The super awesome thing we loved about Cabana Bay was that there were 2 different pool areas. The first pool was located outside of the lobby in the Cabana Courtyard and had a cool water slide, a big pool, a splash pad, and a bar/grill. It also had a bunch of private cabanas that you could rent for the day with a tv, mini fridge and comfortable seating. The second pool was located outside of the Bayliner Diner in the Lazy River Courtyard and had an awesome lazy river, a regular pool, a splash pad, and another bar/grill. By the lazy river, you were able to purchase floats and tubes at The Tube Shack for $7. There are also towel bins where you can pick up towels by the pool and drop off the dirty ones when you are done.

Cabana Bay Pool Outside Lobby


Food:

Cabana Bay Beach Resort has SO many eateries! I wasn’t able to try the food from every place but the food that I did have was fantastic. The main “food court” was called the Bayliner Diner. It is set up cafeteria style where you order your food from different counters (based on different food varieties) and then you pay at the cashier when you are done. I was able to try breakfast, lunch, and dinner at the Bayliner Diner and every meal was great. They also have great kids meals, where each kids meal comes with a main entrée, side, grapes/carrots, and a drink applesauce, milk, or chocolate milk). They had a wide variety of kids breakfast, including French toast, eggs, waffle, and biscuits.

Cabana Bay Bayliner Diner


The Bayliner Diner has a huge seating area that engulfs you in the retro era with TV’s playing old commercials and cartoons as well as drinks and condiments stations at each corner.

Cabana Bay Bayliner Diner Seating

They also offered a refillable cup where you pay one price for your stay and are able to refill your cup unlimited times a day. We paid 17.99 for 7 days and it was worth it for us because I had coffee, tea, soda, water, seltzer water almost every hour while I was at the pool and in the resort. I would even fill it up to bring it back to my room so I didn’t have to buy another drink. It paid for itself in a little under a day because each drink was 2.99-4.99 and if I were to buy 10 2.99 drinks in the day it would already be double of what I paid for the refillable mug!

There was also another eaterie by each pool and a Starbucks in the main lobby!

Mini Market:

Apart of the Bayliner Diner was a mini market with snacks, pastries, drinks, gluten-free options, chips, cookies, create your own yogurt bar, salad bar, and so much more. This is where we were able to buy a half gallon of milk for my daughter and all of her snacks for the room.


Size of Resort 

The size of the resort itself is massive. There are 8 different buildings with different rooms (ranging from standard rooms, one bedroom suites, 2 bedroom suites, courtyard suites, tower suits, and poolside suites). As mentioned before, the resort has 2 different pool areas, which is great because since the resort is so large there was a pool closer to each side of the resort so you didn’t have to walk too far.

Cabana Bay Bayliner Diner View

Proximity to Parks/Citywalk

Cabana Bay is one of the farthest resorts from the Universal Parks/Citywalk but they do offer a free bus shuttle to transport you to Citywalk (from there you walk to the park entrances). There is also a garden path to walk to Citywalk from the resort, which is about a mile. In the heat, it can be a daunting walk but if the weather is nice it will take you around 20-30 minutes to walk. It also depends on how fast you walk. The neighboring hotels, Sapphire Falls and Aventura Hotel are right across the street and Sapphire Falls has a boat that takes you to Citywalk as well.  Overall, even though the parks were not as close to the resort as other hotels on property, I thought it was great to have the option to walk. The shuttle bus to Citywalk is outside of the main lobby and is about a 5-minute trip and each bus comes about 10-15 in between in each other.

The resort is also connected to Universal’s newest water park, Volcano Bay. You can see the huge volcano from the hotel (pictured below!).

Universal Shop:

There is an awesome Universal Gift Shop inside of Cabana Bay (located in the main lobby). There you can find character apparel, pins, cups, magnets, bathing suits, Cabana Bay merchandise and even little things that you might have forgotten to pack such as Tylenol or Chapstick. There is a great Wizarding World of Harry Potter section with wands, robes, and apparel. I loved this store because there were things that I forgot to pick up at the park that I wanted to buy and they had it right at my resort. It was also awesome to have a place to do some last-minute souvenir shopping without having to go back into the parks or Citywalk.

Review of our Stay at Universal’s Cabana Bay Beach Resort| family vacation | vacation with baby | family travel tips | packing lists | #family #travel

Cons:

I enjoyed Cabana Bay SO much and there was only one thing that I considered a “con” during our stay.

No Fan in Bathroom– One thing that we did not like was that there was no fan/ventilation in the bathroom. In the family suite, there was a little room with just a toilet (because the toilet and sink were separated so more people can get ready at the same time). But that little toilet room was so stuffy and honestly, got really stinky at times. My family was not able to use the toilet right after each other because there were times that the bathroom was smelly. (Thank goodness I brought some spray with me!). My brother room had a family suite filled with 6 guys (ages 21-28) and he said that the toilet room was very unpleasant because there was no ventilation. I recommend definitely bringing some air freshener!

Ultimate Family & Baby Vacation Packing List


Ultimate Family & Vacation packing List for Cabana Bay

Don’t forget to download the Ultimate Family Vacation Packing List with bonus Ultimate Vacation Baby Packing List! Take the stress out of packing and remembering to pack everything and just focus on the awesome time you are going to spend with your family. You can use this list for any vacation that you have, no matter where you go!

So that was our stay at Universal’s Cabana Bay Beach Resort! We had an amazing time! Cabana Bay is clean, family friendly, baby friendly, value priced, and have a great staff. We enjoyed our stay very much and will be returning in the future!

Always With Love, Brianna


Want to read more reviews of Universal’s property?? Check out my post “Our Stay at Universal’s Hard Rock Hotel Orlando”!

Want to remember this? Save “Our Stay at Universal’s Cabana Bay” to your favorite Pinterest Board!

September 22, 2018 · Leave a Comment

The Emotional Part of Labor and Delivery

Pregnancy Life

Emotional Side of Labor and Delivery | Birth Affirmations | Preparing For My Baby

What do you think of when you hear labor and delivery? I always think of those movies where the woman is screaming, pushing, and sweating profusely (haha!). Movies show an unrealistic view of labor and delivery and childbirth but it does get the point across- labor and delivery are strenuous.

How to Prepare Your Emotions for Labor and Delivery | Labor and Delivery Tips | Labor and Delivery Affirmations | Birth Affirmations Printable | free printable | #newmom #pregnancy

If you are a first-time soon to be mom then you may be getting ready for all of the physical events that your body will be experiencing. It’s not news that labor and delivery is a very active and physically demanding task, but what a lot of new moms underestimate is the toll that it makes on your mind as emotions as well.

Emotional Side of Labor and Delivery | Birth Affirmations | Preparing For My Baby

All pregnancies, childbirth’s, labor and deliveries are different. Just like no 2 women are the same- no 2 childbirths are the same. No matter what kind of birth you have, medicated, unmedicated, hospital birth, home birth, vaginal birth, or cesarean birth- you will be giving birth to a brand new life. With that great responsibility, comes a lot of emotional work.

Because labor and delivery can affect your emotions in such a very real way, you want to make sure that you are preparing for your birth emotionally as well physically by understanding what emotions you will be experiencing and how you can help prepare yourself for them!


What Emotions You Will Be Experiencing During Labor and Delivery


Excitement

I remember feeling such a rush of excitement in the middle of childbirth. I was so excited to finally meet my little baby. I grew her in my womb and bonded with her over late nights when her kicking would keep me up. I would talk to her when I was having a bad day and sing to her every night after we set up her nursery.

Now, this little baby in my belly was going to be a real life in my arms that I could cuddle and hold. The surge of excitement overcame me in between all of the other emotions I was having! Above all that I was feeling, I just wanted to meet her. And I was so excited to do so!

During labor and delivery, you may be feeling a million and one things, but one of those emotions will be excitement. Choose to hold on to that excitement and let it fuel your childbirth. Instead of being overcome by pain or fear, let excitement and anticipation of meeting your beautiful little baby be what drives you!

Can't Wait to Meet The One Who Will Fill These Little Shoes

Exhaustion

After about 20 minutes of labor and delivery, I was already exhausted and so tired! I just wanted to close my eyes and go to sleep for about 3 days. During childbirth, or even after you feel your first contractions, you feel tired. Your body is working so hard to deliver your baby and it’s perfectly normal to feel tired.

You may FEEL tired but you obviously cannot stop to take a nap in the middle of labor and delivery so you will have to push through that exhaustion. It sounds harder than it is because at that moment you will also be feeling the excitement of meeting your baby!


Sickness (Nausea, lightheaded, etc.)

It’s kind of obvious that you may feel some sort of sickness. I was so nauseous during labor and delivery that I couldn’t even fathom putting ice chips in my mouth. But even though I was nauseous I was extremely thirsty! Your body will be feeling a bunch of different feelings: hungry, thirsty, nausea. It’s completely normal.

Preparing for the Love of a Lifetime

Fear

It is also completely and totally normal to feel some kind of fear. Especially if this is your first baby, it’s normal to be afraid of the unknown. I remember feeling so afraid of what was going to happen to me. I was afraid of needles, I was afraid of feeling pain, I was afraid of what my body was about to do. It may be easy to let that fear overcome you but don’t let the fear of what you are experiencing keep you from being positive and excited about having your baby.

But also, don’t feel like you have to shove fear deep down because you are afraid of what people will say if you say that you’re scared. Everyone expects you to have some level of fear- whether it’s a level of 1 or a level of 10, it doesn’t really matter!


I think you’ll like this post too!

Hemorrhoids during pregnancy


Pain

It’s no surprise that you will be experiencing pain in labor and delivery. Even if you are choosing a medicated birth (which I semi did), you will definitely still be feeling pain. Pain and fear were hand in hand for me. When I was in pain I was afraid that it would never end and then when I didn’t feel the pain, I was afraid that it was going to start again.

If you are afraid of pain, don’t let that stop you from being able to enjoy the birth of your baby. It takes so much strength, physical and mental, to be able to have a baby and take pride and joy in yourself that you have made it this far and that you will be an amazing mom!

Also, keep in mind that everyone’s labor and delivery is different so don’t get too hung up on what you will be experiencing. Don’t fear these emotions. Instead, embrace them and know that they are a part of the process!

Free Mom Planner and Baby Tracker Printable


How to Prepare for the Emotional Part of Labor and Delivery:

Just as you are preparing your body, it’s so important to prepare your mind for labor and delivery. Remember, your body may be able but if your mind is not willing then not much can happen. You want to be able to have your body as well as your mind and emotions ready for the experience of labor and delivery and childbirth. Don’t worry- it’s super easy to do too!

Here are 3 very easy ways to prepare for the emotional part of labor and delivery. And the best part is, that when you prepare mentally and emotionally, you’re really also preparing physically because your mind will become in sync with your body and you are giving yourself the best chances there are to have a smooth and successful labor and delivery.

Rely On Support

1. Surround Yourself with Support

It’s so important to surround yourself with people who love you, support you and will encourage you. Choose people that you want around when you are in labor and delivery. Ask those people to come to the hospital (or place that you are delivering) to support you. The most important decision I made during labor and delivery support wise, was who was going to be in the in the delivery room with me.

My hospital had a policy that when I was laboring, I could have 4 people in the room with me. Then when I was in actual delivery, I could have 2 people in the room with me. I chose to have my husband and family around me during my labor and delivery because I know that they support me and can encourage me when I’m feeling my worst.

Make sure to contact the people that you trust and are close to you to be there for you. You have no idea how much a difference it can be to have a great support system around you at one of the hardest days of your life. Having that support was not just great physically but emotionally as well!

The Emotional Part of Labor and Delivery | Childbirth | Third Trimester | Preparing For Baby | Birth Affirmations | #newmom #baby

2. Have a Plan

Because you know that labor and delivery can be super emotional, it’s always best to have a plan of action. Just like you would make a birth plan, you can make a plan for things that would help you emotionally. One part of the plan is what we did with surrounding yourself with support. Having that plan for people who you love to come when you go into labor is something that will greatly help you physically and emotionally.

You can also get a playlist ready of your favorite songs and music. I’ve also seen mothers who bring essentials oils in their hospital bag to help with uplifting their mood. Another part of my plan was to use positive affirmation and verbal encouragement. That’s number 3 below!


4. Cocoon yourself with positive affirmations/encouragement

My husband, family, and friends were such a great support to me and brought me so much encouragement. Another way that they were able to encourage me was through the affirmation cards that I created. I printed out little cards with encouraging words and put them in my hospital bag and every time that I would be feeling really low or exhausted or in pain my husband would bring them out and start reading them to me or give them to me to read.

It helped me so much because at that moment I couldn’t always remember to be positive or even had time to think. The cards in addition to the support of my husband and family helped me so much!

Free Birth Affirmation cards

Birth Affirmation Cards

To help you prepare for the emotional part of labor and delivery I re-created my birth affirmation cards and made them in a format for you to print! These affirmation cards were so encouraging to me because when I couldn’t think and I was consumed with pain or emotions, telling myself that I was going to be ok and that I couldn’t wait to see my baby really put things back into perspective for me.

I wanted to share these cards with you so you can feel the encouragement and the support during your labor and delivery. Don’t just be stressed about what you are going to be experiencing in labor and delivery, instead prepare for that time by staying positive! Feel free to print them out or download them to your phone or tablet so you can have them handy! (It’s always better to have them and maybe not use them, instead of not having them and wishing you did!)

Get Your Free Birth Affirmation Cards Now!

Having a baby is such a miracle and labor and delivery is what is going to ultimately connect you and your baby. Being able to birth your child, no matter how your delivery goes, is an amazing gift. It’s a physical feat as well an as emotional roller coaster but man is it worth it! Don’t get hung up on the negative side of childbirth, but choose to see the amazing side of childbirth and hold on to the excitement of finally meeting your baby. Everything will be okay- you can do this!

Pin this post to pinterest

Always With Love, Brianna

Wait! Do you love free printables?

Free Mastering Mom Life Resource Library

Become part of the Mastering Mom Life Insider tribe and get instant, FREE, private access to my resource library filled with printables + worksheets to make mom life easier!

Are you prepared for labor emotionally? | Image of pregnant woman

September 17, 2018 · 1 Comment

The Complete 12-18 month Old Perfect Baby Schedule

Baby Routines

12-18 Month Old Baby Schedule | Daily Baby Schedule Template

Inside: Wondering what your 12-18 month old baby schedule should look like? Don’t worry! Read on to find out all of the 12-18 month old transitions and milestones!

In the blink of an eye, my little squirt went from crawling around the house to sprinting up and down my hallways, wreaking havoc on anything that got in her way. I chaotically entered the 12-18 month stage!

Is your sweet baby 12-18 months old already? So exciting! You may have noticed how much your little one has grown and changed over the past year. Watching your baby grow from a newborn to the beginning toddler stages is so precious.

It’s important to know as your baby continues to grow, their everyday schedule will begin to shift and change.

Having a sample 12-18 month old baby schedule can help you follow a schedule that not only works for you but is tailored to your baby’s growth and enhances their milestones and transitions.


Sample 12-18 Month Old Baby Schedule

Your baby’s schedule will go through several changes as your baby completes different transitions. There are 2 pertinent transitions:

  • feeding transitions: when your baby eats more or less of a type of food or liquids
  • nap transitions: when your baby starts to sleep longer during certain naps and begins to drop another nap

This sample 12-18 month old baby schedule has tremendously helped me when my daughter was in transition stages because it allowed me to see what stage of growth she was in so I could assist her and make those transitions easier for her.

Having this schedule also helped me track her milestones because as the schedule slightly changed, I was able to see her growth based on the changes she made in her daily schedule.

(If you are thinking to yourself, “why does my baby even need a schedule?” then be sure to check out this post that will explain the importance and benefits of a schedule for your baby: “Why a Schedule For Your Baby Is So Important”).


Okay so let’s get down to the 12-18 month old baby schedule!


12-18 Month Old Baby Schedule

Please know that I am not a doctor or physician and I am not medically trained. All tips and advice given is based on my own experience and given to me by my own pediatrician. If you have any questions or concerns, please contact your doctor. This post is solely to offer encouragement from my experience and not designed to offer medical advice or treatment. You can read Mastering Mom Life’s full disclosure, disclaimer, and terms here. 


7:15-8:00 am Wake

  • Your day will start at the time your baby normally wakes. My daughter sleeps 11-12 hours through the night depending on the day so this is around the time that she normally wakes up.
  • As soon as she wakes up I sing her a little good morning song to get her smiling and then change her diaper.


7:45-8:15 am First Feeding

  • At the one year mark, your baby can start drinking cow’s milk (see your pediatrician before making the switch) so at 12 months old we began to introduce cow’s milk. We started in increments and began with 25% cow’s milk/75% formula then 50%/50%.
  • At 13 months she drank a 6-ounce bottle with 75% cow’s milk/25% formula and by the end of 13 months, she was fully on cow’s milk.
  • At 15 months this first feeding was considered Baby L’s breakfast. I would feed her a bowl of plain Cheerios with a side of fruit. Then she would have a 4-ounce bottle. (After 18 months she should be weaned from this morning bottle)

I know some parents have their baby completely weaned from the bottle by 12 months. This is personally not my approach and taking the bottle away from my daughter that soon was not something that worked well.

Be sure to do what works best for YOU and YOUR BABY! Work on weaning as it flows best for you and remember to talk to your pediatrician if you are unsure of what to do or when.

12-18 Month Old Baby Schedule | 12-18 Month Schedule | 12-18 Month Activities | Daily Toddler Schedule | Baby Schedule | Parenting Tips | Free Printable Schedule | Free Baby Printables | #parenting101 #babytips #baby

8:45-11:00 am Playtime

  • At 12 months old after breakfast, I began to sit with Baby L and read her 2 books. I would read with her every morning before she turned 1 but as she is getting older she is getting more involved with reading my turning pages and running her finger along with words and pictures. I continue to read with her every morning. I usually read from 9-9:30 am.


  • At 13 months old I began to teach her “blanket time”. This is where I sit down on the floor with her on a blanket and we play together. This is teaching her to stay on the blanket as she plays so eventually I can teach her to independently play while she is on the blanket and I know she won’t run and get into something she isn’t supposed to.

“Blanket time” comes in handy when you need to do the dishes or fold clothes and you know your baby will be playing on his/her blanket.


  • At 15 months old she was successfully playing at “blanket time” by herself and would stay on her blanket for about 15 minutes!


  • At 16 months old Baby L would play with me, then independently, then in the living, then in her room. By 18 months she was fully playing with blocks, books, building boxes and so much more! Having this playtime really allowed her to grow and teach herself new things!

Dad and baby reading


10:00 am Morning Nap

  • At 13 months old, Baby L transitioned out of her morning nap. When she did take this nap, she did not have any food before she went down to nap and slept for about 45 minutes.


  • If your baby is still showing tired cues at morning playtime then your baby may still be taking the morning nap. That is perfectly fine!


  • Some signs to look for that your baby is transitioning out of this nap: sleeping longer in the night and waking up a little later, starts crying when you put them down and they did not do this before, they do not show tired cues.


Don’t forget your nap routine! If you want to read more on the awesome benefits of a nap routine, read my post “The Importance of a Nap Routine.”

Baby Nap Routine


11:00 am Second Feeding

  • At 12 months old I made “breakfast” foods at this time for Baby L since she was eating only her milk at the first feeding. I would make a meal schedule at the beginning of the week and just follow the plan. It was easier for me to make a meal plan so every day I didn’t have to think “umm what should she eat today?”.

Organizing her meals made life easier for me! Some foods she ate included: eggs, pancakes, oatmeal, French toast, peanut butter toast, etc.

  • At 15 months old when she started eating food for her first feeding, this feeding was heartier and was more of a Brunch than just a straight up lunch. I always started this feeding with fruit, usually bananas, strawberries, blueberries, or cantaloupe.

Related Reading

If you’re having trouble knowing if your baby is full be sure to check out my post “Feeding to Get Your Baby Full” so you can know your baby’s hunger cues. A full feeding is vital for a good nap!

Full Feeding Schedule | Feeding to Get Your Baby Full | Baby Tips | Feeding Schedule | Mom Life Tips | #momadvice #parenting


11:30 am/12:00 pm Nap

  • At 12 months old, Baby L was drinking a 6-ounce bottle with her second feeding before this nap.
  • At 13 months old, this nap became her only nap of the “morning”. I call it morning because it’s easy to get confused if you call it afternoon if your baby is still taking an afternoon nap.
  • When Baby L was taking an early morning nap at 10am this nap started at 12:30/1:00pm and was not too long (maybe 1 hour).
  • After about 14 months old, if your baby has dropped the 10am nap then this nap will get longer and your baby will sleep for about 1.5-2 hours.
  • Around 16 months old is when I started to wean and begin to drop this 4-ounce bottle.
  • Remember to do your nap routine for each nap that your baby has!

BONUS: Download the FREE 12-18 Month Old Baby Schedule so you follow the perfect schedule and create your own awesome baby schedule! Click here to get it now!

2:30 pm Third Feeding

  • At 12 months old, your baby will wake up from the nap and want to eat. Baby L would normally eat a 4-ounce bottle at this time.
  • At 13 months old, when your baby is drinking a full bottle in the first feeding and the second feeding is breakfast, then this feeding is lunch.
  • At 14/15 months old when your baby has transitioned out of the full morning bottle and is eating solids for the first and second feedings, then this feeding becomes a snack.
  • After 15 months old this feeding is just a snack, like fruit, yogurt, oatmeal, etc.

Full feedings are the key to great naps!


3:30-5:00 pm Playtime

  • This is more downtime and activity time for your baby to be developing their senses and activities! Sometimes I take a long walk to get Baby L outside.

Or if you have a yard then you can play outside. Or if you have to run an errand you can take your baby out for a drive. The sky is the limit for things to do with your baby!

The beauty about knowing your baby’s schedule is that you can anticipate what they need and when so if you have a few hours that you know your baby is content, fed and well rested then use those hours and do something that YOU need or want to do!

After all, it’s so important to still focus on yourself as a mom!

Go out with your baby for playtime

5:30 pm Fourth Feeding

  • At 12/13 months old this feeding is a light dinner.
  • After about 14 months old and your baby is eating a full breakfast, lunch, with a snack in the afternoon, this meal becomes full dinner!


6:00 pm Cat Nap

  • At 12 months old, your baby may still be taking the late afternoon/early evening nap. Depending on what time your baby’s bedtime is, this nap will be very short.

But some babies still need this nap because it would be 4 hours after they woke up from their last nap. One of my baby schedule principles was for my baby to be up for no longer than 4 hours at a time.

But now that your baby is getting older, they will be up for longer stretches of time but also sleep for a longer amount of time.

  • Around 15 months old, Baby L started dropping this nap. This nap was the last to be dropped, followed by the first morning nap. After this nap is dropped, your baby will only be napping that once after the second feeding.


  • Even at 18 months old, if your baby had a long, busy day your baby may need a nap around this time! Just because a nap may be “dropped doesn’t mean that it’s impossible for your baby to take this nap every once in a blue moon.

Be sure to look for tired cues and follow your baby’s lead!

12-18 Month Old Baby Schedule | Daily Baby Schedule Template

7:30-8:30 pm Bedtime/Last Feeding

  • Remember to have your bedtime routine before every nighttime sleep!


  • If your baby is still taking that last cat nap then your baby’s bedtime will be more towards 8:30ish. At 12 months, I started Baby L’s bedtime routine around 7:45pm and she had her last 8-ounce bottle at 8:30pm.


  • If your baby had dropped that last nap then your baby will be ready for bed around 7:30pm. At 16 months when that last nap was dropped, I started Baby L’s nap routine around 6:45 and she had her last 8-ounce bottle at 7:30pm.


  • Baby L started to sleep 7-8 hours through the night at 8 weeks old! This was made possible because started her on a daily schedule at 6 weeks and began a nap routine and bedtime routine at 6 weeks as well.

By 6 months Baby L was sleeping about 10-11 hours through the night!

12-18 Month Old Baby Schedule for an Easy Day

Tip About Night Time Sleep

Remember, the length of time your baby sleeps at night will be affected by how long their naps are and the overall daily schedule they have. To ensure the best long lasting sleep effects, be sure to have your baby on a daily schedule that is working for you and your baby, and that they are accomplishing full feedings and full naps.

These factors will greatly increase the consistency of your baby’s nighttime sleep!

And there you have it! This is a sample 12-18 month baby schedule!


12-18 Month Baby Sample Schedule

Free 12-18 Month Old Baby Schedule

I created this Ultimate 12-18 Month Sample Schedule in an accessible format for you to print out and follow daily!

This Ultimate Schedule has extra details about when to start nap transitioning and bottle weaning in these 6 months as well. Instead of worrying about all the different schedules, transitions and weaning’s, spend more time focusing on playing with your baby because you have this master schedule!

As a bonus for downloading the ultimate schedule, you also get a free Create Your Own Daily Schedule Template.

That way, you can “follow” the sample schedule but also have somewhere to track your baby’s individual, unique schedule that will be specifically for your baby! After all, that’s what you REALLY want to accomplish- creating a schedule with and for your baby that works best for them and enhances their growth.

You won’t want to miss these 2 awesome resources!

Get Your Free Ultimate 12-18 Month Baby Schedule and Schedule Template Now!

Remember, having a schedule for your baby doesn’t mean that you are confined in every minute of the day. Having a schedule allows you to anticipate your baby’s needs and know what they need and when!

Don’t let a schedule box you in and make you feel like you have to be at home all day. As long as your baby is getting full feedings, is napping well and is playing productively that you are going to have a good day!

I hope I was able to help you see the stages of growth and transitions that your baby will be experiencing in this new stage of life by showing you my sample 12-18 month old baby schedule.

Don’t chaotically enter the 12-18 month stage– embrace this new season with expectation knowing that you prepared!

Pin this post to pinterest

Always With Love, Brianna

Wait! Do you love free printables??

Free Mastering Mom Life Resource Library

Become part of the Mastering Mom Life Insider tribe and get instant, FREE, private access to my resource library filled with printables + worksheets to make mom life easier!

Related Reading
Nap Schedule | How to Start a Nap Schedule with Your Baby | Parenting Tips | Motherhood | #momadvice #momlife #babysleep


12-18 Month Sample Schedule to Make Your Baby Happy & Healthy! This 12-18 month old schedule includes 12-18 month activities, nap schedules, feeding schedules and toddler transitions. It’s a comprehensive, detailed baby schedule to help your baby grow and develop! #parenting101 #babytips #Parenthood #parenting #freeprintable

12-18 Month Baby Schedule | toddler schedule | daily schedule | free printable schedule | mom advice |baby tips | baby nap | baby feeding tips #momlife #baby

September 8, 2018 · Leave a Comment

  • « Go to Previous Page
  • Go to page 1
  • Interim pages omitted …
  • Go to page 20
  • Go to page 21
  • Go to page 22
  • Go to page 23
  • Go to page 24
  • Interim pages omitted …
  • Go to page 29
  • Go to Next Page »
  • Privacy Policy
  • Cookie Policy
  • Terms, Disclosure & Disclaimer Policy
  • About Me
  • Contact
  • As an Amazon Associate, I earn from qualifying purchases.

Copyright © 2026 · Glamour Theme by Restored 316