• Skip to primary navigation
  • Skip to main content
  • Motherhood
    • Mom Life Hacks
    • Pregnancy Life
  • Routines
    • Baby Routines
    • Toddler Routines
  • Family Travel
    • Disney Planning
    • Free Family Vacation Planning
  • Contact
    • About

Mastering Mom Life

Routines for littles made easy!

Family Travel (old)

How To Easily Adjust Baby to Daylight Savings Time

Baby Routines

Help adjust your baby to daylight savings time

Worried your little one is going to lose precious sleep after daylight savings time starts?? Learn the exact steps you can take to make the time transition smooth!

Daylight savings time for kids can sometimes mean sleepless nights, fussy babies, and complete aggravation.

The great news is, you can avoid the havoc by taking some steps to adjust your baby for daylight saving time.

Daylight savings time can be a hard time for your little one because just like need time to adjust to the new time, so does your baby. Most of the time, it’s hard for babies to adjust to the new time change so it can wreak havoc on your baby’s schedule, and even on your family!

The best way to adjust your baby to daylight savings time, both for the start and end of it, is to ease your baby into the time change by preparing for it beforehand.

I’m going to tell you the exact steps to take to help your baby adjust to daylight savings time before it even happens so when the change starts, they will already be fully adjusted!


Want to make daylight saving time easier for your baby? Find out the exact steps to prepare your baby for daylight savings time before it happens so when the time change starts, they will be fully adjusted! Learn the best baby sleep tips for daylight savings time! Plus a free chart to help you! #parenting101 #parentinghacks #parenting #baby #parentingtips

Want to easily adjust your baby to daylight savings time?

Download my bedtime and nap time charts to help you adjust your baby’s sleep based on their nap times and bedtime! The charts include times to put your baby to sleep for both daylight savings time start and end too.

Let’s get down to it!


Tips help you adjust baby to daylight savings time

Important: These steps reach the optimal outcome if your baby is on a daily schedule and consistent routine. Since we are going to deal with how to adjust your baby’s sleep to daylight savings time, you want to make sure you are doing a consistent nap time routine bedtime routine with your baby. This will make the adjustment SO much easier.

Find out about how to start a bedtime routine here and how to start a nap time routine here.


Start the adjustment 10 days before

Daylight savings time always falls on a Sunday.

Both the start and the end of daylight savings time. So if we are trying to adjust our baby to the change seamlessly, it’s best to start 10 days before that Sunday.

That way, then the time change actually happens, your baby is already fully adjusted and will feel no real difference. We’ll talk more about what to do each of those 10 days to prepare your baby for daylight savings time.

Help adjust your baby to daylight savings time

Gradual adjustment is key

The main part of adjusting your baby to daylight saving time is doing it gradually. That’s why we are not leaving our children to just “adjust” to the new time after it’s done. The important factor is to do it gradually!

When you adjust your baby to daylight saving time gradually beforehand, you wont have a cranky, grumpy, time confused child once it happens!


Best ages to begin daylight savings time adjustments

My daughter was born in April and she experienced her first daylight savings time change in November, when she was 6 months. I thought she was “too young” to try to adjust her before the time change so I just left it alone and figured she would adjust naturally like we do as adults. NOT. THE. CASE.

I was so angry at myself for not adjusting her gradually before the time change because my once passive, easy to fall asleep, loving her schedule baby was now an angry, constantly tired, grumpy baby. It took me 2 weeks to get her back on her schedule and normal routines!

So if your baby is a little more than a couple of months I would just start the gradual adjustment. If your baby is well over toddlerhood and can understand the difference in time well enough, then you may be inclined to just let the change happen naturally. The choice is yours!


Steps to Take to help Baby Adjust to Daylight Savings Time

Daylight saving time starts: Spring Forward (When you Lose an Hour in March)

Daylight Savings Time: Spring Forward

1. Starting 10 days before the time change, start to put your baby to sleep 15 minutes before their normal bedtime.

Because in the spring we are LOSING an hour, that means that your baby’s normal bedtime at 7:00 is really going to be 8:00. Which is too late.

Since you want to keep your baby at the 7:00pm bedtime, this really 6:00pm after daylight saving time.

This means you have to start adjusting your baby to go to sleep earlier, so they are making up for that lost hour once it happens.

So at the 10 day mark, if your baby goes to sleep at 7:00p, put your baby down at 6:45.

Do this for 3 days.


Daylight Savings Time 15 Minutes before bedtime

Remember, start your bedtime routine 15 minutes before as well! For example, if your baby goes to bed at 7:00pm and you usually start your baby’s bedtime routine at 6:15, then you need to adjust the bedtime routine as well and start it 15 minutes earlier, at 6:00pm.


2. 7 days before the time change, start to put your baby down an extra 15 minutes before. This is now 30 minutes before baby’s original bedtime.

Now that you have put your baby down for 15 minutes before their normal bedtime for 3 days in a row, you are going to add another 15 to that time.

Keeping with our original 7:00pm bedtime example, you are now going to put your baby down to sleep at 6:30pm.

Do this for another 3 days.

Don’t forget to move your baby’s bedtime routine 30 minutes from its original time!

5 simple steps to survive daylight savings time with babies and toddlers

3. 4 days before the time change, start to put your baby down an extra 15 minutes. This is now 45 minutes before your baby’s original bedtime.

For the past 3 days you have been putting your baby down to sleep a half hour (30 minutes) before their original bedtime. Now that we are only 4 days away from Daylight savings time, it’s time to add another 15 minutes.

You want to put your baby down to sleep 45 minutes before their original bedtime. S if baby goes down at usually at 7:00pm, you are putting them down to sleep at 6:15pm.

Do this for 3 days.

Remember to move your baby’s bedtime routine 45 minutes before!


Daylight Savings time bedtime chart

Don’t forget to download my daylight savings time baby sleeping chart! It details what time to put your baby to sleep at on each day before daylight savings time to help your baby adjust easily!


4. One day before daylight savings time, put baby down one hour before their original bedtime.

For the past 9 days we adjusted your baby’s bedtime by 15 minutes every 3 days. One day before daylight savings time is the time to make the full adjustment and add that extra 15 minutes to make it the full hour.

For example, if your baby goes to sleep at 7:00pm, put baby down to sleep at 6:00pm. This shouldn’t be a huge change because for the past 9 days we’ve been gradually changing the sleep time by 15 minutes. So, the extra 15 minutes to make it an hour, won’t even feel like anything to your baby!

Don’t forget to start your baby’s bedtime routine an hour before too!


5. On daylight saving time night, put baby to sleep one hour before.

All that you’ve been preparing for is finally here! The official time change! Your baby already went to sleep the night before an hour before their original bedtime. That prepared them for tonight’s official time change. When you put your baby down to sleep a 6:00pm tonight, tomorrow night at this time it will be 7:00pm.

So, your baby will be back to their 7:00pm bedtime!

TA-DA! Not too hard right!


IMPORTANT: This is where the importance of a schedule and routine come in! Because you are changing the actual TIME of your baby’s bedtime sleep, you need to also start their bedtime routine the appropriate minutes before to align with the new bedtime.

Bedtime routine importance in daylight savings time

Having a bedtime routine will help your baby transition times because it will allow them to feel comfortable through the adjustment.

Because they know that the bedtime routine signals bedtime sleep after you do the routine at the new time, it will still signal bedtime sleep and it will help them sleep, despite the time change!

Daylight saving time ends: Fall Back (When you gain an Hour in November)

Let’s talk about when Daylight savings time ends and you gain an hour back! It’s basically the same steps but in reverse!

Daylights savings time, fall back

1. Starting 10 days before the time change, start to put your baby to sleep 15 minutes after their normal bedtime.

Because in the spring we are GAINING an hour, that means that your baby’s normal bedtime at 7:00 is really going to be 6:00. Which is too early.

Since you want to keep your baby at the 7:00pm bedtime, this really 8:00pm after daylight saving time.

This means you have to start adjusting your baby to go to sleep later, so they are adjusting to that lost hour once it happens.

So at the 10-day mark, if your baby goes to sleep at 7:00p, put your baby down at 7:15pm.

Do this for 3 days.

Prepare baby for daylight savings time


Remember, start your bedtime routine 15 minutes after as well! For example, if your baby goes to bed at 7:00pm and you usually start your baby’s bedtime routine at 6:15, then you need to adjust the bedtime routine as well and start it 15 minutes after, at 6:30pm.


2. 7 days before the time change, start to put your baby down an EXTRA 15 minutes after.

This is now 30 minutes after baby’s original bedtime.

Now that you have put your baby down for 15 minutes after their normal bedtime for 3 days in a row, you are going to add another 15 to that time.

Keeping with our original 7:00pm bedtime example, you are now going to put your baby down to sleep at 7:30pm.

Do this for another 3 days.

Don’t forget to move your baby’s bedtime routine 30 minutes after its original time!


3. 4 days before the time change, start to put your baby down an EXTRA 15 minutes. This is now 45 minutes after your baby’s original bedtime.

For the past 3 days, you have been putting your baby down to sleep a half hour (30 minutes) after their original bedtime. Now that we are only 4 days away from daylight savings time, it’s time to add another 15 minutes.

You want to put your baby down to sleep 45 minutes after their original bedtime. So if baby goes down at usually at 7:00pm, you are putting them down to sleep at 7:45pm.

Do this for 3 days.

Remember to move your baby’s bedtime routine 45 minutes after!


Daylight Savings Time free chart

Don’t forget to download my daylight savings time baby sleeping chart! It details what time to put your baby to sleep at on each day before daylight savings time to help your baby adjust easily!

4. One day before daylight savings time, put baby down one hour AFTER their original bedtime.

For the past 9 days we adjusted your baby’s bedtime by 15 minutes every 3 days. One day before daylight savings time is the time to make the full adjustment and add that extra 15 minutes to make it the full hour.

For example, if your baby goes to sleep at 7:00pm, put baby down to sleep at 8:00pm. This shouldn’t be a huge change because for the past 9 days we’ve been gradually changing the sleep time by 15 minutes. So, the extra 15 minutes to make it an hour, won’t even feel like anything to your baby!

Don’t forget to start your baby’s bedtime routine an hour after too!


5. On daylight savings time night, put baby to sleep one hour after.

All that you’ve been preparing for is finally here! The official time change! Your baby already went to sleep the night before an hour after their original bedtime. That prepared them for tonight’s official time change. When you put your baby down to sleep at 8:00pm tonight, tomorrow night at this time it will be 7:00pm.

So, your baby will be back to their 7:00pm bedtime! All done!

IMPORTANT: This is where the importance of a schedule and routine comes in! Because they know that the bedtime routine signals bedtime sleep, after you do the routine at the new time, it will still signal bedtime sleep and it will help them sleep, despite the time change!


Help adjust baby to daylight savings time


Free Baby Sleep Charts for Daylight Savings Time!

To help you better adjust your baby, I created these charts for you to easily access and download! It includes:

  • A bedtime chart of what time to put your baby to bed so you can easily gradually adjust your baby based on their specific bedtime!
  • A nap time chart of what time to put your baby to nap so you can easily and gradually adjust your baby based on their specific nap times!
  • Charts for both daylight savings time start and end!

Get the free Daylight Savings Time Chart now!


There you have it! Here are ALL of the steps to take to adjust your baby to daylight saving time, both the start and the end of it!

Remember, the best way to adjust your baby to daylight savings time, both for the start and end of it, is to ease your baby into the time change by preparing for it beforehand.

By following these exact steps you will help your baby adjust to daylight savings time before it even happens so when the change starts, they will already be fully adjusted!

No sleepless nights this year!

Have any questions or want to share how you help your baby adjust to daylight savings time? Feel free to share them in the comments below!

Always With Love, Brianna


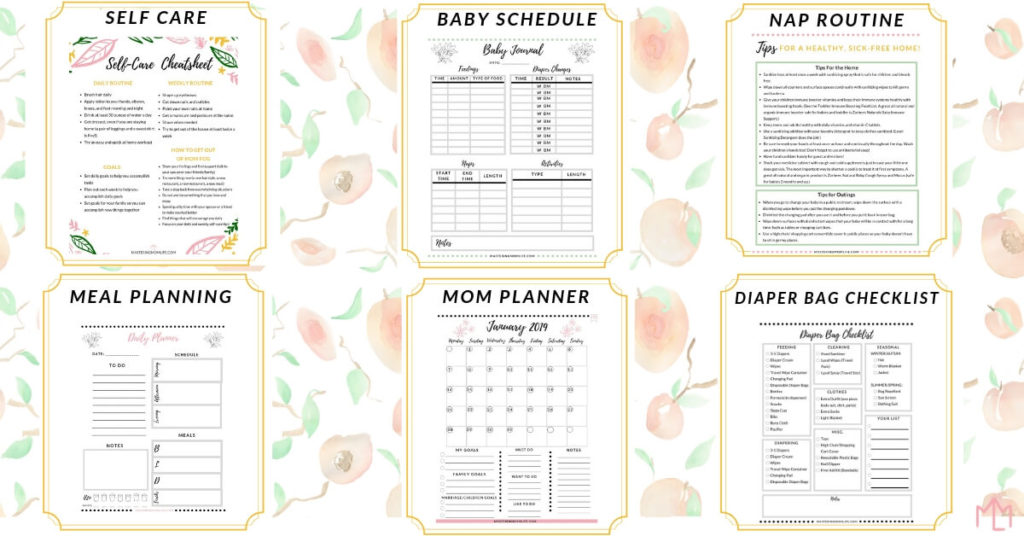
Read these related posts

Importance of a baby bedtime routine to help your baby sleep longer and better!


Baby Nap Routine with Free Nap Routine to Help Baby Sleep Longer Everyday

How to prepare your kids for daylight savings time

How to easily adjust baby to daylight savings time

February 23, 2019 · Leave a Comment

Hemorrhoids During Pregnancy

Pregnancy Life

Hemorrhoids during pregnancy

Inside: The key to dealing with hemorrhoids during pregnancy is to prevent worsening symptoms and to be intentional about the proper prevention, care, and treatment!

Hemorrhoids kicked my butt! (Literally…)

I was 7 months pregnant and unable to move for hours at a time. I was in excruciating pain and tried to keep my tushy up in the air for as long as possible. I wanted to die.

I was NOT prepared for hemorrhoids.

Hemorrhoids during pregnancy can be very overwhelming, painful, debilitating, and frustrating. But you can conquer the horror of hemorrhoids with some key tips!

The key to dealing with hemorrhoids during pregnancy is to prevent worsening symptoms and to be intentional about the proper care and treatment so you can heal quickly and easily!

Today, I’ll be going over EVERYTHING you need to know about hemorrhoids during pregnancy including causes, prevention, treatment, and care. Plus, some “been there, done that” tips and tricks from moms who have battled hemorrhoids.

How to overcome pregnancy hemorrhoids

Everything You Need to Know About Hemorrhoids During Pregnancy

This post contains affiliate links. Any purchases you make through these links, I will receive a small commission at no extra cost to you! Mastering Mom life is a participant in the Amazon Services LLC Associates Program. As an Amazon Associate I earn from qualifying purchases. Please view Mastering Mom Life’s Terms, Disclosure & Disclaimer Policy and Privacy Policy. I wholeheartedly believe in all of the products I recommend and use them all! 


Causes:

What are hemorrhoids?

Hemorrhoids are swollen veins in the rectum that form from increased pressure from pushing and straining. They also develop from sitting on the toilet for a long period of time due to continuing diarrhea and constipation.

Hemorrhoids during pregnancy are SO common because you can experience both constipation and diarrhea while you are pregnant.

Hemorrhoids can be internal, where they are swollen veins in your rectum, or they can be external, the veins swelling and fall outside of the rectum. (I know, not a pretty conversation at all!!)

Hemorrhoids, both internal and external, can bleed.

Prevention:

One of the greatest ways to combat hemorrhoids is PREVENTION!

Take stool softener–

One of the main keys to preventing hemorrhoids in general or preventing them from getting worse is to keep your stool soft. (I know, it’s not a pretty conversation but I promise it’ll be worth it!)

As I mentioned, hemorrhoids usually come about when you are pushing too hard, and too long. When your stool is soft, it irritates your bottom less because you are not pushing longer or hard.


Moisturization–

One of the best ways to keep your hemorrhoids from flaring up or from getting worse is to keep cream on your bottom constantly. Like any other part of your body, when your bottom moisturized, it is less itchy less red, less inflamed and overall less painful.

Different cream options:

Preparation H Cooling Gel with Aloe and Vitamin E

Earth Mama Organic Perineal Balm

Preparation H Maximum Strength Cream

I have actually purchased 3 different creams and use them for different times. The first cream is for instant cooling relief for when I am at my worst and in a lot of pain. The next cream is for use throughout the day to prevent the burning and itching sensation. I like to use it more liberally because it’s all-natural and organic. And the last cream is used for night time to get me through the night.

Everything you need to know about hemorrhoids during pregancy

Go When You Gotta Go

As soon as you feel the urge to use the bathroom, go to the bathroom. When you hold it in it becomes hard and backed up and can cause hemorrhoids. This can also cause constipation that can lead to the formation of more hemorrhoids.

After labor and delivery, especially if you have a vaginal birth, hemorrhoids are prone to return. This is due to the constant pushing during delivery and the strength of those pushes. Having and doing a daily hemorrhoid prevention regimen will help you postpartum!


Treatment:

Internal and Oral creams/medications

Don’t underestimate the power of a good pain reliever when you are experiencing intense pain. There are a couple of medication options. You can take oral medication or topical medication.

One day at a time!

Oral Medication

Be sure to ask your doctor about the oral medication you can and cannot take. I’m going to be 100% honest, there was one day that I was in excruciating pain and I took 1 200mg ibuprofen for the pain that I was experiencing. I vowed to take NO medications during pregnancy but those hemorrhoids just were literally so excruciating.

My doctor advised me to take the medicine and I did for one day. And it was like night and day!

Prescribed Topical Medication

I had 4 hemorrhoids at the same time that were unbelievably agonizing. No topical over the counter cream was working. Because I did not want to take oral pain medication for the second day in a row, my doctor prescribed me this special medicated foaming topical cream. And it worked!

So, for specific medicated treatment options, be sure to ALWAYS talk to your doctor and get professional, medical advice. Especially because you are pregnant and you want to keep our baby’s health a priority.

Essential oils to help with postpartum


Home Remedies

Of course, like anything else under the sun, there are home remedies for hemorrhoids during pregnancy. We’ll get into most of them during the “care” section of this post, but here are some of the home remedies that you can do:

  • Sitz baths
  • Epsom Salt
  • Witch Hazel
  • Aloe Vera

Candle | Getting Your House ready for guests

7 Care Tips:

The success to hemorrhoids during pregnancy going away is to take proper care of them. Ultimately, the way you treat them is going to dictate how worse or better they get.

Here are some care tips for hemorrhoids during pregnancy:

1. Donut Pillow-

The worst thing you want to do is irritate the hemorrhoids by constantly sitting on your bottom and putting pressure down there. Of course, it’s impossible to stand all day, so you can get a pillow that literally looks like a donut. The donut pillow helps you to sit without “sitting on your bottom”. This will relieve all of that awful pressure that you feel when you sit down.

This donut pillow is orthopedic and memory foam. It’s designed for hemorrhoids, pregnancy, and postpartum. AND it’s inexpensive!

Cleaning Bath for your postpartum body changes

2. Baths–

Another really great way to care for hemorrhoids is the take a bath with Epsom Salt. The warm water and Epsom salt can soothe any inflammation, swelling, and irritation. If you are not too far along in your pregnancy where you cannot take a bath yet, then you can do a sitz bath.

A sitz bath is a little bowl that goes over the toilet that you fill with warm water and it is essentially a bath for your bottom and not your whole body. If your hemorrhoids are really inflamed and really bothersome and painful, you can take several sitz baths a day for 10-15 minutes each time.

You can even get a sitz bath soak, which contains lavender, geranium and essential oils specifically for hemorrhoid relief. It can even be used for postpartum!

Free Hemorrhoid Treatment Cheat Sheet


BONUS: Don’t forget to download the Hemorrhoid Care & Prevention Cheatsheet so you can know the exact steps to heal your hemorrhoids. Also, it comes with a checklist of all the things you need for a speedy recovery! CLICK HERE TO GET IT NOW!

3. Cream–

Just because you have a hemorrhoid doesn’t mean you won’t have to use the bathroom. And each time you use the bathroom, it can become worse due to the irritation and increased pushing.

To prevent this, every time you use the bathroom apply this cream. It will instantly provide relief and soothe the pain. AND it will make it easier to use the bathroom because you won’t be afraid to actually use the bathroom!


Hemorrhoids during pregnancy

4. Stool softener–

Just like for prevention, one of the best ways to combat hemorrhoids during pregnancy is to keep your stool soft. The worst part about hemorrhoids is that they can never “heal” fully because you have to use the bathroom daily. So, they are daily irritated.

Because you can’t just “stop using the bathroom so they can heal”, you need to make sure your stool is soft. This will prevent your existing hemorrhoids from being aggravated, getting irritated, and becoming inflamed.

One of the best doctor and nurse recommended stool softeners is Colace.

Hard stool = pushing = hemorrhoids.

So…

Soft stool = no pushing = no hemorrhoids.


Preparing for the Love of a Lifetime

5. Peri Bottle/Wipes-

The proper care of hemorrhoids is to not irritate them. Especially after you use the bathroom because they are already aggravated from you moving your bowels. So to not add any more pain or irritation, you don’t want to use hard toilet paper. Instead, you want to use soft, comforting, soothing wipes.

There are these amazing wipes called Tucks Cooling Pads, that are designed especially for hemorrhoids. They have witch hazel in them too! You can get them here! (I have them on auto subscription on my Amazon prime account and get it on discount!)

But unfortunately, there are also times that even wipes will feel like sandpaper because of how raw your bottom is. So instead of wiping at all, you can use this handy, dandy, life-changing peri bottle! You just fill it with warm water and squirt it on your bottom instead of wiping. It cleansing and soothing.

Momma Tip: You’ll be using a peri bottle after labor and delivery too! They give you a peri bottle to use in the hospital so you don’t have to use toilet paper on your super tender, raw, and painful lady bits.


6. Drink lots of water and eat fibers-

Another way to prevent and combat hemorrhoids is to drink lots of water and eat plenty of fiber-filled foods. This will regulate your bowels and keep your bowel movement soft. Don’t underestimate the power of water!


7. Don’t Push, Just Relax-

Because hemorrhoids are caused by straining and perpetual pushing, you want to be sure you are NOT pushing when you use the bathroom. The stool softener will make your stool soft and the water and fiber will reduce the risk of constipation so your bowels should be moving smoothly.

Instead of pushing, just sit and relax and let your body do the rest. Grab a book or your favorite magazine and just wait for your body to naturally move your bowels. Sometimes it takes a couple of seconds and sometimes it takes a couple of minutes. But being sure to not strain is the best way to care for existing hemorrhoids and prevent further ones from developing.

Focus on Self Care and Rest

What to do If your hemorrhoids during pregnancy are very, very painful:

Hemorrhoids can be VERY, VERY painful. There are some cases where you will need to stay home from work and possibly not be able to move a muscle. I won’t say this is often, but it can be normal. Depending on how many hemorrhoids you have and how inflamed they are, the pain can be very intense. Be sure to drink A LOT of water and watch what you are eating.

The most comfortable positions are to sit on a donut pillow in a reclined position or lay face down (with more pressure on your side and now your baby bump) with your bottom a little propped up.

Talk to your doctor. Keep her/him updated and heed their advice!


Hemorrhoid treatment and hemorrhoid prevention checklist and cheatsheet

Free hemorrhoid prevention & care cheatsheet!

I created this cheat sheet to help you battle and overcome hemorrhoids by giving you actionable steps to help you stay comfortable throughout the day!

I suffered terribly with hemorrhoids during pregnancy and I WISH I had a cheat sheet on the proper care and treatment because then I wouldn’t have had to go through the painful trial and errors of what works and what doesn’t. I wanted to give you this Cheatsheet so you can sail through this pregnancy symptom!

The cheatsheet includes a list of things to do throughout your day so you can care for your bottom. I include everything in this post and put this information into actionable steps for you to take. Plus, I give you the ultimate hemorrhoids care checklist of everything you need to keep pain at a minimal and comfort at a maximum!

Get the cheatsheet now!


Well, there you have it! I hope I was able to help you feel a little more confident in battle your hemorrhoids during pregnancy.

Remember, the key to dealing with hemorrhoids during pregnancy is to prevent worsening symptoms and to be intentional about the proper care and treatment so you can heal quickly and easily!

Be sure not to push or strain, it’ll only make it worse!

Now when hemorrhoids are kicking your butt, you can kick them right out 🙂

Do you have any remedies or tips from your own experience for the soon to be mamas battling the horror of hemorrhoids? Write them in the comments below!

Pin this post to pinterest

Always With Love, Brianna

P.S. Join Amazon Family!

Joining Amazon Family has been the best decision I made! Not only do you save money on almost everything that you purchase, but you can put things on monthly and bi-monthly subscriptions. Such as wipes, diapers, creams- just about anything! It saves me money and sanity because I never have to forget to pick something up if it runs out because I know it’s getting delivered to my door! PLUS save 20% on diaper subscriptions when your little one gets here! SCORE!

Join for free today and start a 30 day free trial!


WAIT! Do you love free printables??

Free Mastering Mom Life Resource Library

Become part of the Mastering Mom Life Insider tribe and get instant, FREE, private access to my resource library filled with printables + worksheets to make mom life easier!


Maybe you’ll like this post too!

Essentials for Quick and Easy Postpartum Recovery

Disclaimer: Please know that I am not a doctor or physician and I am not medically trained. All tips and advice given is based on my own experience and given to me by my own doctor. If you have any questions or concerns, please contact your doctor. This post is solely to offer encouragement from my experience and not designed to offer medical advice or treatment.

everything you need to know about Hemorrhoids during pregnancy | Image of a bathroom

Want relief from hemorrhoids? Find out everything you need to know about hemorrhoids during pregnancy including internal and external! In this post I talk about hemorrhoid causes, hemorrhoid prevention, hemorrhoid treatment, hemorrhoid care, and even tips and tricks to help you recover quickly and easily! Get rid of those pregnancy hemorrhoids as painless as possible! #pregnancy

February 20, 2019 · 3 Comments

Postpartum Body Changes and How to Cope

Mom Life

Postpartum Body Changes and how to cope

Inside: Does your body feel so foreign after giving birth? Find out the ways different your postpartum body changes so you can bounce back easily!

I was not prepared for my postpartum body. It hurt to sit, hurt to stand, hurt to cough, hurt to pee. Having a baby is no joke. And let’s be honest, the aftermath of having a baby can be equally challenging!

But you overcome the postpartum body changes with knowing how to prepare for them and what you can do to help you heal quicker.

Today I want to talk to you about the 5 things that shocked me about my postpartum body AND how to cope with them. These are the things that I was utterly unprepared for and was like a fish out of water trying to figure out how to survive.

But knowing the different postpartum body changes, how to cope with the challenges, and how to heal faster will help you bounce back to your normal self in no time!

A lot of these things are the things that NO ONE TOLD ME ABOUT.

Granted they are unpleasant topics that don’t come up in normal conversation, but I still wanted to give you a chance to be more prepared than I was!

Want a checklist of postpartum essentials? Check out my ultimate Postpartum Essentials checklist so you can be prepared and heal faster!

Let’s get down to it!


5 Shocking Things Postpartum Body Changes and how to cope!

This post contains affiliate links. Mastering Mom life is a participant in the Amazon Services LLC Associates Program. As an Amazon Associate I earn from qualifying purchases. Please view Mastering Mom Life’s Terms, Disclosure & Disclaimer Policy and Privacy Policy. I wholeheartedly believe in all of the products I recommend and use them all! 

1. Hemorrhoids

Man oh man, I was NOT prepared for hemorrhoids. I had them during pregnancy but after pushing a 9-pound baby out for over an hour they really intensified.

And my postpartum body with plagued with the horror of hemorrhoids. And it was one of my most shocking postpartum body changes!

I never hear of anyone talking about hemorrhoids. I feel like it’s one of those “ugly truth” topics in life that everyone seems to ignore.

Here are the 2 ways to battle hemorrhoids:

First, Prevention:

One of the greatest ways to fight hemorrhoids is PREVENTION!

If you only have a tiny hemorrhoid and you don’t want it to get worse, or if you don’t have hemorrhoids and want to keep it that way, this is what you do:

Keep your bottom moisturized–

I know this sounds really silly but one of the things that helped me prevent hemorrhoids in the early stages was keeping my bottom slathered in cream. You basically don’t want your booty to get to the point where I can become red and inflamed.

This cream is awesome! I have it on my monthly automatic order because I use it and love it so much!

Take stool softener–

Another way to prevent hemorrhoids is to make your stool soft. (I know, I told you this wasn’t going to be a “pretty” conversation! But I promise it will be worth it!)

You can use Colace.

Go when You have to-

Another tip is to go when you have to go. As soon as you feel the sensation to use the bathroom, do it. When you hold it in it becomes hard and backed up and can cause hemorrhoids.

Second, Proper Care:

But if you are one of those poor souls that are a victim of hemorrhoids (like I was!), then this is how you can combat the pain and discomfort:

Donut Pillow

Instead of putting pressure on your bottom when you sit, a donut pillow helps you to sit without “sitting on your bottom”. This will relieve all of that awful pressure that you feel when you sit down. You can use this donut seat cushion pillow for any type of surface- chairs, cars, work, cough, anywhere!

Extra Strength Pain Killers

This may be obvious, but when you are in that much pain over hemorrhoids (and it CAN be really, really painful.)

Baths

Baths are an amazing pain reliever. The warmth of the bath with sooth the pain and irritation of the hemorrhoid and also even “shrink” them. (Be sure to get the okay from your doctor before you take a bath!)

Cream

Every time you use the bathroom apply this cream. It will instantly provide relief and soothe the pain AND make it easier to use the bathroom because you won’t be afraid to actually use the bathroom!


Check out this post all about how to deal with the oh-never-so-fun bathroom troubles!

Hemorrhoids during pregnancy


Stool softener

Like I mentioned above, you want to make sure you are taking a stool softener! This helps with prevention AND healing. Anytime you strain to use the bathroom or the stool is hard it will hurt. So, prevent that pain by taking the softener. Trust me, you are going to thank yourself!

Peri Bottle/Wipes

Your bottom area is so tender, raw, and inflamed that even the graze of a piece of toilet paper can send you into a pain frenzy! To prevent making any of the pain worse, I suggest using a peri bottle with warm water and “rise” your bottom with the water instead of wiping.

Or you can use these amazing wipes that are designed to soothe hemorrhoids and discomfort. They are called Tucks cooling pads and even have witch hazel in them!

Postpartum Recovery Essentials Checklist

Don’t forget to get my free postpartum recovery essentials checklist to you are 100% prepared and ready for easy, pain-free postpartum recovery!

2. Hair loss

I was completely shocked to have to deal with hair loss and the dryness of my hair that came along with my postpartum body! Pregnancy made my hair glow and postpartum made my hair die (or at least it felt like that!). Here are some things you may experience:

  • Hair loss
  • Dry hair
  • Dry “patches” in your scalp
  • Dandruff

If you are struggling with postpartum hair then these are the tips that I was told and it’s starting to work.

Postpartum Body Changes | Hair Related

What to do:

Do not use the same hair products or shampoo for more than 3 months in a row

I was told that using the same shampoo and condition consistently for a long period of time can dry out your hair. The thought behind this is that your hair becomes “used to” the product and therefore doesn’t work properly. So, if you are using the same moisturizing shampoo for the past 2 years then it can be counterproductive.

Find a shampoo that is moisturizing but that doesn’t have a lot of chemicals

The more chemicals, the more damaging. Research some products that have fewer chemicals because it will less likely dry out your hair.

Use Aquaphor on the dry areas

If you have dry patches or areas on your hairline or scalp, you can apply Aquaphor ointment to it regularly to keep it hydrated and moisturized.

Essential oils to help with postpartum

Talk to your doctor or (maybe even hairstylist) before using any “dandruff” products

At the first sight of dandruff in my postpartum body, I automatically used shampoo designed for dandruff. But it was actually the worse thing I did. The shampoo caused my hair to fall out and my head to flake! So be sure to ask a specialist before you start using new products.

Use essential oils

Essentials oils are pretty much amazing for anything! And your hair is no exception! You can use peppermint oil to lather into your scalp and it will relieve any itchiness or redness. But be sure you don’t have open wounds or cuts before applying!


Postpartum Body Changes and how to cope

3. Weak bladder

Another postpartum body change is a weak bladder. Do not feel like you are alone when you go to sneeze or laugh and accidentally start to tinkle. Weak bladders are very common amongst moms! Your body goes through so much and so quickly that your bladder is still recuperating as well!

What to do:

Kegels

A really good tip to help you prevent leaks is to strengthen your pelvic floor. You want to do some Kegels and practice strengthening your muscles down there. One you start to do that, you’ll have more control!

Wear Liners

Another tip is to be sure to wear liners. I was still wearing mesh hospital undies for like 3 weeks after delivery with those gigantic pads! But when I started to bleed less I switched to 100% cotton underwear and regular thin liners. It worked like a charm!


4. Brittle nails

Your nails are not exempt from the postpartum body trauma. I learned this the hard way! In about a day’s time your nails can go from strong as ever to weak like paper.

postpartum body changes | nails

What to do:

Prenatal vitamin

To keep yourself healthy, you want to continue to take a prenatal vitamin, and this well help a lot with nails, hair, and overall health. I took this one and its organic PLUS has folate!

Cut and buff nails regularly

Of course, you have a newborn so you can’t spend endless time on your nails! But about once a week or every other week I cut my nails, file them (so I’m not scratching baby!), buff them a bit (with this buffer), and then put on a coat of this strengthening clear polish.

5 shocking postpartum body changes and how to cope with them! Find out how your body changes after having a baby and how you can relieve those symptoms to heal quicker and easier. Learn how to deal with the different changes you experience postpartum! #momlife #postpartumrecovery #momadvice

5. Backaches

Unfortunately, a constant backache is another postpartum body change. If you had an epidural, the site that the epidural catheter was inserted can be sore or painful for up to a couple of weeks. Some women experience lower back pain for year after pregnancy, especially if you had a “back labor” and had issues with your back during pregnancy.

The good news is that there are a couple of things you can do to prevent that pain and keep it minimal.

Here’s what to do:

Wear a girdle or back brace

A back brace or high lined postpartum girdle can definitely help lower back pain. It gives your back much needed support and relives pain.

Cleaning Bath for your postpartum body changes

Warm baths with Epsom salt

A warm bath can work wonders! The warm water and the added Epsom salt soothes aches and pains. (Be sure not to submerge in water until your doctor gives you the all-clear at your postpartum appointment.)

Magnesium

Magnesium is a great natural supplement to help with muscle aches and pains. Especially if you don’t want to continue to take pain relievers constantly. Once magnesium is in your system, it helps you sleep better, have more energy, and even regulates you!

This one is really great because it’s a powder that you can put in smoothies and drinks or even water!

Good pillow (& mattress)

Don’t underestimate the power of a good pillow! After I had my daughter I had to invest in a new mattress and pillow and it worked WONDERS! It relieves pressure from certain pain points in my back and neck and allowed me to have restful sleep (when I was able to sleep!).

I purchased the MyPillow and absolutely love it! Totally worth the investment.

And there you have it!

Missed Something?

Here is the list of overall products that will help your postpartum body (I have used ALL of these items and they continue to be tried and true!)

Hemorrhoid Cream: 1) Preparation H        2) Earth Mama Angel Babe Organic Perineal Balm

Hemorrhoid Pillow: Donut Seat Cushion Pillow Memory Foam

Hemorrhoid Care: 1) Peri Bottle     2) Tucks Cooling Pads

Essential oil: Peppermint oil

Buffer: 4 Step Buffing Block

Strengthening Nail polish: Sally Hansen Diamond Strength Instant Nail Hardener

Prenatal/Postnatal Vitamin: Garden of Life Vegetarian Prenatal Vitamin Supplement with Folate, Iron & Probiotics

Stool softener:  Colace

Hair Healing Ointment: Aquaphor

Back brace: 1) Postpartum Belly Girdle Wrap 3 in 1 Support Recovery Band    2)  Copper Compression Recovery Back Brace

Magnesium: Garden of Life Magnesium Powder

Epsom salt: Epsoak Epsom Salt

Panty Liners: Carefree Scented Thin Liners

Good pillow: MyPillow 


Postpartum Recovery Essentials Checklist

Download my ultimate list of postpartum recovery essentials!

The checklist includes everything in this post PLUS some extra items to add further comfort for you!

Don’t feel like you need to remember all of these items, instead of download the list so you know for a fact that is getting all of the items you need for a quick and easy recovery!

There’s nothing worse than being in pain and feeling uncomfortable and you don’t have anything to bring your relief. Let me help you recover easily, quickly, and in the most pain-free way so you can feel better in the blink of an eye!

Download the Postpartum Checklist now!


I hope I was able to prepare you for these shocking postpartum body truths as well as give you some tips to help you heal faster!

Have any tips that you used to help your postpartum recovery go smoothly? Let me know in the comments below!

Always With Love, Brianna

Keep Going! Read more #MomLife Tips & Hacks!

  • Conquer Postpartum with these Ultimate Essentials to Help You Heal Quicker and Pain-Free!
  • The Best Survival Tips to Improve Mom Mental Health
  • 7 Killer Mom Make-Up Products

Please know I am not a doctor or medically trained. All tips and advice given is based on my own experience and given to me by my own specialists and doctors. If you have any questions or concerns, please contact your doctor. This post is solely to offer encouragement from my experience and not designed to offer medical advice or treatment.

Postpartum Body Changes No One Told me About | Image of flowers, brushes, and candle on desk.

5 Crazy ways your body changed after baby: postpartum body changes

How your body changes after birth and after baby

February 16, 2019 · 1 Comment

The Best Tips for Doing Disney on a Budget

Family Life, Family Travel

Planning a trip to Disney world on a budget does not have to be impossible!

Inside: Do you want to visit the happiest place on earth but automatically think that it’s too expensive and unaffordable? Think again! Planning a trip to Disney on a budget is a lot easier thank you think!

 Going to Disney World doesn’t have to put you into debt!

Here is a list of detailed tips for planning a trip to Disney World on a budget. With in-depth information to make your dream vacation a reality!

Pin for later! ⤵️
Easiest ways to save money at Disney World

Tips for Planning The Best Trip to Disney World on a Budget!

1. Research the best places to stay

The first very important step to planning a trip to Disney on a budget is to decide where you want to stay.

The key is research, research, research!

The main 2 options you have are to stay on Disney property or to stay off-site.

Let’s go over these 2 options!

Option 1: Staying on Disney Property

Do not be deceived by these words and automatically think this is the most expensive option!

There are times that I went to Disney World and it was actually CHEAPER for me to stay on-site than at a regular hotel in the Orlando area. Let me tell you why… PERKS!

There are phenomenal perks when you stay onsite at a Disney Resort and they can save you a tooonnn of money if you take advantage of them.

Here are some of the perks for staying on-site that are serious money savers:

Disney Value Resort

Free transportation to and from the Disney parks (saving you money on parking fees at the park)

There are Disney buses that pick you up from your resort and drop you off at the desired park. There’s a bus for Magic Kingdom, Epcot, Animal Kingdom, Hollywood Studios, Disney Springs and both Disney waterparks.

If you drive your car you also get free parking at the Disney parks too! So you’re saving about $30 a day! There is also a nightly fee for parking at the Disney Resort, so if you eliminate the need for a car, you’re saving an additional $15 a night for parking.

You get to pick your Lightning Lanes 7 days in advanced

Lightning Lane (formerly known as Fast Passes) are awesome because you don’t have to wait in line for a ride, you just come back at you appointed time and you get straight on.

People who are not staying on site choose their fast passes 3 days in advanced of their trip. But Disney Resort guests get to choose their fast passes 7 days in advanced so they get first pick at the rides and times.

This in turn saves you money because the better lightning lane selections you get, the quicker you can do the attractions, which means you’re getting the most out of your park day!

Why go to one park 2 days and waste money on another ticket when you can do everything in one day? Disney on a budget money saving!

Want to find the best, cheap rates at Disney Resorts?

Use a travel planner!

As an authorized Disney travel planner, I’ll help you find the best promotions and sales AND track the cheapest days, weeks, and months to travel so you can save the most money.

Receive a FREE quote so you can start planning a magical Disney vacation…stress-free!

Click here for free Disney vacation help!

Want to visit Disney World but don’t want to spend too much money? Here are 15 tips for planning a trip to Disney World on a budget! These tips will help you do Disney on a budget and plan an affordable and cheap Disney vacation for your family! Plus, a free Disney Printable Planning Packet! #disneyworld #traveltips #familygoals

Option 2: Stay in a Off-Site Location

Now that we briefly went over staying on Disney site, let’s talk about how to save money if you are staying off site!

Booking off-site can mean you choose to stay in a hotel, villa, or home vacation rental style accommodations.

There are plenty of reasons why a family would choose to stay off site, despite the Disney perks. One reason being that they have a bigger family and staying off site is cheaper so they can get larger accommodations!

I have stayed at a regular hotel, rented a villa, and rented a house through a rental site. All of these options have worked and at different times depending on my family’s needs.

If you have children that you want them to be in their own room or you have a larger family that is willing to split the cost of renting a 2 or 3 bedroom place, then this option is much cheaper than booking 2-3 Disney rooms.

Magic Kingdom Castle

The key to this option is to really research prices and different places.

You want to stay somewhere close enough to the parks so you’re not wasting time driving too far but also a place that is less expensive. I rented a villa for only $600 for the week (8 days, 7 nights) that was 15 minutes from the parks and included incredible amenities, such as a pool, rec. room and restaurant on the complex. It was totally worth it because it was less than $100 a night.

We had to rent a vehicle and pay for parking fees at Disney but that cost was offset by spending less on a nightly rate than we would have at Disney. It worked because there were more of us chipping in!

Interested in Staying Off-site?

As a certified travel agent, I can help you book off-site locations too! From home vacation rentals to hotels and suites, I can help you figure out all of your best options AND find you the best deals for your budget.

I’ll help you create the perfect magical vacation tailored to your family. Ready to explore off-site options?

Click here to get started!

2. Go on value season:

No matter where you stay, if you are planning a Disney World vacation on a budget, you’ll want to travel during the offseason.

Because EVERYTHING is cheaper during the offseason. Plane tickets, hotels, car rentals, and even theme park tickets! Not only will things be cheaper, but the parks won’t be as crowded!

Think of off off-season being when kids are in school and there are no holidays or special events. Peak seasons tend to be when kids are off of school and people are on vacation.

Disney on a Budget | Visit on Value season


3. Plan early

Whenever you are planning a Disney World trip on a budget, you want to make sure that you are planning early. Anything that you need to book or buy will be cheaper when you buy it early.

Planning early also gives you more time to save. The sooner that you research your trip details and decide on what you want to do, the more information you have on exactly HOW much you need to save.

4. Drive

Another option to plan a trip to Disney on a budget is to drive. If you are within driving distance of Florida and you have a large family, then driving will be a lot cheaper than flying. I know this tip is common sense, but if you have the option to drive and flights are looking too expensive, it may be the best option.

Airplane | Flying to Disney on a budget


5. Look at a flight low fare/best fare calendar

If you are in your researching phase and are looking in to flights to Orlando, be sure to check the airlines low fare calendar. This is where they will show you the cost of your trip for each day of the month.

That way, you can see which days are more expensive to fly and which days are the cheapest! I’ve scored tickets for only $69 each way by using the low fare calendar. I was planning on flying out a Wednesday and it was $110 each way, but then I checked the low fare calendar and found out it was $40 cheaper to just fly out the next day! Score!

Planning a family vacation to Disney World on a budget | Image of Disney magic Kingdom Cinderella castle

6. Look for perks EVERYWHERE!

Just like staying on the Disney site has perks, so does a lot of other places! From hotels, to airlines, to car rentals, and more!

Disney World Money Saving Ideas

Rent Baby Gear

If you’re traveling with a baby or toddler then you know that kids have tons of STUFF they use every day and every night. It can be a lot to lug all of their baby gear on vacation. You’ll need extra baggage for the gear if you’re traveling by plane and you’ll need tons of space in your vehicle if you’re traveling by car.

An easy way to fix this is to rent your baby gear when you arrive at your destination!

BabyQuip offers clean, safe, and insured baby gear rentals. They deliver and set up the gear for you, AND picks it up when you’re finished with it.

This service allows you to skip all the packing and enjoy your vacation from the moment you arrive. They can even meet you at the airport!

Click here to reserve all the equipment you need to make your stay feel more like home!

Choose an Airline with Good Value

For example, I flew Southwest one time just so I can take advantage of the free 2 checked bags per person! It was the first time flying with our baby and we had a lot of extra stuff with us (car seat covers, diapers, wipes, extra clothes, bottles, etc.).

So instead of flying another airline where each checked bag is $25, we saved $50 a person by switching airlines!

Use the Chase Disney Visa Credit Card for Disney World Perks

I’m totally guilty of signing up for the Disney credit card just so I can rack up free money to go on Disney vacations.

But it ended up being incredible because I use the card for everyday purchases that I would be making anyway, and I get “Disney dollars” for each purchase I make.

My husband and I ended up with about $1,200 of FREE Disney dollars for just using the card on things that we use everyday- like utilities, gas, food, and shopping, that we were going to need to pay for anyway!

Plus, you get 10% off Disney purchases at Disney World AND have these amazing character meet and greet opportunities and get FREE pictures. Just for having a Disney credit card!

The credit card has an option for no annual fee and it’s like having a little piece of Disney with me every day. I absolutely love it because it saves me SO much money when we go to Disney World!

Find out more about the Disney Visa Card here.

7. Bring the essentials with you

Planning a trip to Disney World on a budget also consists of making sure that you are bringing all of the essentials with you. Ever checked out the prices of a bathing suit on vacation? Or the price of a bottle of Tylenol? It’s like 3 times the regular cost!

Vacations tend to be expensive because let’s face it, things are expensive! But if you plan properly and make sure that you are bringing with you everything that you needed, you won’t have to spend money on things that you had at home and just forgot to bring.

So, save your vacation money for things you actually want, and not on meaningless things that you could have brought with you from home, like a razor or bathing suit or tums.

Sleepy Hollow Waffle Sandwich Magic Kingdom

8. Save on food costs

One of the greatest costs of any vacation is food. A really cool thing that Disney parks let you do is bring snacks and drinks in the park.

So you can essentially plan your whole meals and snacks without spending a dime on food in the park! I’ve even brought in bottles of water and packed snacks with us so we weren’t spending money every 2 hours on a little bite to eat. It’s a great way to save money!

If you didn’t opt for a rental car and just used Disney transportation, you can even have groceries delivered straight to your resort so you can have snacks and make your food. It saves a lot of money!


Related Reading
How to save money at Disney World

9. Buy Disney merchandise at home

A really great way to save money and plan a trip to Disney World on a budget is to purchase Disney merchandise at home before your trip. Most of the items you are going to want to buy are things that you can easily get on the Disney Store website or even at your local dollar store!

Buy your own bubble machine, glow in the dark products, and Disney apparel at home!

Want your family to wear matching Disney shirts or Disney apparel? Check out Target, Walmart, and your local stores to find things on sale. Because let’s be honest, one t-shirt at Disney is going to cost you about $30 when you can buy all the t-shirts for your family for that price

Save your souvenir budget for things that you can ONLY get in the parks on things that you know you are really going to want. Don’t spend your budget on a bubble machine and a light up sword.

Disney Entrance

10. Use credit card points to buy Disney gift cards

If you REALLY want to plan your trip the cheapest way possible, another great tip is to use your credit card points to buy Disney Gift cards.

Then it’s like free money!

A lot of people have credit cards where you get a percentage of cash back for every dollar you spend. Then you can cash in those points or request the cash back at certain places. For example, use your Target credit card to purchase Disney gift cards, that way you’re saving 5%!

A really thrifty idea that I had was to open a Disney Chase credit card, claim the free $300 bonus for enrolling and then use that money towards my trip.

Then for every dollar you spend on the credit card, you get a percentage that goes into a fund that you can access to use for any Disney item (including Disney store, flights, hotel stay, theme park tickets, and more!)

So what my family does is use the Disney credit card for every purchase we have (bills, grocery, gas, etc.). Then we pay the credit card off with our debit account. That way we are collecting all of this free Disney money JUST for simply using the credit card!

We’ve been using the Disney Credit card for over 2 years and have accumulated thousands of dollars that is FREE money! (We are saving it to use for another Disney cruise for our wedding anniversary!)

Budgeting is all about thinking SMARTLY!

11. Use a Disney Travel Planner

One of the best vacation decisions you can make is to use an authorized Disney vacation planner! A travel agent has first access to the best deals, promotions, sales, and even dates that will make your trip the cheapest it can possibly be.

Looking for this kind of vacation assistance? I can help!

As a certified Travel Agent and authorized Disney Travel Planner specializing in Disney vacations, I can help you plan the most stress-free vacation while finding you the best prices for the dream vacation you have in mind!

What do you get with a Disney Vacation Planner?
  • Personalized vacation help and itinerary planning
  • Price monitoring so you receive the lowest price
  • Crowd Calendar and Seasonal Pricing to know the best time to book
  • Help with park reservations and dining reservations
  • Client folder sent to you with park maps and tips prior to departure
  • Any modifications and changes to your vacation
  • On-vacation assistance for any questions

All for FREE!

Interested in Disney vacation planning help?

ClICK HERE FOR FREE DISNEY PLANNINg!

Grab your Free Disney World Princess Guide!

Traveling with a Disney Princes-lover? Download my free guide to the best princess experiences at Disney World!

Including the best places to stay, best dining experiences, best meet and greets and parades to meet your favorite characters.

Get my Ultimate Princess Disney World Guide here!

Recap: Doing Disney on a Budget 

So, there you have it! Here is a list of comprehensive and detailed tips for planning a trip to Disney World on a budget!

  • Research the best places to stay (on Disney World property or off-property)
  • Visit during the low season (Value season)
  • Plan and book early
  • Consider driving
  • Look at low-fare calendars on airline sites
  • Bring essentials with you
  • Pack food
  • Buy merchandise at home
  • Utilize a credit card with points and cash rewards
  • Use an authorized Disney Vacation Planner

Remember, planning a trip to the happiest place on earth doesn’t have to break the bank. With these smart tips, you can have an epic vacation and not worry about spending too much money!

Happy Disney Planning!

Always With Love, Brianna

You might also enjoy these articles to help you plan an amazing trip!

Tips for Taking Your One Year Old To Disney World | Disney with a Toddler | Disney Mom | Family Travel Tips | #disneyfamily #momlife #familytravel
Our Stay at Disney's All-Star Movies resort with a Baby | Disney Mom | Disney World | Disney with Toddlers | family travel Tips #disneymom #disneyworld
Ultimate Tips for Flying with a Baby

February 12, 2019 · 7 Comments

Why You Should Set Goals for Your Baby

Baby Routines

Learn the 5 reasons why you should set goals for your baby and children

We all know the importance of setting goals for our self, but have we ever thought of setting goals for our babies? We’re not talking about the kind of goal that you want to kick yourself if you fail at, but about realistic goals to encourage their daily growth. We’ll walk all about the reasons why you should set goals for your baby!

Some of the most important reasons why you should set goals for your baby are:

  • To encourage their growth,
  • Be able to track milestones,
  • Increases the bond between you and baby,
  • And it sets a good precedent and habit in your home.

Do you want to encourage your baby’s daily growth and help track your baby’s milestones? Learn all about why you should set goals for your baby! Read the 5 reasons why you should set goals for your baby and the benefits of setting goals. Discover awesome these baby tips and parenting tips! #parentingtips #babytips #familygoals

One of the easiest ways I track my own goals, my family’s goals, and my baby’s goals is in a goal tracker! I created an awesome and completely FREE #MomGoals 2019 Goal Planner to help you create goals, track goals, and accomplish all of the goals you have for yourself and your family.

Download the Goal Planner now!


So, let’s get down to the amazing reasons and benefits of setting goals for babies!


Why You Should Set Goals for Your Baby


Helps track milestones and growth

One of the first reasons why you should be setting goals for your baby and children is to be able to help you track their milestones and growth. Most of the time our children hit milestones and we celebrate the big ones and then kind of just expect for the rest of them to keep coming.

But EVERY milestone is a HUGE accomplishment! No matter how big or how small.

Your child will have different milestones at different ages. The best way to start setting goals for your child is to choose the next milestone that they are supposed to reach and set it as a goal. Now that the milestone is a goal and not just a milestone that is eventually coming, you begin to work at that goal and nurture the developmental processes that your baby is experiencing.

So when your baby actually reaches that milestone, it is also an accomplished goal!

For example, one of the major childhood development milestones is walking. Instead of waiting for my baby to begin to walk, I will encourage her to walk and set up the stage for her success.

So I will take her by the hands and inch forward and backward with her and put her on my feet and “pretend” that she is walking. I will create daily habits in line with her being able to reach that milestone. And in turn, accomplishing that goal.

Being able to track these milestones and your child’s growth is an amazing!

Learn the 5 reasons why you should set goals for your baby and children

You are following their growth track instead of someone else’s

I know a lot of parents who get really caught up in the comparison trap between their children. Even I fall into it myself! Your first reaction is to automatically compare your child’s milestones and growth to another child’s, or even another child of yours.

The fact is, every child is different and every child grows at a different rate. Yes, there are ages that growth and milestones are most likely to take place but it doesn’t mean that your child is behind or moving too quickly if they don’t fall exactly into that box.

One of the reasons I love most about setting goals for children’s is the ability it gives you to follow your child’s pace of growth, and not someone else’s. The goals and milestones that you set for your baby will be done at your child’s time and you are able to follow their track of growth instead of someone else’s.

Putting milestones and growth into terms of goals really helps you see how far your child has come. It allows you to celebrate even the tiniest of things and helps you understand your child’s growth.

Dad and baby reading | Bonding

You are working with your baby toward something together 

Another reason why you should set goals for your baby and children is because it bonds you. Because you are helping your baby work toward a goal, it is bringing you and your child closer on another level. Working on something with your baby bonds you as opposed to just waiting for your baby to reach the next milestone on their own.

You become connected to your baby and to the progress of your baby’s growth. You’ll be able to have so many cherished memories of even the smallest things because you chose to make a goal for your baby instead of just waiting around for it to happen.


You are actively helping your baby

I love to set goals for my children because I know that I am actively helping them. I am being a part of their growth process and making everything that they do something that I want to be a part of. Babies grow SO FAST and taking the time to engage with your child and help them on their growing process can be so meaningful.

It also makes you feel like a present parent wanting the best for their child and working toward that goal together. It’s a wonderful feeling!

Baby Playing and reaching new milestone

Sets a good precedent into toddlerhood and childhood

One of the main reasons why you should set goals for your baby is because it sets an amazing precedent for your child as they enter toddlerhood and childhood (and even adulthood!). The habits and traditions that we start when our children are young are the ones that will be instilled in them and shape their life.

Choosing to set goals for yourself and your baby all throughout their childhood will show them the ability to achieve accomplishments!

Yes, setting a goal for a baby can sound a bit dumb but in the larger picture you are teaching your child to set goals, work at them, and achieve them. This is an amazing character trait that will shape them into an amazing person.

We all want our children to succeed and we can actively help them in their accomplishments by setting goals with them and helping them accomplish them!

[click_to_tweet tweet=”Goals are not about failing, but about giving you a reason to keep working at something!” quote=”Goals are not about failing, but about giving you a reason to keep working at something!”]


How to Reach Your Goals \\ Slay Your Goals!

Tip: Reduce setting yourself up for failure

I want to clarify that these goals are not necessarily “timeline goals”. Meaning, you think “little Johnny must be walking in 2 weeks are we failed”. No no no.

I am talking about making overall goals that you want to see your baby accomplish and that you can help them achieve. This means that, if my baby was supposed to be walking by 15 months but she’s 16 months and still only cruising furniture, then that’s 100% okay! My goal is to see my daughter walk, not see her walk at a specific time.

Having a timeline goal is not wrong but it is important to know what type of goal to set and how to approach achieving the goal.

The last thing you want to do is set you or your children up for failure! Goals are not about failing, but about giving you a reason to keep working at something!

Mom Goals 2019 Goal Planner Post Image


Download my Free #MomGoals 2019 Goal Planner Now!

The Free #MomGoals Planner is designed to help you:

  • Brainstorm the goals that you and your family want to achieve that month
  • Plan your monthly goals
  • Achieve your monthly goals by helping you create action steps
  • Complete your goal action steps with easy to use trackers
  • Plan your month at a glance
  • Create an attainable “to-do” list with prioritized sections
  • Make goals for not only yourself, but your children and spouse
  • Write your notes for the month so you never forget to do anything!
  • Help you break down all of the goals you want to accomplish in 2019 in an easy to accomplish way!

The #MomGoals 2019 Goal Planner is a 24-page printable calendar workbook to help you master your goals this year! Start the year off right with creating, tracking, and accomplishing your goals!


>>So there you have it: why you should set goals for your baby and children! Remember, setting goals for your children will help you track their overall growth and milestones, help you bond, encourages their growth, and sets a good model in your home.

Happy goal setting!

Always With Love, Brianna

Want to learn more about goal setting?? Check out my post ” How to Create Goals that You Will Actually Keep!”

You may also like these articles:

How to get your baby to sleep in a crib in 7 easy steps

Importance of a baby bedtime routine to help your baby sleep longer and better!

February 8, 2019 · 6 Comments

  • « Go to Previous Page
  • Go to page 1
  • Interim pages omitted …
  • Go to page 13
  • Go to page 14
  • Go to page 15
  • Go to page 16
  • Go to page 17
  • Interim pages omitted …
  • Go to page 29
  • Go to Next Page »
  • Privacy Policy
  • Cookie Policy
  • Terms, Disclosure & Disclaimer Policy
  • About Me
  • Contact
  • As an Amazon Associate, I earn from qualifying purchases.

Copyright © 2026 · Glamour Theme by Restored 316