• Skip to primary navigation
  • Skip to main content
  • Motherhood
    • Mom Life Hacks
    • Pregnancy Life
  • Baby Routines
  • Toddler Routines
  • Contact
    • About
Mastering Mom Life

Mastering Mom Life

Baby Tips

How to Easily Prevent Baby Gas (Best Bottle Feeding Tips)

Baby Routines

Best Bottle Feeding Tips to Help Prevent Gas

Inside: Find out 7 easy and effective bottle feeding tips to prevent and gas so you can have a happy baby!

It was 2 o’clock in the morning and my sweet little 5 week old baby girl was crying for an hour straight. Not normal “baby crying”. I’m talking back-arching, red-faced, legs scrunched, screaming-crying.

And I was crying with her.

I was at a loss for words and had no idea what to do.

Was it colic? Did her stomach hurt? Is this a sign that something is seriously wrong and I just don’t know it??

Then, as if heaven opened up, she let out an earth-shaking burp and toot -what we call passing gas in our house 🙂

Low and behold, she had a really, really, bad case of trapped gas!

From that night forward, I vowed to do everything I can to prevent it from happening again.

If your baby is experiencing gas pains, I’m going to share all of my best tips and tricks to help you prevent and eliminate any gas troubles!

I used these same exact tips with my first baby to help reduce gas and with my second baby to help prevent gas troubles from ever arising.

And it’s worked!

Here are 7 easy baby bottle feeding tips to reduce gas and prevent discomfort in your baby’s tummy.

No time to read this now? That’s ok! Save it your favorite Pinterest board for later!
How to easily prevent baby gas: bottle feeding tips

Please know that I am not a doctor or physician and I am not medically trained. All tips and advice given is based on my own experience and given to me by my own pediatrician. If you have any questions or concerns, please contact your doctor. This post is solely to offer encouragement from my experience and not designed to offer medical advice or treatment. Please view Mastering Mom Life’s Terms, Disclosure & Disclaimer Policy and Privacy Policy.

What are the signs my baby has gas?

When your baby is experiencing gas, it can look like:

  • Excessive crying
  • Red face
  • Arched back while crying
  • Scrunched legs

In my personal experience, my daughter’s colic had a lot to do with her gas issues (and feeding issues that I’ll show you how to prevent).

How to identify baby gas issues?

Sometimes gas pains can mirror signs of colic. That’s why it’s so important to track your baby’s feedings, poops, and overall behavior every day.

To identify the difference between normal gas and gas issues, you’ll want to write down when your baby eats, how much, and their mood afterwards.

If you are breastfeeding, also keep a food diary of what you are eating and when because your diet directly affects what your baby is eating.

If you start to see a pattern of:

  • fussiness after eating,
  • baby stops fussing after burping or passing gas,
  • is irritable for more than an hour everyday,
  • showing discomfort when cries (red face, pulling up legs, arching back)
  • not sleeping or eating well

These are just some common signs that your baby is experiencing gas troubles. If you notice a consistent pattern of these signs, it’s time to visit the pediatrician and possibly discuss other feeding options such as a mom diet change for breastfed babies or a formula change.

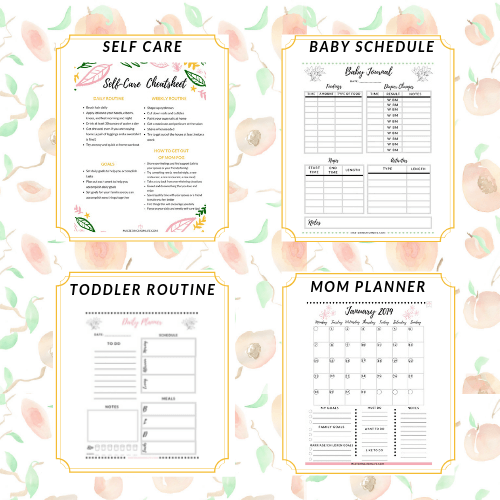
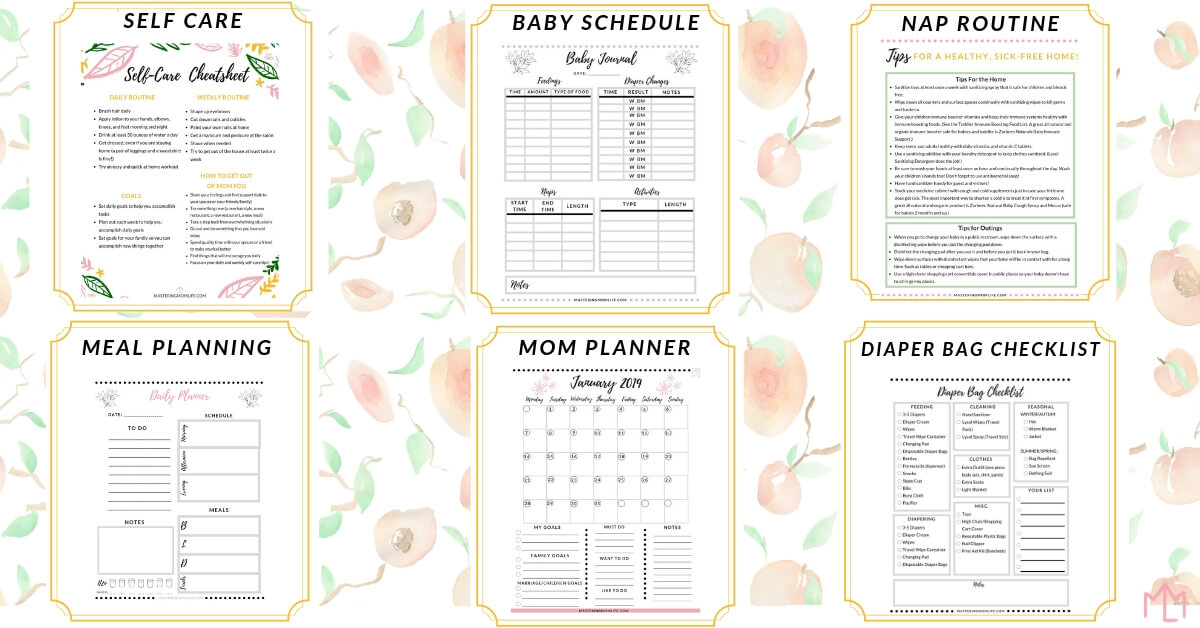
Download the FREE Mommy & Me Planner + Tracker!

Use this free planner to help you track your baby’s feedings, moods, diaper changes, naps & more!

It also helps you plan your to-do list and everyday mom life tasks in the same place so you don’t have to use 3 different planners and lists to get the job done!

Mommy & me planner: Image of desk and flowers

Why do babies get gas?

Babies are naturally gassy! A baby’s digestive system is still developing and is maturing as they grow.

Just like adults, when we eat and our belly grumbles, a baby’s stomach does the same thing but they are too little to vocalize it and their systems are immature.

That’s why we burp babies, because they can’t burp themselves yet.

Babies also tend to swallow air when eating and this creates little bubbles of gas in their tummies.

7 Easy Baby Bottle Feeding Tips to Prevent Gas

Here is the list of exact step by step tips I used to help prevent and reduce gas in my babies.

I started using these tips when my first born was 4 weeks and used them immediately after birth when my second was born.

1. Angle Your Baby When Feeding

The first bottle feeding tip to reduce gas in babies to position your baby at least 45 degrees on your lap when feeding.

Don’t lay your baby down to eat.

A good tip to keep an eye out for is to make sure their head should be elevated higher than their stomach.

Your baby doesn’t have to be sitting straight up, 90 degrees, but you just want to keep their head and elevated so they can digest properly.

Mastering Mom life is a participant in the Amazon Services LLC Associates Program. As an Amazon Associate I earn from qualifying purchases.

Easy Bottle Feeding Tips to prevent and reduce baby gas

2. Fill Bottle Nipple

One of the main culprits that causes gas is when your baby swallows air.

To prevent this from happening, fill the bottle nipple completely with milk so your baby is only swallowing the milk and not extra air.

The key to this tip is to use the slowest nipple your baby can tolerate without getting frustrated (and taking 10 years to eat haha).

You want to use a slow flow nipple so your baby isn’t just swallowing large amounts of milk, which can another cause of gas and can leave lead to increase spit ups.

If you are using the pace bottle feeding method, be sure to use an anti-colic bottle (see tip below!) and a slow flow nipple.

3. Use Anti-Gas Bottles to Prevent Gas

 This bottle feeding tip to prevent gas is kind of obvious, but can really be a difference between a fussy baby and a calm, comfortable baby.

When I was a new mom making my baby registry, I had no idea why there were 100 different bottles.

After my baby was born and we started to experience baby gas troubles, I totally understood.

Different bottles have different functions.

There are:

  • Standard, regular, “I can buy these at the dollar store” bottles.
  • Breastfeeding bottles that mimic a breast
  • Anti-colic bottles
  • Anti-gas bottles
  • Wide nipple bottles
  • Narrow nipple bottles
  • & so on!

The bottles you want to focus on are anti-colic/anti-gas bottles. They have a ton of different options out there too that will best fit your baby’s needs.

To cut to the chase, these bottles are designed to eliminate extra air so your baby isn’t swallowing large amount of air when they suck.

Most of anti-gas bottles have a vent of some sort to dispel that air from the bottle.

I’ve personally used the Tommy Tippee anti-colic Closer to Nature bottles and Dr. Browns bottles.

Each of these bottles come in a wide nipple or standard nipple depending if your little one is breastfeeding or not (the wide nipple mirrors the natural breast-like feeling)

In my experience, the Dr. Browns bottles work better for my babies because I’ve noticed they have considerably less gas when we used them and they are easier to hold.

The downside to these bottles is the extra parts. More parts mean more dishes/cleaning but in my opinion, it’s worth it if my baby is going to be less gassy and happier 🙂

Want to make sure your baby has a full feeding so they sleep better? Check out this post to help you reach full feedings!

4. Burp after every ounce to Prevent Gas

A baby’s system isn’t mature enough yet to “burp by itself”. You know when you drink soda really fast and you feel a bubbly sensation and then burp? No one had to pat your back to burp you. Your body did it on it’s own.

A baby’s digestive system can’t perform that function yet.

So instead of just releasing the gas through a burp like an adult, your baby just feels that uncomfortable, bubbly sensation….and therefore cries.

To prevent the gas from building up in your little one’s belly, you want to frequently burp your baby during her feedings.

Not every 2 minutes where he gets frustrated and is screaming from hunger. But after every ounce or 2, simply burp your baby.

How to burp your baby:
  • place your baby in a burping position
  • cup your hand slightly
  • gently pat their back for a couple of seconds (30-60 seconds)

Doing this after every ounce or so can help prevent and reduce your baby’s gas.

Common burping positions:
  • Place baby upright with their belly flat against your shoulder and pat their back
  • Sit baby straight up on your lap and gently lean them a bit forward while holding their chest and pat their back
  • Lay baby flat on their belly on your forearm while your hand is gripping/securing their chest and pat baby’s back (football hold)

Remember to always have a burp cloth ready for the occasional spit up!

5. Bicycle Legs

This baby gas tip is for after feedings or can be done with your baby is actuall crying with gas.

Simply lay baby on their back on a secure, flat surface. Start to move their legs up toward their chest and then back down again. Mimicing a bicycle!

This helps release gas and comforts them when they are experiencing gas.

6. Keep baby elevated every 10 minutes for 1-2 minutes

Another great tip to prevent and reduce baby gas is to keep your baby elevated for a couple of minutes after every 10 minutes during a feeding.

This also is a good hack for babies who struggle with reflux!

I incorporate this tip during every feeding by combining it with my daughter’s burp time.

Every other time I burp her, I will keep her upright and elevated for a couple of minutes after she burps just to really secure her from getting any gas.

7. Optional: Use a Probiotic

15 minutes after I delivered my daughter, she was sent to the NICU and received 2 doses of antibiotics every 12 hours for 3 days. At the time, I had no idea the possible effect antibiotics can have on a 1 hour old baby!

After my daughter started showing signs of colic (and extreme gas), my husband and I went on the hunt to do anything we can to help her. I changed my breastfeeding diet, started to supplement, switched formula 4 times, and eventually arrived at our solution…

My daughter needed probiotics.

Her system was so immature to handle the antibiotics and it affected her digestive system.

We stumbled upon the Gerber Soothe formula that had a special probiotic already mixed in. within 2 weeks, my daughter was a different baby. She slept better, ate better, and was overall so much happier!

Gerber also makes the probiotic in drop form that you can add to any milk or drop into your baby’s mouth.

If your baby is struggling with gas or colic, talk to your pediatrician about the possibility of a probiotic. It might be your saving grace like it was for us!

Download the FREE Mommy & Me Mini Planner + Tracker!

Well there you have it! I hope these 7 easy bottle feeding tips to prevent gas helps your little one feel better, happier, and more comfortable.

And I hope it give you the confidence to know that you are doing a great job!

Always With Love, Brianna
Read these awesome articles to help you with baby feedings!
  • How and When to Feed Your Baby to Easily Accomplish Full Feedings

February 2, 2021 · Leave a Comment

14 Easy Newborn Baby Tips to Make Mom Life Easy

Baby Routines

Inside: Find out the ultimate easy newborn baby tips and tricks to help you not just survive but thrive the first month home with your baby!

Honesty time– life with a newborn can you leave you whiplashed missing your old life.

Why? Because the newborn phase is HARD.

The nights are long, the feedings are endless, the sleep deprivation is R.E.A.L.

But there’s nothing greater than snuggling up with your newborn and feeling her small chest breathe in and out on yours.

It makes it all worth it.

But how can you make those first weeks with your newborn not only survivable but easy??

I’ll share with you the 14 best easy newborn baby tips and tricks to help you survive and thrive the first month at home with your baby so you feel confident and in control- NOT panicked and overwhelmed!

With these tips, you’ll streamline right through “the difficult newborn stage” so you can just enjoy the cuddles.

Let’s get down to it!

No time to read this article now? That’s ok! Save it to your favorite Pinterest board to read later!

14 Easy Newborn Baby Tips & Tricks to Master the First Month With Your Baby

These tips truly saved my sanity the first month at home with each of my girls. I’ve learned A LOT from trial and error (and huge diaper explosions!) so be sure to follow these tips to avoid my downfalls 🙂

As an Amazon Associate I earn from qualifying purchases. Please view Mastering Mom Life’s Terms, Disclosure & Disclaimer Policy and Privacy Policy. I wholeheartedly believe in all of the products I recommend and use them all! 

Organizational Easy Newborn Tips

1. Make a Diaper Caddy/Basket

There’s nothing worse than your baby’s bare bottom being out and your digging your hand under the changing table trying to find a diaper only to pull out a pair of pants.

#nothelpful

Having a dedicated diaper basket truly streamlined our diaper changing routine.

Inside of our diaper caddy is:
  • Diapers
  • Diaper cream (this one is the BEST and my daughters never experienced a rash)
  • Wipes
  • Scented diaper sacks for dirty diapers
  • Nail clippers
  • Nose frida
  • Burp cloths
  • Extra change of clothes
  • Pacifier

(We sometimes take this caddie from room to room in the house so having these extra items helps me not have to run around like a chicken with no head in the middle of a poop explosion emergency)

2. Organize Clothes Near Changing Table

One of the best easy newborn tips to have your baby’s clothes organized in an easily accessible way. This means if you have to blindly reach in the drawer or cabinet in the middle of the night for something, you know exactly where it is.

Organize your baby’s clothes by category and then by size.

I have a pile of:

  • short sleeve onesies
  • long sleeve onesies
  • footies
  • pants

Then I have a bakset for each of the following:

  • bibs/burp cloths
  • swaddles
  • extra sheets
  • socks/hats

3. Nursing Basket and Pumping Station/Caddy

If you’re nursing or pumping (or both!) it’s important to stay organized too. Not only for your own sanity but to help make feedings go as smooth as possible.

You can set up a basket that you take around the house with you so whenever you nurse/pump you always have everything you need at your fingertips.

Inside my nursing basket:
  • Burp cloths
  • Nipple cream
  • Water bottle
  • Travel pillow
  • In my Pumping Basket:
  • Nipple cream
  • Pump parts
  • Breast pads
  • Wipes
  • Pumping bra

4. Cut tags on New clothes

No one likes a tag scratching down on the back of your neck! Same for babies, we want to make them as comfortable as possible. Little things like itchy tags and uncomfortable clothing can really irritate a baby and make them super fussy.

When you receive a new item of baby clothing, wash it, cut the price tags, and then cut the inside tags on the seams.

Be sure to remove all of the little plastic things where the price tags were too!

5. Keep your Diaper bag ready

The next newborn tip is to have a plan of action for your diaper bag. I personally always have my diaper bag packed and ready so when it’s time to leave I’m not wasting precious time trying to stuff 10 diapers in there.

When we come home from an outing, I’ll clean out the bag and get it ready for the next time we’ll need to use it.

That way, it’s always ready and it’s one less thing you have to worry about when trying to run out of the house.

Of course, there are always a couple of things you need to add to it before you leave, like water or milk, but that’ll be easy to remember because everything else is already packed!

Read this post to learn all about how to pack the perfect lightweight diaper bag so you never forget anything but you’re also not carrying around the kitchen sink!

Diaper Bag Essentials List: Items for a Perfect Diaper Bag | mom life tips | checklist | #momlife #parentingtips

6. Place a Pacifier in every room

If you’re baby takes a pacifier, this newborn tip will save your sanity.

All you have to do is put a pacifier in every room of the house where you know you will be with your baby at some point in the day.

My baby uses the Soothie pacifier (which are super inexpensive!)

So in the living room, we have a green pacifier, in my bedroom is a purple one, and in her room is a pink one.

We leave each pacifier in the room they belong instead of taking it with us to the next room in the house when we walk around with her.

Also make sure to have one in your car seat and diaper bag!

We use the pacifier clips and clip one in the car seat and one in the pocket of her diaper bag.

I also make sure to have a burp cloth in every room of the house as well. Sometimes I even walk around the house with the burp cloth/receiving blanket on my shoulder for quick & easy spit up clean up.

I use these burp cloths and they are absolutely a lifesaver! They are just big enough to drape over my shoulder but small enough not to feel like you’re holding a blanket around.

7. Track your baby’s day

I love this newborn tip because it’s super simple but crazy effective.

All you have to do is track your little one’s activities throughout the day. Write down their naps, feedings and awake times.

This will help you not only track your baby’s growth but it will also help you see their overall routine, which can help you anticipate their needs!

Baby’s automatically fall into a routine- when they eat, sleep, and are awake.

Tracking your baby’s day will help you see this pattern and by following your baby’s natural routine, you can get to know their cues.

That means when your baby cries, you’ll immediately know if it’s hunger, overtiredness, general fussiness, or even a diaper change.

Tracking your baby’s day helps you get to know your baby better!

I created a FREE Baby Schedule Collection to help you easily track your baby’s day without headache. You can instantly download the Baby Schedule Collection which includes a Baby Tracker, Daily Schedule, and Weekly Feeding Tracker.

Download it below!

8. Clean bottles after use

I know this newborn baby tip can seem a little overwhelming but hear me out…

If you clean your baby’s bottle after every use then when it’s time for your little one to eat, you’ll never have to worry about your kitchen sink overflowing with dirty bottles and stuck washing them while your baby is screaming for more milk.

(Trust me, I speak out of very unfortunate experiences here…)

So just do future self a favor and clean the bottle after each use (if you can!). You’ll thank yourself later.

Easy Newborn Baby Tips for Better Sleep

9. Utilize the Swaddle

The swaddle was my gift from heaven-seriously. My first daughter loved the swaddle. My second fought it a bit but really fell in love with it after a few days.

I swaddled my baby for every nap where she slept in her crib and after every nighttime feeding for bedtime sleep.

It’s best to use an actual swaddle with Velcro or a zipper and not just the swaddle blankets because your baby’s hand can easily escape those.

I love the Swaddle Me swaddles. They are affordable, the velcro lasts for a long time, and they are comfortable for little ones

10. Use a Sound machine

Ever wondered what you can do to help your baby sleep better?

2 words- sound machine.

Having a sound machine was literally one of the best things I did to improve my baby’s sleep. And not just nighttime sleep- naps too!

All you have to do is put on a sound machine in the room your baby is sleeping and this will help your little one fall asleep.

Did you know it sounds like a mini vacuum cleaner inside of the womb?

Your baby is used to a melodic sound like this and it lulls them right to sleep!

I have used 2 different sound machines:

  • a simple one that had 8 different sounds,
  • and the Hatch that is a sound machine & night light combo (put this one on my Amazon registry after researching it and after receiving it, I love it!)

Both have worked effectively so go according to your budget!

Easy Newborn Baby Tips for Baby’s Comfort

11. Pull onesie down instead of over head

Every wonder what those little flaps on the top of your baby’s onesie if for? It’s so you can pull it down their body!

This is especially helpful when you have a diaper blow out and can’t lift the onesie over your baby’s head.

12. Put baby’s Towel in the dryer

Giving your baby a bath can be very nerve-wracking, for you and for baby! Your baby doesn’t quite understand the concept of a bath yet so it’s best to make sure they feel as comfortable as possible!

This newborn tip is easy- simply throw your baby’s towel in the dryer while your baby is in the bath so when you’re done, the towel is nice and warm for your baby’s cold skin.

13. Flip out the Diaper ruffles

There’s nothing worse than hearing your little one go “number 2” and then watch as the poopy climbs up their back and down their leg. Talk about throwing their clothes into an incinerator.

If you want to avoid stinky diaper blow out, this newborn tip is awesome!

After ever diaper change, make sure to flip out the little ruffles that are around their leg.

This will help keep whatever’s in their diaper actually IN their diaper.

14. Use Diaper Cream in baby’s rolls to prevent chaffing

Baby’s are soooo cute and fat but those rolls can sometimes be a little problematic. If not cared for properly, they can begin to chaff (and get smelly too).

I use this CeraVe Healing Ointment for Babies in all of my daughter’s rolls, cracks, and crevices and it REALLY helps her stay cool and comfortable.

I also use this cream after every diaper change and none of my babies have ever had any diaper rash. It’s seriously the best diaper cream.

I swear this stuff is a miracle! I even use it when I’m itchy or irritated.

Easy Baby Activities

One of the questions I hear the most is…

“What do I do with my baby all day?”

Trust me, I hear ya! Sometimes it seems like all your baby does is eat, sleep, and run through diapers faster than a coyote.

But keeping your baby stimulated during his/her awake time is great for better naps and overall better sleep.

If you’re wondering what activities you can actually do with your newborn, be sure to check out my Tiny One’s Boredom Buster Activity Toolkit!

This activity toolkit is jampacked with over 30 activities for newborn babies all the way to toddlers. So as your baby grows, you’ll already have all the activities you need to keep your little one stimulated and reaching new milestones.

Each activity in the guide is fun, low prep, and affordable- designed to help promote milestone development, promote parent/child bonding, and even help your baby to learn how to play independently.

The Activity Toolkit also comes with a step by step guide showing you how to create an easy activity play routine for your baby plus 15 different resources and templates to help you plan a week of activities in under 5 minutes.

Learn more about the Tiny One’s Boredom Buster Activity Toolkit HERE!

BUY NOW!

Well there you have it!

I hope you enjoyed all of these easy newborn tips to help make those newborn days easier and simplify mom life.

Do you have any easy newborn tips that make your life easier? Share them below in the comments!

Always With Love, Brianna

Wait! Do you love free printables??

Resource Library Image

Become part of the Mastering Mom Life Insider tribe and get instant, exclusive access to my Mom Treasury filled with FREE printables + worksheets to make mom life easier!

January 6, 2021 · Leave a Comment

The Best 0-4 Weeks Old Newborn Routine

Baby Routines

Inside: Feeling overwhelmed by the newborn phase? Learn the best 0-4 weeks old newborn routine to help you learn your baby’s cues and make each day as easy as possible!

It was 1 o’clock in the morning…I was rocking and feeding my newborn for 6 hours straight. My eyes were swollen from crying, my chest was sore, and my head was pounding like a construction site.

It was 24 hours of what felt like a year.

Immediately the questions flooded my mind…

Am I spoiling her?

Am I creating bad habits for later?

Why is she always so fussy?

Are her days mixed up with her nights?

To say I was overwhelmed was a complete understatement.

I had no idea what I was doing because I felt lost. I was living my life from one 2 hour stretch of sleep to another- and it was killing me.

But then I found a golden nugget: a newborn routine that actually made sense!

Not a newborn routine that sounded impossible to do with a 1 week old….

…but a newborn routine that gave me a hint of structure to my day with my baby with cues that made me feel confident so I knew she was eating enough and her sleep patterns were totally normal.

And I want to share this 0-4 weeks old newborn routine with you!

This awesome 0-4 weeks old newborn routine will help you feel less…well, helpless- so you can feel more in control and less overwhelmed, especially in those beginning days where the whole world feels like it’s crashing down around you (hello hormones!).

Important: This newborn routine can be used for breastfed babies, formula fed babies, & combination feeding.

Be sure to download the FREE printable download of this newborn routine so you can easily save it and always have it with you!

In this printable, I also share with you different variations of real-life sample routines with breastfeeding, formula feeding, bottle feeding AND combination feeding! Don’t forget to download it now!

So let’s get down to it…

(No time to read this now? That’s okay! Pin it to your favorite board for later!)

0-4 Weeks Old Simple Newborn Routine to survive the first 4 weeks with your baby

The Best 0-4 Weeks Old Newborn Routine

I started this newborn routine when my daughter was a week old and it truly saved my sanity!

But first, what is a newborn routine and how do you start one?

What is a Newborn Routine?

A newborn routine is simply a series of actions you’ll take with your baby each day to help you begin a solid feeding & sleep foundation for the coming weeks.

A newborn routine is NOT a rigorous, harsh schedule.

In this 0-4 weeks old newborn routine, you are simply following your baby’s cues to come up with a pattern for your day so you can meet his/her needs accordingly.

For this newborn routine you will not be dictated by the clock for feedings and naps but simply following along with the clock to track when your baby is doing what.

For example, if your baby eats every 3 hours and your baby last ate at 12 but is still fast asleep at 3:30, you know it’s probably time for a feeding.

But if your baby ate at 12 and is now showing hunger cues at 2:30, you feed on demand- don’t make your baby wait those 30 minutes just because the clock hasn’t hit 3:00 yet.

It’s all about flexibility and following your baby’s cues while guiding him along the way.

With this newborn routine, you will be setting a solid foundation for when your baby is able to sleep through the night- with these simple routine tips, you’re setting up the stage for a great 8-12 week stretch of easy feedings and naps/nighttime sleep.

Hello long stretches of nighttime sleep, goodbye sleep deprivation!

But remember, the goal right now is NOT to get your baby to sleep through the night. Your goal is to set the foundation for feedings, awake time, and sleep.

By doing this newborn routine you’ll know when your baby needs to eat, be awake, and sleep.

You’re basically just getting to know your baby better. And there’s no one better to care for your baby than you, mama!

Remember, this routine isn’t about following the clock so if one day your baby is eating at 10:30am and the next day she’s eating at 11:15am—that’s okay!

You follow her cues based on her needs within this routine.

Newborn Routine: Feeding

Let’s begin with the feeding- which in my opinion is one of the hardest parts of having a newborn. Figuring out WHAT to feed your baby is going to be the first step.

Are you breastfeeding? Are you formula feeding? Are you bottle feeding? Are you pumping?

The list of feeding questions can go on and on.

But it’s important to not become overwhelmed with figuring all of this out.

Maybe you breastfed in the hospital but got home and realized it wasn’t a right fit for you and baby. Or maybe your baby is super fussy and you have to change your diet.

Or maybe you decided to formula feed but now have no idea what formula is best.

I personally have been through ALL of these scenarios…

  • I have quit breastfeeding because I couldn’t find out what was making my daughter colicky.
  • I have switched formulas 4 times because there was blood in my daughters stool.
  • I have switched bottles because of gas issues.
  • I have changed my diet during breastfeeding.
  • I’ve exclusively pumped because I needed my husband’s help during nighttime feedings and this gave us the ability for him to feed her too.

Let’s just say feeding issues had me STRESSED.

When your baby is eating well and eating the right thing for HER, life gets easier.

There’s nothing worse than a baby who is miserable, in pain, and gassy and they can’t explain to you what’s wrong. My heart literally breaks.

So first things first, feed your baby what is BEST FOR HIM.

If you’re struggling with breastfeeding or latching or diets, talk to a lactation consultant. Most pediatricians can point you in the direction of someone who can help you.

If you chose to formula feed, talk to your baby’s pediatrician for recommendations. Different formula has different ingredients, such as different iron contents.

If for any reason you feel the way you are feeding your baby is bothering her, talk to your doctor about it.

I’ve called my pediatrician at least 10 times on different occasions because my daughter was either constipated, had mucousy stools, couldn’t latch, was gassy, etc.

She pointed me in the direction of a different formula or gave me a clue as to what I should stop eating.

Starting to feel confident in what your baby is eating, how much they eat, and their hunger cues is a huge part in my newborn routine.

So don’t stress and take these 4 weeks to get to know your baby more and how he/she eats!


Read this post for more details all about full feedings!
Full Feeding Schedule | Feeding to Get Your Baby Full | Baby Tips | Feeding Schedule | Mom Life Tips | #momadvice #parenting

Newborn Routine: Awake Time

In a normal baby schedule, after a feeding there’s usually a time where your baby is up. This is called awake time.

But with a newborn, their awake time or wake window is super short.

Their awake time or wake window is the time from when they wake from the last nap to the time where they go back to sleep.

And the main thing I noticed about newborn awake time is most of the wake window is taken up by feeding.

My daughter would wake up at 10:30 and eat for like 45 minutes to an hour- which is her whole wake window! By the time she was done eating and had a full feeding, it was time to go back to sleep.

(Remember, an overtired baby is a fussy, upset baby so no one wants that!)

Even up until 4-5 weeks my daughter was taking a WHILE to eat. After about 5 weeks her feedings started to get a bit shorter because she was more comfortable with the bottle/breast. We also took the time to burp her every ounce/every 5 minutes breastfeeding to reduce gas and it worked really well for her.

Everything about a newborn takes grace and patience!

So if you find that your baby is literally eating and sleeping all day long, that’s okay! His wake window is his feeding time.

Some babies eat really fast and will have a bunch of awake time before going back to sleep. This is completely normal too!

With this 0-4 weeks old newborn routine, you are simply following your baby’s hunger and sleep cues to help them feel the most comfortable while maintaining some predictability in their day.

Super simple 0-4 weeks old newborn routine to help you survive the first month with your new baby!

Newborn Routine: Naps

Let’s talk about naps in this 0-4 weeks old newborn routine. To be honest, baby sleep always gave me anxiety.

Will my baby only fall asleep in my arms?

What if my baby gets too attached to the pacifier?

Will my baby ever learn to self-soothe?

When will my baby sleep through the night?

All of these questions were super valid for a sleep deprived mom who just wanted another hour of sleep!

But newborn sleep is super sporadic- and that’s totally normal. Maybe one nap your baby sleeps 2 hours but then after the next feeding they literally only sleep for 25 minutes before waking up in a full-out scream.

Your goal is just to give your baby a nap when you see his/her sleep cue.

Sleepy Cues:

  • Rubbing eyes,
  • Yawning,
  • Blank staring,
  • Slow blinking, etc.

Maybe one nap is in a swing, the next nap is in a baby carrier, and the next nap is in a bassinet.

That’s perfectly normal!

As your baby gets older in weeks, you can try to lay down your baby for one nap in their bedtime spot (such as a crib or bassinet).

This will begin to help baby learn the difference between sleep locations. Usually, the first nap of the day is easiest to accomplish so you can try to put baby down in her bassinet for this nap if you want to try it out.

Newborn naps can truly take place anywhere- as long as they are sleeping at points in the day.


Read this post for more awesome information about baby naps!
Nap Schedule | How to Start a Nap Schedule with Your Baby | Parenting Tips | Motherhood | #momadvice #momlife #babysleep

What if my baby isn’t napping?

There were some days where my 3 week old daughter would be up for like 4-5 hours every evening. Hello witching hour!

During this time, no matter how many times I tried to put her to sleep, she would wake up screaming 10 minutes later. She would seem constantly hungry and completely boycott her naps.

I nursed her as much as I could when I was breastfeeding those weeks (when she was cluster feeding) and when she was on the bottle I fed her every 2.5 hours or would feed her a half ounce about every half hour.

It was brutal.

And even now that my daughter is older than 5 weeks, she still goes through a period every week where she refuses to sleep.

Babies are always growing and are in different developmental stages all the time. Through these growth spurts, your baby will react differently. So just go with the flow of your baby’s cues and try not to stress too much.

If he genuinely seems hungry, feed him. If she’s tired, offer a nap. If he wants to be cuddled, hold him. If she’ll only sleep in your arms, wear her.

You can’t spoil your baby.

You are the best form of comfort and relief for your baby!

This post contains affiliate links. Mastering Mom life is a participant in the Amazon Services LLC Associates Program. As an Amazon Associate I earn from qualifying purchases. Please view Mastering Mom Life’s Terms, Disclosure & Disclaimer Policy and Privacy Policy. I wholeheartedly believe in all of the products I recommend and use them all! 

Tips for a Good Newborn nap in this 0-4 Weeks Old Newborn Routine:
  • For one nap a day, place baby in a quiet, dark area (bassinet/crib in a room)
  • Swaddle (I love this swaddle!)
  • Sound machine (We’ve used this Homedics sound machine for my first and the Hatch for my second)
  • Be sure baby had a full feeding & appropriate awake time

Newborn Routine: Bedtime Sleep

Last but not least on our easy newborn routine is bedtime sleep- which is different than a nap.

When your baby is first born they will take the same length of sleep all day, usually 2-3 hour stretches (but sometimes less).

As your baby gets older every week your goal is to complete full feedings (like we talked about above) so their tummy is full and they sleep comfortably- and eventually longer!

As I said, this newborn routine isn’t about getting your baby to sleep 8-hour stretches in their first month of life. It’s about laying the foundation of *good sleep patterns* so when they are developmentally ready, they can sleep longer.

During the nighttime, usually, the last feeding that I’m awake before heading to bed, I’ll do a mini bedtime routine.

Simple 0-4 Weeks Old Newborn Routine | Featured

Here’s my newborn bedtime routine:

  • I’ll change my baby’s clothes,
  • give her a wipe down so she’s fresh,
  • keep the lights dim,
  • and sing her a song while feeding her
  • When it’s time for sleep, I swaddle her and put her in the bassinet/crib. (Laying the baby down in a stationary (safe) place for nighttime sleep will also indicate that it’s bedtime, not just a daytime nap.)

These little things are to signal that it’s nighttime sleep. So eventually as I do this for weeks and she gets older, she’ll be signaled that it’s nighttime sleep- which should be a longer stretch before feeding again.

I started doing this for bedtime sleep when she was 1 week old and by 5 weeks she was sleeping one 5-6 hour stretch during the night- VICTORY!

Don’t Stress- Your Newborn will Change

As your baby continues to grow and develop there will be some days where it looks like he regressed. Maybe your baby is super fussy and refuses to sleep unless in your arms. Or maybe your baby is doing longer stretches of sleep and then one day wakes every 45 minutes.

Newborns are constantly growing and developing so having a routine like this one can help you keep track of when they are going through growth spurts and how you can help them through it- all while being confident as a mama!

But as your newborn reaches a month old, you’ll have this routine that will grow with them, not that they will grow out of.

This is a flexible routine based on your babies cues and habits that form an overall structure for your day

And it all begins by tracking your baby’s activities: their feedings, naps, and awake time.

By tracking these things and starting this easy newborn routine you’ll begin to notice your baby’s individual cues for when they are ready for what they need next.

Free 0-4 Weeks Old Newborn Routine Printable

Free Printable 0-4 Weeks Old Newborn Routine + Real Life Samples

Don’t forget to download my FREE newborn routine and real-life sample routines!

This routine is exactly what I personally used for my daughter and the real-life sample routine is her exact trackings each week. So you can see what I did and when!

Download the Newborn Routine Here!

Recap Time for the 0-4 Weeks Old Newborn Routine!

With this 0-4 weeks old newborn routine, you are simply following your baby’s hunger and sleep cues to help them feel the most comfortable while maintaining some predictability in their day.

Remember, here’s the overall structure of the 0-4 weeks old newborn routine:

  • feeding (every 3-4 hours)
  • awake time (60-90 minutes)
  • nap (20 minutes to 2 hours in length)
  • bedtime sleep (swaddle in a cool dark room in bassinet/crib)

This newborn routine personally gave me a hint of structure to my day with my newborn that made me feel confident so I knew she was eating enough and her sleep patterns were totally normal.

By tracking these things and starting this easy newborn routine you’ll begin to notice your baby’s individual cues for when they are ready for what they need next.

Be sure to download my FREE Mommy & Me Planner where you can track your baby’s feedings, activities, and naps in ONE place. This is a planner + tracker combo perfectly designed to help mamas with their little one’s routine!

Download it below by clicking the download button!

What’s next?? Month 1-4!

Ready to learn how to survive and thrive in the first 4 months with your baby? Read the 1-4 Month Old Easy & Flexible Baby Routine to help you navigate months 1-4 with your little one 🙂

Always With Love, Brianna

Wait! Do you love free printables??

Resource Library Image

Become part of the Mastering Mom Life Insider tribe and get instant, exclusive access to my Mom Treasury filled with FREE printables + worksheets to make mom life easier!

Want to truly thrive in the newborn phase and mom life??

Check out the super SPECIAL offer on the You Got This, Mama Organizing System, to help you reduce stress, save time, track your baby’s activities AND organize your whole mom life without pulling your hair out- in ONE place!

Take advantage of my LIMITED TIME OFFER here!

SAY YES TO STRESS-FREE #MOMLIFE DAYS NOW!

Check out more posts about making life with baby easier!

19 Baby Essentials: The Ultimate List to help you prevent wasting money| Image of baby
5 Reasons your baby needs a nap routine
Baby Daily Schedule | What My Baby's Daily Schedule Looks Like | Motherhood | Baby Schedule | #momlife #parenting

December 8, 2020 · 1 Comment

4 Easy Mom Hacks to Prevent Car Seat Battles

Baby Routines

What to do when your baby hates the car seat

Inside: Baby hates the car seat? Learn the 4 easy tips to help make your car seat battles seem like history!

We’ve all been there…

Where car door is flung open to maximum capacity as you are trying to wrangle your child into the car seat while your little one flails their body around like a fish out of water.

Then, as if perfectly on cue, you hear the subtle hum of the car behind you inching closer and closer trying to get into the spot that your open door is currently occupying.

You signal a sorry sign to the driver as your baby refuses to be bucked in.

The driver gives you *the eye roll*.

Trust me, we’ve ALL been there.

When your baby hates the car seat, running errands can be almost impossible. But it doesn’t have to be!

My daughter was the queen of car seat tantrums, but I started using fun tips and tricks and now, she loves her car seat!

I’ll show you the 5 easy tips that you can do when your baby hates the car seat and how to turn those struggles into successes.

Baby hates the car seat? Here are 5 easy mom hacks to end car seat battles:

  1. Start on the right foot
  2. Create a diversion
  3. Have special car toys
  4. Kiddie Playlist
  5. Combine Trips

Let’s get down to the details of these easy tips!

What to do when your baby hates the car seat

One day Baby L was absolutely refusing to sit in her car seat…I’m talking head rearing, back-arching, screaming.

I was at a complete loss of what to do.

The driver honking at me didn’t help either.

If you’ve ever been in this frustrating pickle, I’m sending you a virtual hug!

These mom life hacks can help make car seat troubles seem like history 🙂 

Before you start to walk to your car, here are 5 mini mom life hacks to make the car seat buckling as smooth as possible:

1. Start on the right foot

The first tip to preventing car seat troubles is to prepare your baby before you get to the car.

Before you start walking to the car, is when you’ll want to get everything ready that you need.

(Those items will come later in the next tips so keep reading!)

But the key is to start on the right foot.

If you know your baby hates the car seat, you want to keep your little one as calm as possible beforehand, so it’s not a completely apocalyptic situation.

Disclosure: This post contains affiliate links. As an Amazon Associate I earn from qualifying purchases. Please view Mastering Mom Life’s Terms, Disclosure & Disclaimer Policy and Privacy Policy. I wholeheartedly believe in all of the products I recommend and use them all! 

2. Create a diversion

The next tip to ending car seat battles is to distract your baby as much as possible.

Just like when your baby is getting a shot or doing something else they really hate, you want to create a diversion so you are drawing their attention away from the fact that they are getting in the car.

You can create a diversion by handing your child a:

  • favorite snack,
  • a little toy,
  • or even a shiny object (baby appropriate).

Pack your diaper bag with things that you KNOW your baby will love. Then before you even see the car, hand your baby the distraction.

Your little one will be so occupied that they don’t even care about being restrained.

Side Tip: If your baby gets distracted and then quickly notices they are sitting in the car seat and gets upset, use the next 2 tips!

How to prevent car seat battles in 4 easy steps

3. Have special car toys

If your baby hates the car seat, you may need to take extra precautionary measures.

For me, this meant hiding special toys in the back seat pockets…

What are special toys?

A special car toy is a toy that your baby only plays with in the car. This can help make the car seat a fun, special activity instead of a dreadful one.

When Baby L was just 6 months old, she had a special car mobile that we would bring with us and it really calmed her down.

As she got older and turned 1, we made a little car toy bag that we left in the car with her baby dolls and “toy remote control” that she loved.

Now that she’s 2, we purchased this V-Tech car steering wheel and it has worked wonders!

Using “special” toys that your baby can only play with while in the car help makes the car a special/fun thing for your little one to look forward to.


4. Kiddie Playlist

The fourth tip to help your baby’s aversion to car seats is to create a fun kid playlist!

Put together a playlist of your child’s favorite songs or nursery rhymes that you know will get them excited. As you are buckling them in, sing the songs and make it fun!

Singing and doing nursery rhythm hand movements (such as the itsy bitsy spider) is another create a diversion for your baby.

This is a great way to get their mind off of being angry about being restrained.

These are the songs we have on our kid playlist:

  • Mickey Mouse Clubhouse Theme Song
  • Fancy Nancy Theme Song
  • Let It Go from Frozen
  • You’ve Got a Friend in Me from Toy Story

If you have Spotify, you can also download a Mother Goose Nursery Rhyme playlist that is already created for you. All you have to do is press play!


5. Combine Trips

My new motto since becoming a mom is: never do 5 trips when it can only take 2!

It’s always best to plan your errands in a way that prevents your having to take your little one in and out of the car seat 10 different times.

I started running errands at places that have a cluster of stores so I can eliminate needing to drive to the next place. It’s been a sanity saver!

I learned to not just run my errands aimlessly. When you have a baby with you, you want to plan out your errands in a way that works best for your little one’s routine.

Related Post: How to Make an Awesome Structured but Flexible Baby Routine

If there’s a way to hit one store that can eliminate 2 different errands, that’s the way to go!

Eliminating the need to have to put your baby in and out of the car 1000 times will help make your day run waaayyyy smoother.

Mommy & me planner: Image of desk and flowers

Download your free Mommy & Me Mini Planner!

I created this planner to help you plan your to-do list & errands AND track your baby’s routine and schedule in ONE place. Now you can plan your hours, days, and weeks in a way that works for YOU and your little one.

Want to get a taste of how the planner can help you? Get 15 FREE pages right now by filling out the form below. (Plus get a really awesome discount for the full planner!)

You’ll get a mini version of the planner, called the Mastering #MomLife 2020 Organizer, and see that this planner can truly become your new mom life bestie. ????

Want to truly kick mom life chaos on its head??


Check out the super SPECIAL offer on the FULL You Got This, Mama Organizing System, to help you reduce stress, save time and organize your whole mom life like a without pulling your hair out!

Interested in the full Mastering #MomLife 2020 Organizer?? Take advantage of my LIMITED TIME OFFER here!

GET THE FULL PLANNER NOW!

I know these little tips can seem small and insignificant but anything to make your day even 1% easier is always worth a try!

Remember, if your baby hates the car seat, ere are 5 easy mom hacks to end car seat battles:

  1. Start on the right foot
  2. Create a diversion
  3. Have special car toys
  4. Kiddie Playlist
  5. Combine Trips

Now you don’t have to worry about rude drivers waiting for you to close your door. Your little one will go into their car seat without any struggles!

Always With Love, Brianna

Keep reading these posts for more easy hacks!

Best Tips for Eating Out with Your Baby: Stress-Free

How to Make an Awesome Structured but Flexible Baby Routine

What My Baby’s Daily Schedule Looks Like

Wait! DO you love free printables??

Resource Library Image

Become part of the Mastering Mom Life Insider tribe and get instant, exclusive access to my Mom Treasury filled with FREE printables + worksheets to make mom life easier!

5 tips to help your baby love the car seat

February 28, 2020 · Leave a Comment

How to Handle Baby Missed Naps- The Easy Way!

Baby Routines

How to deal with missed naps and wake windows

Inside: Is your little one always fussy & overtired? Find out exactly what to do for baby missed naps and toddler skipped naps!

Have you ever experienced the wrath of a missed nap– when your child is so fussy you want to pull your hair out?

I’ve learned the hard way…

Missed naps = Fussy baby.

Not just any “fussy”– I’m talking about red face screaming and back arching tantrums…the kind of fussy that only comes about when your child has failed to go to sleep.

But the good news is, missed naps don’t have to be a normal event in your house.

Learning your child’s golden window—their window of wake time—will help you teach your baby to nap consistently, tantrum-free.

Finding out your baby’s wake time is the best thing you can do to help eliminate your baby becoming overtired.

Which means they’re less fussy and you’re happier!

We’ll talk about how to:

  • know your baby is overtired
  • know their wake time/wake window
  • avoid missing a nap
  • deal with skipped naps
  • help your baby actually go down for a nap

Let’s dive into all the ways you can reduce missed naps and keep your child out of the overtired danger zone!

How to deal with Missed Baby Naps and Toddler Skipped Naps

One week my daughter decided to boycott her naps for 4 days—FOUR DAYS.

That meant I was home with a toddler for over 10 hours, without her taking a single nap. Not even 2 minutes of peaceful shut-eye.

I remember sitting in my daughter’s room barely able to keep my eyes open as she was screaming and spinning circles freaking out because I told her it was time for her nap.

Her golden window of wake time was left open too long…

Whether your little one is 6 months old or 3 years old, if they still take a nap, one of the most important things you can do is be aware of their golden window—their wake time.


What is a wake window?

A wake window or wake time is the amount of time your child is up from their last sleep to the time they go back to sleep.

This wake time is used to help you understand the maximum amount of time your child can be up without being overtired and fussy—and ultimate missing the time they were supposed to nap.

The first thing to do when your baby misses a nap is to make note of the time, their mood, and why it happened.

We’re going to talk more about how to do this exactly by tracking your baby’s or toddler’s schedule.

But first, let’s talk about the signs of a missed nap…


Why is my baby so fussy?

If you’re struggling with not understanding why your child is so fussy at a certain time of day, it could be because they’ve been awake too long. And their window of wake time needs to be closed.

Some reasons a baby is up too long is because:

  • they were kept up (if their schedule was interrupted),
  • they missed their window (if they were busy doing something else),
  • or if they intentionally do not want to sleep.

Babies can’t verbally express to you when they are tired so their body expresses it for them and they get extremely fussy. And when your baby grows into a toddler, sometimes they refuse to nap just because they don’t want to miss anything.

To help you prevent your baby from entering the land of fussiness, you want to be aware of their wake window.

How to Handle Missed Baby & Toddler Naps

How to know my baby’s wake window?

As babies grow, their golden wake time window and nap times will shift.

Remember when your newborn slept all day? As they got older, their nap times changed and their number of naps was reduced.

But how do you know how long your baby’s wake window should be??

I’ve spent hhouuuurrsss asking myself this question as a new mom. Every month seemed to be a change but instead of being overwhelmed by it, I started to track it.

But figuring out your child’s schedule is the key to reducing baby missed naps!

Tracking Your Child’s Schedule

If you’re having trouble knowing when your child’s nap time “should be”, then follow these simple steps to help you!

  1. Track their daily activities and mood for 5 days.

You’ll start to see a pattern of their super fussy times—which signals OVERTIRED.

  1. Use that pattern to create a schedule

By seeing their sleep, wake, and eating patterns, you can create a schedule that will help them limit their fussy times.

By using this method, you’re not forcing your child on a schedule that doesn’t work for them. You’re leaning into the turn of their natural body clock.

Use the FREE Baby & Toddler Daily Tracker to help you complete these steps stress-free. Track your child’s naps, feedings, moods, and activities all in one place. Then you can easily start to see their routine so you can know without a doubt their golden wake window 🙂

Get the FREE Tracker now!

How About Toddler Skipped Naps?

The great part about this system is that it will work for toddlers too!

If you find your toddler is really irritable at a certain time when they shouldn’t be, you can track those times and moods for a week and reassess their nap times.

After tracking Baby L’s wake times and nap lengths, I was able to see an overview of her schedule. And this significantly helped me!

I started to use her own pattern as a guide for her schedule. When I saw she was off of her schedule, I noticed she was way fussier. But when she was on her schedule, she was an absolute dream.

Wake Hours per age

Here’s an example of Baby L’s wake time windows as she’s grown:

Birth-3 months: 1- 1.5 hours

4-6 months: 1.5-2 hours

7-9 months: 2-2.5 hours

10-14 months: 3-4 hours

15-24 months: 4.5-5 hours

24-36 months: so far, it’s remained at 5 hours

Feel free to use this as a guide for your baby’s wake times!

BONUS: Don’t forget to download the FREE Baby & Toddler Daily Tracker to help you understand your baby’s schedule so you can easily know their wake window! CLICK HERE TO GET IT FREE!

How to help your baby/toddler actually go down for a nap

If you’re having a hard time getting your baby or toddler to even TAKE a nap, consider starting a consistent nap routine that will help them signal when it’s time for sleep. This will help wonders!

After Baby L boycotted her naps for 4 days, the only thing that helped me get her back on track was sticking to her nap routines.

Using a nap routine helps your baby signal that it’s time for sleep, as opposed to them playing. So, when their brain processes that it’s nap time, they will begin to calm down and prepare for a nap. It’s pretty awesome!


Related Reading!

Step by Step Guide to Help Your Baby Nap: Helping Your Baby Who Just Cries During Naps | parenting tips | nap schedule | baby daily schedule | nap routine | #momlife #babyschedule


What to do if your baby misses a nap?

If your baby misses a nap that is in between another nap, just skip the nap and continue your schedule to the next nap. Try to keep your little one as comfortable as possible to reduce them from getting even fussier.

I wouldn’t recommend leaving them in their bed to cry it out until they fall asleep. I would wait until tomorrow to restart the schedule and make sure to catch their tired cues so you can be sure to put them to nap when it’s time.

If your baby misses their last nap of the day, just wait until bedtime to put them back down. Forcing them to nap after they have already missed that window can cause a disrupt in the whole day!

But if you see it’s only a half-hour after their normal nap time and you think your child will fall asleep, go ahead and put them down!

There’re no hard and fast rules when it comes to nap times, it all depends on your child and the time of the day.

So if your baby misses a nap, don’t beat yourself up! There’s always tomorrow 🙂


What about Nap transitions?

Some babies/toddlers get really fussy around their nap transition too (when they are dropping a nap). This is totally normal!

Just continue a nap routine with them and they should fall right into their rhythm.

Get the FREE Baby & Toddler Daily Tracker!

To help you track your baby’s routine and start a thriving schedule, I created a FREE Baby & Toddler Printable Daily Tracker to help you track your baby’s mood, feedings, naps, and playtimes.

Use this tracker easily figure out your child’s golden window of wake time so they never enter the overtired disaster zone!


Missed naps are no fun. But they don’t have to become a normality!

I hope with these tips and tricks you feel more confident in knowing your bay’s golden window of wake time.

They get restful naps and you save your sanity—a win win!

After Baby L’s miserable napless week, I’m thinking of making t-shirts that say “I Survived my Baby’s Missed Nap”…

And I’d wear it with pride 🙂

Have any questions about naps?? Use the comments below to ask away!

Always With Love, Brianna

Read more Baby Tips & Tricks Here!

3 Reasons Your Baby Needs a Nap Routine

How to Create  Simple Structured but Flexible Baby Schedule

Step by Step Guide to Help Your Baby Nap Better & Longer!


Wait! Do you love free printables??

Resource Library

Become part of the Mastering Mom Life Insider tribe and get instant, exclusive access to my Mom Treasury filled with FREE printables + worksheets to make mom life easier!

How to easily deal with baby and toddler skipped naps

January 13, 2020 · Leave a Comment

15 Fun, Educational Baby & Toddler Toys: The Best Toy Gift Guide

Baby Routines

Educational baby and toddler toys

Inside: Looking for fun, educational baby and toddler toys? Find out my favorite 15 guilt-free baby toys to keep your little one loving to learn!

Christmas usually equals more toys…and more toys usually lead to more mess, more storage, and less space.

But it doesn’t have to!

I used to be very anti-toy because I didn’t want another toy I had to put away during clean up. But then I shifted my focus from “we need fewer toys” to “we need better toys”.

Now, I actually love toy shopping because I know my daughter is going to continue to learn while playing!

The key to surviving the Christmas toy avalanche is to focus on toys that are educational and toys to enhance your child’s growth and development.

Of course, I like to spoil Baby L with some toys that are purely for fun but you don’t have to sacrifice pleasure for learning because most toys these days are both!

That’s why this year I’ve put together the ultimate list of fun educational baby and toddler toys that any little kiddie will love.

To add even more convenience, all of these toys can be found on Amazon during their holiday sale so you’re saving money and saving time because you don’t even have to leave your house to purchase them. A win-win!

Let’s dive into the ultimate fun and educational baby and toddler gift guide!

Ultimate List of Educational Baby & Toddler Toys

In this post, I’ll be sharing my favorite toys for kids ages 6 months to 5 years old. If you have little ones in that age range, this will be sure to read 🙂

If you don’t have time to read it now, you can pin this post to your favorite Pinterest board to come back to later!

Pin this post to pinterest

This post contains affiliate links. As an Amazon Associate, I earn from qualifying purchases. Please view Mastering Mom Life’s Terms, Disclosure & Disclaimer Policy and Privacy Policy. I wholeheartedly believe in all of the products I recommend and use them all! 

Pro Tip: To take advantage of these deals, be sure to become a Prime Member so you can get free 2-day shipping.

For babies 6 months to 24 months

Pound and Tap Bench with Slide-out Xylophone

I was able to see this amazing toy in action and I immediately fell in love with it. My nephew received the Pound and Tap Bench for his first birthday and as soon as he opened it up, he was occupied for hours. Even my daughter who is 2 and a half had a blast playing with it!

This toy is great for teaching your baby hand-eye coordination, fine motor skills development, and musicality because your little one has to place the ball in the hole and then pound it down so it falls on the xylophone underneath the hole. Therefore, making music!

A perfect, old fashioned 3 in 1 toy.

Baby Einstein Curiosity Activity Station

I love toys that can keep your kiddo busy for more than 15 minutes at a time! Most “toy clutter” comes from the fact that you need more toys to keep your baby entertained. But with toys like the Baby Einstein Activity Station, it’s like having 20 toys in 1!

The Activity Station is a table than can turn to a tabletop station, so your baby can sit on the floor and play or pull himself up to stand. It helps your little one transition during their most important milestones.

I really like this particular activity station because it has multiple aspects to keep your baby engaged and developing skills. From gears to lights to melodies, your baby’s creativity will also be sparked.

Lego DUPLO My First Bricks Building Kit with 80 pieces

As a parent, as soon as I hear 80 Lego pieces, I’m plagued with the vision of me stepping on lego bricks all day long. But not these legos! These Lego bricks are designed with little ones (and parents) in mind.

DUPLO Lego First Bricks are large enough where they cannot fit into a child’s mouth (hello safety!) but small enough to fit into a store away bin or bag. I love these DUPLO Legos because they encourage imagination and creativity while building motor skills.

My daughter now owns 3 different sets that she’s been playing with for years. These Legos were actually her first toy where she learned how to stack colors!

Pink Fong Baby Shark Melody Shape Sorter

“Baby Shark..Doo..Doo..Doo..Doo”

The infamous song that every parent knows!

This toy is sure to be a sensation this Christmas and I’m certain it’s on a lot of wish lists. It fuses the popular song with color and shape sorting to make an exciting toy that will keep your little one busy for a while!

It builds gross motor and sensory skills while keeping your baby entertained…so you can finally get some dishes done *wink wink*

For little ones 2 to 4 years old

Radio Flyer Classic Dual Deck Tricycle

A lot of Christmas toys are just that, toys. But one of the best gifts you can give your child is the gift of exploration of the outdoors. That’s why I’m always careful to get my daughter something for Christmas that she can play with outside as well.

Toys are great, but you’ll never forget the moment your baby started peddling on their tricycle for the first time 🙂

Fischer Price Laugh & Learn Smart Learning Home

This is the Toy Of The Year Award 2019 Winner for a reason!

The Laugh & Learn Smart Learning Home is a 360 degrees learning sensation with an interactive hub, crawl-through door, and enough gadgets and gizmos to keep your toddler learning for hours.

It comes with 3 stages of learning, so the toy can grow with your child. I really love this feature because most toys feel like a waste of money once your child outgrows it. But this toy is almost like an educational investment. It also comes in 4 different languages to promote language growth and development as well as sings over 200 different songs.

My daughter absolutely loves her Smart Learning Home!

Melissa & Doug Examine and Treat Vet Play Set

This pet playset is the best to boost your child’s imagination! It comes with 24 pieces, including a plush cat and dog and a tote to carry the medical supplies. Good Housekeeping Institute recognized this toy as helping kids develop empathy while they play.

I found that when my daughter plays with doctor playsets, she tends to have a better understanding when she visits the doctor’s office and doesn’t freak out as bad as she used to. I’m able to teach her about bandages and stethoscopes and it becomes a new game for us!

For kiddies 4 to 5 years old

Kid K’NEX Oodles of Pals Building Set

This is the ultimate STEM toddler toy! Built to engage your toddler in science, technology, engineering, arts, and math, the K’Nex encourages developmental growth and discovery. The pieces are large enough to encourage imagination and creativity without difficulty.

Learning Resources Puzzle Globe

Do you have a little one fascinated by travel and geography? This Puzzle Globe is perfect to help your toddler engage in fine motor skills while learning about the world. It’s a 14 piece set that includes a spinning, interactive globe, and 6 continent pieces.


Other Must Share Favorites

I love educational toys, but sometimes I like to spoil Baby L with a toy just because it’s her favorite character. Here are some toys that are on Amazon’s “Top Toy List” that is sure to be a must-have on the playground this year.

In case you were looking for the most popular toys this year, here’s my compiled list of favorites!

Little People Disney Frozen Elsa Castle

Ages 18 months to 5 years

This ice palace is a baby show stopper! As soon as the holiday toy flyers started coming in the mail the first thing my daughter did was flip the pages to find this Frozen castle. She started jumping up and down shouting “Let it go! Let it go!”

Paw Patrol Total Team Rescue

Creative play meets loving animals– Paw Patrol is always a kid favorite! This toy is one of Amazon’s top toys of 2019 so if it’s on your kiddo’s wish list, be sure to order it before the rush 😉

Get Your Free Christmas Digital Planning Spreadsheet!

Do you want to take the stress out of Christmas planning and gift shopping?? I do!

Download the FREE Christmas Digital Planning Spreadsheet to help you keep track of your Christmas list, budget, gifts, store sales, and so much more. Stay on budget, save time, and save your sanity by downloading this spreadsheet where you can access it on any device!

Download the spreadsheet now!

I hope these toy ideas will help you build a fun, learning toy collection for your little one. Remember, you don’t have to sacrifice learning for fun because most toys do both!

With these toys, you’ll be saying goodbye to the avalanche of pointless Christmas toys and hello to a new year of fun learning!

Happy toy shopping!

Always With Love, Brianna

The Best fun Learning Baby and Toddler Toys Gift Guide

The Best fun Learning Baby and Toddler Toys Gift Guide


November 14, 2019 · Leave a Comment

9 Smart Summer Diaper Bag Essentials

Baby Routines

9 Smart Summer diaper bag essentials to keep you prepared all summer

Inside: Is your diaper bag ready for summer? Find out the 9 summer diaper bag essentials so you can pack the perfect bag and enjoy a lovely summer day!

Ever blindly reach into the diaper bag, fumbling around trying to find the sunblock– only to remember you didn’t pack it??

You’re standing in the scorching sun and your heart immediately drops…

You resent yourself because you forgot to pack something so important!

The weather this time of year can be so unpredictable. One day it’s downpouring cats and dogs and the next it’s sweltering so hot you can fry an egg on the car.

To be ready for summertime means your diaper bags need to be stocked with the perfect necessities! So, your summer diaper bag may have a few extra essentials.

Packing these 9 summer diaper bag essentials will ensure you and your baby are ready every day for a fun, summertime adventure!

With these summer diaper bag essentials, you will always be prepared!

9 Summer Diaper Bag Essentials

This post contains affiliate links. Any purchases you make through these links, I will receive a small commission at no extra cost to you! Mastering Mom life is a participant in the Amazon Services LLC Associates Program. As an Amazon Associate I earn from qualifying purchases. Please view Mastering Mom Life’s Terms, Disclosure & Disclaimer Policy and Privacy Policy. I wholeheartedly believe in all of the products I recommend and use them all! 

1. Sun Block

You’ll definitely want to make sure you always have sunblock with you. It’s the first summer diaper bag essential. The sun can be extremely dangerous to babies!

The best way to protect your little one from the sun is to be generous with sunscreen. I always try to carry a tube a sunblock with me as well as a little rub on stick version. Even if your baby has a hat on, you may want to put some sunblock on your baby’s button nose or on the top of their ears.

Those little overlooked places tend to burn the fastest!


2. Bathing Suit

I know some moms who don’t always have a bathing suit on hand but I learned my lesson the hard way.

One day, as I drove home from the grocery store, Baby L saw the sprinklers in a park and went ballistic. She kept begging me to take her to the “wa-wa”. (Her trying to say water in the cutest way possible 🙂 )

So I let her run through the water with her cute jean shorts and new lace tank top!

After that, I always make sure I have a bathing suit on hand- even if I leave one in the car. You won’t die without it, but since it’s summer—it’s probably best to be safe than sorry.

Remember: Hot days = Water Play

Baby in bathing suit: summer diaper bag essentials

Photo by Robert Boston on Unsplash

3. Swimmy Diaper

On the same topic, if you are going to pack a bathing suit and your baby is still in diapers, you’re going to want to pack a swimmy diaper too.

I usually buy one pack and keep a couple of extra diapers in the car and one in my diaper bag. It’s always better to not need it than to need it and not have it!

Here are the waterproof diapers that I keep in the car. They come in different sizes and fit perfectly!

4. Extra clothes & Plastic bag

Having extra clothes is always a necessity! You never know when your baby is going to have an accident and you don’t want your little one to be stuck in dirty clothes…or be stuck naked.

Having an extra change of clothes is a great summer diaper bag essential. If your baby is like mine and loves running through water with their clothes on, then you’ll have an extra set of clothes.

But it’s also best if you pack a Ziplock bag or any plastic bag too. Now you have a place to put the wet or dirty clothes and it doesn’t dirty anything else in your bag.

Smart Summer Diaper Bag Essentials

Parent Tip: I usually put the clean extra set of clothes in the Ziplock bag at the bottom of my diaper bag. Then I use the clothes when needed and the put the dirty clothes in the Ziplock bag.

It’s brilliant and organizational!

BONUS: Don’t forget to download the free Summer Diaper Bag Checklist so you can be sure to pack these essentials every day! CLICK HERE to get it now!


5. Water Resistant Sun Hat

The summer sun is relentless. The easiest way to protect your baby’s eyes from the sun is to put a hat on him. A sun hat with a wide rim is best!

You can even find a water-resistant sunhat that your baby can wear in the water. 3 benefits in 1 hat!

6. Insect Repellant

Another Summer diaper bag essential is insect repellant. Especially if you live in an area with a lot of biting bugs!

If you’re also planning on being outside around dusk or in the evening, you’ll want to have insect repellant on hand.

I found out my daughter is allergic to mosquito bites and I didn’t even think about having insect repellant in my diaper bag. Now it’s an absolute essential.

As a bonus, you can also pack this anti-itch Benadryl stick. If your baby gets a bug bite, just rub it on the bite and your baby will feel much better. No more itching. That way, you can continue having a fun day without a cranky baby!

This is my favorite baby bug repellant. It’s organic and doesn’t have any chemicals or harmful ingredients!

7. Mini first aid kit

A mini first aid kit is a year-round diaper bag essential for me, but even more so in the summer. Since the weather is warm, your baby has fewer clothes on and their skin is more exposed. Which means and fall can result in a scrape or scratch.

You don’t have to carry around a full 50-piece, clunky first aid kit, but it’s wise to have a couple of band-aids and some Neosporin on hand.


Check out this post too!

How to Easily Clean your diaper bag featured image


8. Water

The heat in the summer can feel like you are wrapping yourself like a thick, scorching blanket. In some locations, the humidity alone can make you want to sprint to the nearest pool.

Babies can get dehydrated very quickly and can suffer from heat exhaustion. To prevent these very serious conditions, always carry around some water.

If your baby is not old enough to drink water, keep her hydrated with milk. (Always ask your doctor before giving your baby water for the first time.)

Bring your baby’s favorite sippy cup or bottle and have a bottle of water on hand. Make sure your little one is drinking every hour, depending on how hot it is.

Here are some awesome on-the-go sippy cups that I’ve used!

9. Snacks for energy

Don’t forget your baby’s favorite snacks to keep them energized. You’ll want to make sure your child is eating normally while they are playing throughout the day.

These are Baby L’s favorite snacks on-the-go snacks:

Summer Diaper Bag Free Checklist


Never forget your Summer Diaper Bag Essentials!

Be sure to download the FREE Summer Diaper Bag Checklist so you can always be prepared and have these essentials with you. Keep it on your phone as a reminder or print it out and check it off every time you pack your bag!


So there you have it! Here are the 9 summer diaper bag essentials to help you always be prepared for your family’s adventures:

  1. Sunblock
  2. Bathing suit
  3. Swimmy diaper
  4. Extra clothes and a plastic bag
  5. Water-resistant hat
  6. Insect repellent
  7. Mini first aid kit
  8. Water
  9. Snacks

Now, when you are in the heat of the moment and rummaging through your bag grasping for sunblock, you can confidently pull it out of the pocket and give yourself a pat on the back for remembering to pack it 🙂

Pin this post to pinterest


Are there any other essentials you have in your summer diaper bag? Leave some tips in the comments below!

Always With Love, Brianna

Wait! Do you love free printables??

Free Mastering Mom Life Resource Library

Become part of the Mastering Mom Life Insider tribe and get instant, exclusive access to my Mom Treasury filled with FREE printables + worksheets to make mom life easier!

You might like this post too!

Diaper Bag Essentials List: Items for a Perfect Diaper Bag | mom life tips | checklist | #momlife #parentingtips

9 Summer Diaper Bag Essentials: How to pack the perfect summer diaper bag

June 19, 2019 · 1 Comment

Tips for Eating Out with Baby

Baby Routines

Master Eating Out with Your Baby

Inside: Find out the secret to eating out with your baby successfully! These tips will help you master being able to take your baby to any restaurant!

My daughter was 8 months old and I was experiencing cabin fever– bad.

My living room walls were closing in on me and each second it felt like my house was getting smaller and smaller. I felt like Alice in Wonderland! The last thing in the world I wanted to do was cook dinner.

My husband came home, looked at me and said the 7 most perfect words I could hear at the time: “Don’t cook. Let’s go out to eat.”

Eating out with your little one can be challenging, but sometimes you just need to get out of the house. And you can’t let the fact that you have a child hold you back!

Are you craving your favorite restaurant but afraid to take your baby out to eat? Don’t worry, I’ve totally been there!

The true secret to eating out with your baby is to prepare, prepare, prepare!

Taking your baby out to a restaurant with you is not only possible but can be easy. I’ll share all of my tips and tricks to help you master eating out with your baby!

If you follow these tips, not only will you be able to master eating out with your baby, but you’ll also be able to take your baby ANYWHERE!

Want to master eating out with your baby? These 10 tips will help you successfully take your baby to restaurant and be able to give you the confidence that you can take your baby anywhere! Learn to dine out with your baby without stress! Plus, get a free restaurant kit checklist! #babytips #parenting #momlife


Say goodbye to feeling trapped inside of your house and hello to all of the different possibilities that you can take your baby to!

To help you truly master eating out with your baby, I created this awesome Restaurant Kit for Baby Checklist for everything that you will want to bring with you when you eat out!

This ultimate checklist has everything you will possibly need to have an amazing meal out with your family without worrying about your baby having a miserable time. Get the checklist now!


Let’s get down to it!


Tips for Eating out with Your Baby

This post contains affiliate links. Any purchases you make through these links, I will receive a small commission at no extra cost to you! Mastering Mom life is a participant in the Amazon Services LLC Associates Program. As an Amazon Associate I earn from qualifying purchases. Please view Mastering Mom Life’s Terms, Disclosure & Disclaimer Policy and Privacy Policy. I wholeheartedly believe in all of the products I recommend and use them all! 

10 Tips to make eating out with baby super easy

Stock your diaper bag with essentials

The number one thing that you are going to need when eating out with your baby is a stocked diaper bag. But not just stocked with anything…but with the RIGHT things!

In my Restaurant Kit for Baby Checklist, I give you the ultimate list of everything you need to stock your diaper bag with before eating out with your little one. With this checklist, trust me, you won’t forget anything!

Some of the important things to definitely have that most parents don’t think about is:

  • Disinfectant wipes
  • High chair cover
  • Plastic bib
  • Handheld toys
  • Plastic placemats
  • Utensils

Those are just some of the important items to have, but to get my FULL list, download my Restaurant Kit for Baby Checklist now! It even has a list of things that you can bring and make a restaurant “busy” kit for your baby or toddler to keep them entertained and having fun!

Free restaurant kit checklist for baby


Go to a family friendly place

It’s important that when you go out to eat with your baby or children that you are visiting a family friendly place. It’s not the best idea to visit a place that has fancy white table clothes and 5 different glasses on the table.

The key is to be a family friendly environment. It doesn’t have to necessarily be a kids place” like Chuck E Cheese, but you’d be surprised at how many local restaurants and diners are actually family friendly.

Some restaurants offer crayons and coloring pages and chalk and a mini chalkboard too!


Look at the menu beforehand

There are 2 reasons to look at the menu before going to a restaurant with a baby:

  1. To see if there is anything that your baby can eat
  2. To see if you need to bring your own food for your baby

I’ve been taking my daughter to restaurants with me since she was 4 months old! When she was still little, she would just sit in her car seat and have a nice nap.

Then when she got older and could sit up by herself confidently, I would put her in a high chair close to me and just bring her food to eat from home!

As she got older and started eating more of a variety, I would then just order food that I knew she could share with me.

Don’t be afraid to bring your own baby food, jar food, homemade food, and snacks!

Diaper Bag Essentials | Extra Snacks

Bring a high chair cover

If your baby is old enough to sit up and eat in a high chair at a restaurant then you want to be sure to bring a high chair cover. I’m not a particularly super paranoid person about germs, but I feel like that when it comes to food, I like things to be as clean as possible.

I believe that the restaurant does clean down high chairs after every use, but there’s no way to be SURE. I don’t know if the last kid spit out food or drooled all over, which is totally possible!

Because I know how messy babies can be (my daughter can be very messy!), I like to be on the safe side and bring my own high chair cover. That way, I KNOW what my baby is sitting on is clean. It also reduces the risk of her getting sick.

I purchased this 2 in 1 convertible highchair cover and shopping cart cover. It’s super easy to use and even rolls up into a little bag so you can bring it anywhere with you!


Bring a disposable adhesive placemat

Having an adhesive placemat at a restaurant is SO helpful because it not only keeps the table clean from baby messes, but it also give your baby something to play with!

These placemats are disposable and have different characters and designs on them.

My daughter loved them and it kept her so entertained when she was a baby! Now that she’s a toddler she loves to trace the designs and it keeps her busy and having fun while mommy and daddy eat!


Help goes a long way

Of course, you can eat out with your baby by yourself, but some extra help can truly be lifesaving! If you’re taking your baby out to a restaurant for the first time, I would recommend taking your spouse or a family member or friend so you can have an extra hand to help.

Sometimes your baby will need help eating and you can’t focus on eating yourself. Having someone to help can be great because you can take turns tending to your baby.

After all, you’re going to a restaurant so you can enjoy some outside food and to have a nice time!

Master Eating Out with Your Baby

Reinforce with disinfectant

Like I mentioned, I’m a strong believer in making sure things are clean when I am out and about with my little one. I may look like the crazy lady at the table, but before I put my baby down I always disinfect the table, chairs, and menus with a travel disinfectant wipes.

I’ve been doing this since my baby was born and I think it is one of the reasons that my daughter has never been sick with the flu or stomach bug that goes around.

You have no idea how much of a headache you can be saving yourself later by just taking 2 seconds to wipe down a surface or a chair.

I also disinfect each baby changing station before I change my baby in public. I once witnessed a little girl throw up on a changing table and someone just cleaned it with a paper towel and NO soap or disinfectant!

Needless to say, I was scarred and now I disinfect each time I change my baby in a bathroom!


Wait! Love Free Printables??

Free Mastering Mom Life Resource Library

Become part of the Mastering Mom Life Insider tribe and get instant, FREE, private access to my resource library filled with printables + worksheets to make mom life easier!


End tables/round tables work well

If you are worried about being in other people’s way at the restaurant with your baby being in a high chair, I found that end tables and round tables work really well. It’s best if you are able to remove a chair from the table and replace it with the high chair instead of just sticking your baby at the end of the table. Some people are not as baby friendly and can “bump” into the high chair when they are walking by.

You can avoid this happening by requesting a table where your baby can be placed at the actual table and not just at the end of it.


Choose a time according to baby’s schedule

If your baby is on a consistent schedule, then you want to make sure you are eating out with your baby at a time that you know your baby will be in a good mood.

For example, don’t go to a restaurant at the time that your baby usually naps. Your baby will be grumpy, cranky, and irritable from being tired. Try to go out around when you know your baby will eat or have a snack so your baby will be happy.

After all, you want your baby to be happy and not be miserable! This will make the time out more enjoyable for your as well!

Read more about the baby’s daily schedule here!


Restaurant Kit for Baby Checklist

Free Restaurant Kit for Baby Checklist

Don’t forget to download the free restaurant kit for baby checklist so you can be sure to pack everything you need for eating out with your baby! Everything on the checklist will give you the ability to pack an awesome “restaurant kit” to help your baby stay happy, content and entertained! I also include a diaper bag checklist to help you make sure your diaper is stocked with everything you need while you’re out with your baby and family!

Get the checklist now!


>> So, there you have it! Here are 8 tips for eating out with your baby successfully! Don’t be overwhelmed with taking your baby out. Instead, enjoy the time out with your family!

Remember, the true secret to eating out with your baby is to prepare, prepare, prepare!

If you follow these tips, not only will you be able to master eating out with your baby, but you’ll also be able to take your baby ANYWHERE!

Now, when you’re having your own Alice in Wonderland experience…don’t even think about cooking. Get out of the house and feel confident knowing you can accomplish eating out with your baby!

Have any other tips that you do when you eat out with your little one? Feel free to share them in the comments below!

Pin this post to pinterest

Always With Love, Brianna

Wait! I think you’ll like these posts too!

How to keep your house clean with a toddler

Ultimate Tips for Flying with a Baby

Planning a trip to Disney world on a budget does not have to be impossible!

Best tips for eating out with a baby

how to conquer eating out with your baby

February 27, 2019 · 1 Comment

How To Easily Adjust Baby to Daylight Savings Time

Baby Routines

Help adjust your baby to daylight savings time

Worried your little one is going to lose precious sleep after daylight savings time starts?? Learn the exact steps you can take to make the time transition smooth!

Daylight savings time for kids can sometimes mean sleepless nights, fussy babies, and complete aggravation.

The great news is, you can avoid the havoc by taking some steps to adjust your baby for daylight saving time.

Daylight savings time can be a hard time for your little one because just like need time to adjust to the new time, so does your baby. Most of the time, it’s hard for babies to adjust to the new time change so it can wreak havoc on your baby’s schedule, and even on your family!

The best way to adjust your baby to daylight savings time, both for the start and end of it, is to ease your baby into the time change by preparing for it beforehand.

I’m going to tell you the exact steps to take to help your baby adjust to daylight savings time before it even happens so when the change starts, they will already be fully adjusted!


Want to make daylight saving time easier for your baby? Find out the exact steps to prepare your baby for daylight savings time before it happens so when the time change starts, they will be fully adjusted! Learn the best baby sleep tips for daylight savings time! Plus a free chart to help you! #parenting101 #parentinghacks #parenting #baby #parentingtips

Want to easily adjust your baby to daylight savings time?

Download my bedtime and nap time charts to help you adjust your baby’s sleep based on their nap times and bedtime! The charts include times to put your baby to sleep for both daylight savings time start and end too.

Let’s get down to it!


Tips help you adjust baby to daylight savings time

Important: These steps reach the optimal outcome if your baby is on a daily schedule and consistent routine. Since we are going to deal with how to adjust your baby’s sleep to daylight savings time, you want to make sure you are doing a consistent nap time routine bedtime routine with your baby. This will make the adjustment SO much easier.

Find out about how to start a bedtime routine here and how to start a nap time routine here.


Start the adjustment 10 days before

Daylight savings time always falls on a Sunday.

Both the start and the end of daylight savings time. So if we are trying to adjust our baby to the change seamlessly, it’s best to start 10 days before that Sunday.

That way, then the time change actually happens, your baby is already fully adjusted and will feel no real difference. We’ll talk more about what to do each of those 10 days to prepare your baby for daylight savings time.

Help adjust your baby to daylight savings time

Gradual adjustment is key

The main part of adjusting your baby to daylight saving time is doing it gradually. That’s why we are not leaving our children to just “adjust” to the new time after it’s done. The important factor is to do it gradually!

When you adjust your baby to daylight saving time gradually beforehand, you wont have a cranky, grumpy, time confused child once it happens!


Best ages to begin daylight savings time adjustments

My daughter was born in April and she experienced her first daylight savings time change in November, when she was 6 months. I thought she was “too young” to try to adjust her before the time change so I just left it alone and figured she would adjust naturally like we do as adults. NOT. THE. CASE.

I was so angry at myself for not adjusting her gradually before the time change because my once passive, easy to fall asleep, loving her schedule baby was now an angry, constantly tired, grumpy baby. It took me 2 weeks to get her back on her schedule and normal routines!

So if your baby is a little more than a couple of months I would just start the gradual adjustment. If your baby is well over toddlerhood and can understand the difference in time well enough, then you may be inclined to just let the change happen naturally. The choice is yours!


Steps to Take to help Baby Adjust to Daylight Savings Time

Daylight saving time starts: Spring Forward (When you Lose an Hour in March)

Daylight Savings Time: Spring Forward

1. Starting 10 days before the time change, start to put your baby to sleep 15 minutes before their normal bedtime.

Because in the spring we are LOSING an hour, that means that your baby’s normal bedtime at 7:00 is really going to be 8:00. Which is too late.

Since you want to keep your baby at the 7:00pm bedtime, this really 6:00pm after daylight saving time.

This means you have to start adjusting your baby to go to sleep earlier, so they are making up for that lost hour once it happens.

So at the 10 day mark, if your baby goes to sleep at 7:00p, put your baby down at 6:45.

Do this for 3 days.


Daylight Savings Time 15 Minutes before bedtime

Remember, start your bedtime routine 15 minutes before as well! For example, if your baby goes to bed at 7:00pm and you usually start your baby’s bedtime routine at 6:15, then you need to adjust the bedtime routine as well and start it 15 minutes earlier, at 6:00pm.


2. 7 days before the time change, start to put your baby down an extra 15 minutes before. This is now 30 minutes before baby’s original bedtime.

Now that you have put your baby down for 15 minutes before their normal bedtime for 3 days in a row, you are going to add another 15 to that time.

Keeping with our original 7:00pm bedtime example, you are now going to put your baby down to sleep at 6:30pm.

Do this for another 3 days.

Don’t forget to move your baby’s bedtime routine 30 minutes from its original time!

5 simple steps to survive daylight savings time with babies and toddlers

3. 4 days before the time change, start to put your baby down an extra 15 minutes. This is now 45 minutes before your baby’s original bedtime.

For the past 3 days you have been putting your baby down to sleep a half hour (30 minutes) before their original bedtime. Now that we are only 4 days away from Daylight savings time, it’s time to add another 15 minutes.

You want to put your baby down to sleep 45 minutes before their original bedtime. S if baby goes down at usually at 7:00pm, you are putting them down to sleep at 6:15pm.

Do this for 3 days.

Remember to move your baby’s bedtime routine 45 minutes before!


Daylight Savings time bedtime chart

Don’t forget to download my daylight savings time baby sleeping chart! It details what time to put your baby to sleep at on each day before daylight savings time to help your baby adjust easily!


4. One day before daylight savings time, put baby down one hour before their original bedtime.

For the past 9 days we adjusted your baby’s bedtime by 15 minutes every 3 days. One day before daylight savings time is the time to make the full adjustment and add that extra 15 minutes to make it the full hour.

For example, if your baby goes to sleep at 7:00pm, put baby down to sleep at 6:00pm. This shouldn’t be a huge change because for the past 9 days we’ve been gradually changing the sleep time by 15 minutes. So, the extra 15 minutes to make it an hour, won’t even feel like anything to your baby!

Don’t forget to start your baby’s bedtime routine an hour before too!


5. On daylight saving time night, put baby to sleep one hour before.

All that you’ve been preparing for is finally here! The official time change! Your baby already went to sleep the night before an hour before their original bedtime. That prepared them for tonight’s official time change. When you put your baby down to sleep a 6:00pm tonight, tomorrow night at this time it will be 7:00pm.

So, your baby will be back to their 7:00pm bedtime!

TA-DA! Not too hard right!


IMPORTANT: This is where the importance of a schedule and routine come in! Because you are changing the actual TIME of your baby’s bedtime sleep, you need to also start their bedtime routine the appropriate minutes before to align with the new bedtime.

Bedtime routine importance in daylight savings time

Having a bedtime routine will help your baby transition times because it will allow them to feel comfortable through the adjustment.

Because they know that the bedtime routine signals bedtime sleep after you do the routine at the new time, it will still signal bedtime sleep and it will help them sleep, despite the time change!

Daylight saving time ends: Fall Back (When you gain an Hour in November)

Let’s talk about when Daylight savings time ends and you gain an hour back! It’s basically the same steps but in reverse!

Daylights savings time, fall back

1. Starting 10 days before the time change, start to put your baby to sleep 15 minutes after their normal bedtime.

Because in the spring we are GAINING an hour, that means that your baby’s normal bedtime at 7:00 is really going to be 6:00. Which is too early.

Since you want to keep your baby at the 7:00pm bedtime, this really 8:00pm after daylight saving time.

This means you have to start adjusting your baby to go to sleep later, so they are adjusting to that lost hour once it happens.

So at the 10-day mark, if your baby goes to sleep at 7:00p, put your baby down at 7:15pm.

Do this for 3 days.

Prepare baby for daylight savings time


Remember, start your bedtime routine 15 minutes after as well! For example, if your baby goes to bed at 7:00pm and you usually start your baby’s bedtime routine at 6:15, then you need to adjust the bedtime routine as well and start it 15 minutes after, at 6:30pm.


2. 7 days before the time change, start to put your baby down an EXTRA 15 minutes after.

This is now 30 minutes after baby’s original bedtime.

Now that you have put your baby down for 15 minutes after their normal bedtime for 3 days in a row, you are going to add another 15 to that time.

Keeping with our original 7:00pm bedtime example, you are now going to put your baby down to sleep at 7:30pm.

Do this for another 3 days.

Don’t forget to move your baby’s bedtime routine 30 minutes after its original time!


3. 4 days before the time change, start to put your baby down an EXTRA 15 minutes. This is now 45 minutes after your baby’s original bedtime.

For the past 3 days, you have been putting your baby down to sleep a half hour (30 minutes) after their original bedtime. Now that we are only 4 days away from daylight savings time, it’s time to add another 15 minutes.

You want to put your baby down to sleep 45 minutes after their original bedtime. So if baby goes down at usually at 7:00pm, you are putting them down to sleep at 7:45pm.

Do this for 3 days.

Remember to move your baby’s bedtime routine 45 minutes after!


Daylight Savings Time free chart

Don’t forget to download my daylight savings time baby sleeping chart! It details what time to put your baby to sleep at on each day before daylight savings time to help your baby adjust easily!

4. One day before daylight savings time, put baby down one hour AFTER their original bedtime.

For the past 9 days we adjusted your baby’s bedtime by 15 minutes every 3 days. One day before daylight savings time is the time to make the full adjustment and add that extra 15 minutes to make it the full hour.

For example, if your baby goes to sleep at 7:00pm, put baby down to sleep at 8:00pm. This shouldn’t be a huge change because for the past 9 days we’ve been gradually changing the sleep time by 15 minutes. So, the extra 15 minutes to make it an hour, won’t even feel like anything to your baby!

Don’t forget to start your baby’s bedtime routine an hour after too!


5. On daylight savings time night, put baby to sleep one hour after.

All that you’ve been preparing for is finally here! The official time change! Your baby already went to sleep the night before an hour after their original bedtime. That prepared them for tonight’s official time change. When you put your baby down to sleep at 8:00pm tonight, tomorrow night at this time it will be 7:00pm.

So, your baby will be back to their 7:00pm bedtime! All done!

IMPORTANT: This is where the importance of a schedule and routine comes in! Because they know that the bedtime routine signals bedtime sleep, after you do the routine at the new time, it will still signal bedtime sleep and it will help them sleep, despite the time change!


Help adjust baby to daylight savings time


Free Baby Sleep Charts for Daylight Savings Time!

To help you better adjust your baby, I created these charts for you to easily access and download! It includes:

  • A bedtime chart of what time to put your baby to bed so you can easily gradually adjust your baby based on their specific bedtime!
  • A nap time chart of what time to put your baby to nap so you can easily and gradually adjust your baby based on their specific nap times!
  • Charts for both daylight savings time start and end!

Get the free Daylight Savings Time Chart now!


There you have it! Here are ALL of the steps to take to adjust your baby to daylight saving time, both the start and the end of it!

Remember, the best way to adjust your baby to daylight savings time, both for the start and end of it, is to ease your baby into the time change by preparing for it beforehand.

By following these exact steps you will help your baby adjust to daylight savings time before it even happens so when the change starts, they will already be fully adjusted!

No sleepless nights this year!

Have any questions or want to share how you help your baby adjust to daylight savings time? Feel free to share them in the comments below!

Always With Love, Brianna


Read these related posts

Importance of a baby bedtime routine to help your baby sleep longer and better!


Baby Nap Routine with Free Nap Routine to Help Baby Sleep Longer Everyday

How to prepare your kids for daylight savings time

How to easily adjust baby to daylight savings time

February 23, 2019 · Leave a Comment

Why You Should Set Goals for Your Baby

Baby Routines

Learn the 5 reasons why you should set goals for your baby and children

We all know the importance of setting goals for our self, but have we ever thought of setting goals for our babies? We’re not talking about the kind of goal that you want to kick yourself if you fail at, but about realistic goals to encourage their daily growth. We’ll walk all about the reasons why you should set goals for your baby!

Some of the most important reasons why you should set goals for your baby are:

  • To encourage their growth,
  • Be able to track milestones,
  • Increases the bond between you and baby,
  • And it sets a good precedent and habit in your home.

Do you want to encourage your baby’s daily growth and help track your baby’s milestones? Learn all about why you should set goals for your baby! Read the 5 reasons why you should set goals for your baby and the benefits of setting goals. Discover awesome these baby tips and parenting tips! #parentingtips #babytips #familygoals

One of the easiest ways I track my own goals, my family’s goals, and my baby’s goals is in a goal tracker! I created an awesome and completely FREE #MomGoals 2019 Goal Planner to help you create goals, track goals, and accomplish all of the goals you have for yourself and your family.

Download the Goal Planner now!


So, let’s get down to the amazing reasons and benefits of setting goals for babies!


Why You Should Set Goals for Your Baby


Helps track milestones and growth

One of the first reasons why you should be setting goals for your baby and children is to be able to help you track their milestones and growth. Most of the time our children hit milestones and we celebrate the big ones and then kind of just expect for the rest of them to keep coming.

But EVERY milestone is a HUGE accomplishment! No matter how big or how small.

Your child will have different milestones at different ages. The best way to start setting goals for your child is to choose the next milestone that they are supposed to reach and set it as a goal. Now that the milestone is a goal and not just a milestone that is eventually coming, you begin to work at that goal and nurture the developmental processes that your baby is experiencing.

So when your baby actually reaches that milestone, it is also an accomplished goal!

For example, one of the major childhood development milestones is walking. Instead of waiting for my baby to begin to walk, I will encourage her to walk and set up the stage for her success.

So I will take her by the hands and inch forward and backward with her and put her on my feet and “pretend” that she is walking. I will create daily habits in line with her being able to reach that milestone. And in turn, accomplishing that goal.

Being able to track these milestones and your child’s growth is an amazing!

Learn the 5 reasons why you should set goals for your baby and children

You are following their growth track instead of someone else’s

I know a lot of parents who get really caught up in the comparison trap between their children. Even I fall into it myself! Your first reaction is to automatically compare your child’s milestones and growth to another child’s, or even another child of yours.

The fact is, every child is different and every child grows at a different rate. Yes, there are ages that growth and milestones are most likely to take place but it doesn’t mean that your child is behind or moving too quickly if they don’t fall exactly into that box.

One of the reasons I love most about setting goals for children’s is the ability it gives you to follow your child’s pace of growth, and not someone else’s. The goals and milestones that you set for your baby will be done at your child’s time and you are able to follow their track of growth instead of someone else’s.

Putting milestones and growth into terms of goals really helps you see how far your child has come. It allows you to celebrate even the tiniest of things and helps you understand your child’s growth.

Dad and baby reading | Bonding

You are working with your baby toward something together 

Another reason why you should set goals for your baby and children is because it bonds you. Because you are helping your baby work toward a goal, it is bringing you and your child closer on another level. Working on something with your baby bonds you as opposed to just waiting for your baby to reach the next milestone on their own.

You become connected to your baby and to the progress of your baby’s growth. You’ll be able to have so many cherished memories of even the smallest things because you chose to make a goal for your baby instead of just waiting around for it to happen.


You are actively helping your baby

I love to set goals for my children because I know that I am actively helping them. I am being a part of their growth process and making everything that they do something that I want to be a part of. Babies grow SO FAST and taking the time to engage with your child and help them on their growing process can be so meaningful.

It also makes you feel like a present parent wanting the best for their child and working toward that goal together. It’s a wonderful feeling!

Baby Playing and reaching new milestone

Sets a good precedent into toddlerhood and childhood

One of the main reasons why you should set goals for your baby is because it sets an amazing precedent for your child as they enter toddlerhood and childhood (and even adulthood!). The habits and traditions that we start when our children are young are the ones that will be instilled in them and shape their life.

Choosing to set goals for yourself and your baby all throughout their childhood will show them the ability to achieve accomplishments!

Yes, setting a goal for a baby can sound a bit dumb but in the larger picture you are teaching your child to set goals, work at them, and achieve them. This is an amazing character trait that will shape them into an amazing person.

We all want our children to succeed and we can actively help them in their accomplishments by setting goals with them and helping them accomplish them!

[click_to_tweet tweet=”Goals are not about failing, but about giving you a reason to keep working at something!” quote=”Goals are not about failing, but about giving you a reason to keep working at something!”]


How to Reach Your Goals \\ Slay Your Goals!

Tip: Reduce setting yourself up for failure

I want to clarify that these goals are not necessarily “timeline goals”. Meaning, you think “little Johnny must be walking in 2 weeks are we failed”. No no no.

I am talking about making overall goals that you want to see your baby accomplish and that you can help them achieve. This means that, if my baby was supposed to be walking by 15 months but she’s 16 months and still only cruising furniture, then that’s 100% okay! My goal is to see my daughter walk, not see her walk at a specific time.

Having a timeline goal is not wrong but it is important to know what type of goal to set and how to approach achieving the goal.

The last thing you want to do is set you or your children up for failure! Goals are not about failing, but about giving you a reason to keep working at something!

Mom Goals 2019 Goal Planner Post Image


Download my Free #MomGoals 2019 Goal Planner Now!

The Free #MomGoals Planner is designed to help you:

  • Brainstorm the goals that you and your family want to achieve that month
  • Plan your monthly goals
  • Achieve your monthly goals by helping you create action steps
  • Complete your goal action steps with easy to use trackers
  • Plan your month at a glance
  • Create an attainable “to-do” list with prioritized sections
  • Make goals for not only yourself, but your children and spouse
  • Write your notes for the month so you never forget to do anything!
  • Help you break down all of the goals you want to accomplish in 2019 in an easy to accomplish way!

The #MomGoals 2019 Goal Planner is a 24-page printable calendar workbook to help you master your goals this year! Start the year off right with creating, tracking, and accomplishing your goals!


>>So there you have it: why you should set goals for your baby and children! Remember, setting goals for your children will help you track their overall growth and milestones, help you bond, encourages their growth, and sets a good model in your home.

Happy goal setting!

Always With Love, Brianna

Want to learn more about goal setting?? Check out my post ” How to Create Goals that You Will Actually Keep!”

You may also like these articles:

How to get your baby to sleep in a crib in 7 easy steps

Importance of a baby bedtime routine to help your baby sleep longer and better!

February 8, 2019 · 6 Comments

How to Easily Get Baby to Sleep In A Crib

Baby Routines

How to get your baby to sleep in a crib in 7 easy steps

Pulling your hair out trying to get your baby to sleep in a crib? Don’t worry, I’ve been there!

There’s nothing better than knowing your little one is safe and sound, dreaming of sweet zzzz’s in the comfort of their own crib.

Getting your baby to sleep in a crib is a really big accomplishment. The great news is, it’s not as difficult as it may seem!

The most important keys to getting your baby to sleep in a crib are:

  • Try to start as early as possible
  • Associate the crib with positivity,
  • Start daily routines, and
  • Go at your baby’s pace.

Let’s talk all about the realistic and practical steps and ways of getting your baby to sleep in a crib easy and stress-free!

How to get baby to sleep in a crib in 7 steps

1. First thing first, start a nap and bedtime routine

Let’s talk about routines!

I believe that a strong and consistent nap routine and bedtime routine is the KEY to your baby sleeping better. Not only does a routine help your baby sleep better and longer, but it also gives you the ability to incorporate the crib into the routine.

For example, I started my daughters daytime nap routine when she was 11 weeks old, and within 1 week she was napping in her crib every nap.

Making the crib a part of your routine is one of the best ways to get your baby to sleep in a crib. Grab my free routines to help your baby sleep in his/her crib now!


Download my Free Sample Nap Routine Now!

AND

Download My Free Sample Bedtime Routine!

2. Start as early as possible

One of the best steps you can take to getting your baby to sleep in a crib is to transition them as soon as possible.

I actually started putting my baby in her crib the first night we brought her home from the hospital. She was sleeping so well in the little side of the bed bassinet in the hospital that when we got home I just wanted to see how she did in the crib. And she did amazing!

It was a little bit of an extra step because I was breastfeeding and had to go to her nursery to feed her at night. But it didn’t bother me too much because I knew that in the long run getting her used to a crib early was important to me.

BUT don’t get too discouraged if your newborn was sleeping in a bassinet or in something else at first! You can easily transition your baby to a crib. Just remember, the younger they are- the better! Start the transition as soon as you feel it is time and don’t wait too long.

That’s why the first step is to have a solid bedtime routine. If you’re sticking to that consistent routine then your baby will get used to their crib easier.

Baby Napping

3. If you didn’t start right away, integrate the crib slowly starting with naps

If your baby did not sleep in a crib from an early age then DO NOT WORRY! You can always start now.

The next step is to integrate crib sleeping with naps first. Getting your baby used to sleep for shorter amounts of time in the crib will set the stage for sleeping a longer stretch of time in the crib at night.

I can’t stress this enough- be sure to have (or start!) a solid and consistent nap routine with your baby. This routine will help your baby adjust to the new sleep surrounding.

For example, if your baby is used to sleeping in a swing or rock n’ play, then start your baby on a routine where they now nap in the crib.

You want to take baby steps and not do everything at once. Getting your baby used to one change at a time is good enough! Then after a week or 2 when your baby is used to the change and it has become a normal, then you can begin another change.

Baby Nap Routine

4. Don’t associate negativity with the crib

If you want your baby to sleep in a crib, then you have to make the crib a positive place. The last thing you want is for your baby to associate the crib with a time out!

Make sure that you are not associating the crib with any negative connotations. If your baby is used to crying and crying in the crib, then your baby is not going to like being in a crib. You want to make the crib a safe haven for sleep. Just like we feel about our beds!

If your baby is getting used to sleeping in a crib then, of course, there is going to be a transition phase where he/she cries for a bit. But don’t let that become a habit!

I would not advise sleep training AND transitioning your baby to a crib at the same time. You do not want to associate sleep training crying with being in the crib for the first time.


How to get your baby to sleep in a crib in 7 easy steps

5. Give your baby something they love

One of the best ways to get your baby to sleep in a crib is to give your baby something he or she loves in the crib. Whatever it is that makes your baby feel safe and happy- offer it to them in the crib. Just like we don’t want to associate negativity with the crib, we want to make sure we are associating positivity with the crib.

You can do this by offering your baby the pacifier or a favorite blanket or a stuffed animal. (Remember to ask your doctor about SIDS reduction and what you can or cannot place in the crib with your baby!)

My daughter loved the swaddle, so we used that to our advantage and swaddled her each time she was in the crib. She began sleeping amazingly! Then as she got older, we let her sleep with her favorite blanket. And to this day she loves she crib and even wants to be in there to go to sleep!

How to get baby to sleep in a crib | give your baby something they love

6. Make the crib a comfortable place

You want your baby to love the crib, so you have to make the crib as comfortable as possible! Here are some tips to making sure the crib is a comfortable place:

  • Make sure to have a comfortable crib sheet
  • That the room can is a good temperature.
  • The crib is in a place where you can have darkening curtains so your baby can sleep better.
  • I also started using a sound machine when my baby was still a newborn and even to this day that sound signals sleep and she wants to go in her crib.

So, make sure you are setting the crib up in a room that has all of the things that would make your baby feel comfortable!

7 tips to get your baby to sleep in a crib


7-. Sleep in the baby’s room to help with transition

If you see that your baby is having a hard time transitioning to the crib then you can make the transition easier by sleeping in your baby’s room.

This way, your baby will know that you are there and will feel a sense of peace and normalcy. You don’t have to do this for a long time, just until you see your baby is better transitioning.

THEN- you can just put a piece of your clothing at the bottom of your baby’s crib or tuck your shirt under the mattress so your baby can still smell you and be comforted by you but you don’t have to actually be in the room!

OR if you want to skip sleeping in your baby’s room altogether and just put a piece of your clothing in the crib or room for comfort, then that’s totally ok too! I used both of these tips and they have worked like a charm.


So, there you have it! How to get baby to sleep in a crib in 7 steps!

Remember, the most important keys to getting your baby to sleep in a crib is to try to start as early as possible, associate the crib with positivity, start daily routines, and to go at your baby’s pace.

Don’t become overwhelmed by the transition, just ease into it in baby steps. You don’t want to overwhelm your baby by implementing so many changes at once. Start by making a nap and bedtime routine and get your baby used to consistency.

Free Sample Nap Routine and Free Sample Bedtime Routines

Get the Free Nap & Bedtime Routines!

Don’t forget to get my Free Nap and Bedtime Routine so your baby can start getting great sleep!

I worked soooo loonnnggg creating routines that actually work and when it found it- it was like gold! After weeks of trial and error of figuring out what works and what doesn’t, I created a nap routine and a bedtime routine that actually works! And I want to share it with you!

Get the Free Nap Routine Now!

Get the Free Bedtime Routine Now!

Baby Bedtime Routine


As always, feel free to email me with any questions or write your questions in the comments below! Do you have any tips to help babies sleep in a crib?? Let us know in the comments!

You got this mamma!

Always With Love, Brianna

Pin this post to pinterest


Wait! Do You Love free printables??

Resource Library Image

Become part of the Mastering Mom Life Insider tribe and get instant, FREE, private access to my resource library filled with printables + worksheets to make mom life easier!


7 Steps to help your baby sleep in a crib | Image of nursery and crib

How to get your baby to sleep in a crib in 7 easy steps! Here are all of the tips and tricks to get your baby to transition to a crib | How to teach your baby to love the crib | transition your baby to a crib | get baby to sleep in a crib | baby tips | parenting 101 | #babytips #parentingtips #momtips

7 Easy tips to help baby seep in a crib

How to easily help your baby sleep in a crib

February 5, 2019 · 5 Comments

Importance of a Baby Bedtime Routine

Baby Routines

Importance of a baby bedtime routine to help your baby sleep longer and better!

Do you want your baby to sleep better and longer through the night? You are not alone! All parents wish for their baby to sleep peacefully through the night. One of the main keys to getting your baby to sleep through the night is a solid baby bedtime routine.

You may not think a baby bedtime routine is important, but I have found that a bedtime routine can make all the difference in the world to helping your baby sleep better and longer!

Bedtime routines are so crucial because it helps your baby know it is bedtime, helps them fall asleep faster, and ultimately stay asleep longer!

The importance of a baby bedtime routine to help your baby sleep better and longer! | Improve your baby’s sleep patterns | baby bedtime routine tips | baby nighttime routine | gentle bedtime routine | baby sleep | free bedtime routine | baby tips and tricks | parenting tips | #babytips #parenting101 #parentingtips #baby

Find out all of the amazing reasons why having a baby bedtime routine will improve your child’s nighttime sleep and even their overall day!

Before I start telling you the awesome reasons why you should have a bedtime routine, I wanted to give you my personal baby bedtime routine that has helped my daughter sleep through the night 10 hours from 8 weeks old! I use the same bedtime routine now that she’s 2 and she still sleeps 12 hours through the night! AND she takes amazing naps! I can’t tell you how priceless an amazing bedtime routine can be.

Steal my baby bedtime routine by downloading the routine below!


So let’s get down to it!


5 Reasons Why a Baby Bedtime Routine is Important


Help’s Baby Signal Nighttime Sleep

I love routines and schedules because it helps your baby know what is happening next and ultimately helps you anticipate their needs. A bedtime routine does just that as well!

Having a baby bedtime routine will help your baby know that it’s time for nighttime sleep. Which is different than daytime sleep because during your day your baby just naps and then wakes up after a shorter period of time. You want your baby to be able to distinguish between daytime sleep (naps) and nighttime sleep.

The sooner your baby knows the difference between those 2 sleeps, the better! The last thing you want is your baby waking up at night every 3 hours because he thinks it’s daytime and time for play. Of course, if your baby is still dream feeding or needs feedings throughout the night, they will wake up to eat. But after the feeding, your baby will go back to bed.

Bedtime routines will help your baby KNOW that nighttime sleep is coming. Doing the same routine consistently each night before bedtime will let your baby know that nighttime sleep is coming. Then after a couple of days, when you start to do the routine your baby will automatically know that it’s bedtime.

Nap routines will help your baby do the same thing- it will signal that it’s time for a daytime nap. Having a strong nap routine will greatly affect your baby’s nighttime sleep because your baby will know the difference between the nap routine and bedtime routine. (And ultimately daytime sleep and nighttime sleep).

I can’t stress enough the importance of a nap routine as well! Get my sample nap routine to help your baby nap consistently and longer every day by clicking here!

Baby Napping

Helps baby fall asleep faster (& self soothe)

Because a bedtime routine helps signal nighttime sleep and let’s your baby know that it’s bedtime, your baby will be able to fall asleep faster. When you put your baby down for sleep without any routine, your baby is crying waiting for you to pick her back up. But when you have a strong, consistent bedtime routine, your baby knows it’s time for sleep and it will reduce the causes of your baby crying and not falling asleep.

You want your bedtime routine to be comforting to your baby and fill them with everything they need before they go to sleep. When your bedtime routine is filled with loving hugs and comforting acts, then it will prevent your baby from being upset before going to sleep.

Your bedtime routine will ultimately help your baby self-soothe and fall asleep on their own. As time passes, this will help your baby fall asleep faster!

Finding a solid bedtime routine that works is like striking gold! Don’t forget to download my Sample Bedtime Routine that has helped my baby sleep through the night since 8 weeks old! Get the bedtime routine now!


Helps baby sleep longer

Since your baby now knows that it’s time for bedtime and is falling asleep faster, your baby will start to sleep LONGER. Doing a bedtime routine each night will show your baby consistency which will give your baby predictability and rest. When your baby is well rested and in a good schedule groove, your baby will start to sleep longer.

No more waking up after 5 hours one night, 4 hours the next night, and 7 hours the next night. A baby bedtime routine will help your baby sleep through the night for a consistent amount of time!

Importance of a baby bedtime routine to help your baby sleep longer and better!

Helps baby’s overall mood

When my baby is sleeping peacefully and consistently through the night I notice that she is also having consistent naps during the day. The last thing any parent wants is for their baby to experience bad sleeps! Having your baby get a good night sleep and taking full length naps each day will help your baby’s overall mood.

That is why having a nap routine and a bedtime routine is SO important. These little details will help your baby thrive on a day to day basis because your baby is getting the sleep they soo need.

The Importance of a Baby Bedtime Routine

Helps baby day to day schedule

Like I mentioned before, I LOVE having my baby on a schedule will consistent routines. It gives me the sanity I need because I know what my baby needs and when but also helps my baby know what is happening and what will happen next. Having a schedule gives your baby consistency and helps them thrive all day long!

When your baby is waking up rested because they slept through the night they are more likely to complete full feedings, nap consistently, and play happily! Once you introduce strong, consistent routines into your baby’s life you will begin to see a positive shift in their overall daily schedule!

(Find out more about how to tell if your baby has had a full feeding by clicking here!)


Don’t Forget- Consistency is KEY!

Keep in mind that it does NOT happen overnight! It will take time for your routine to be established. In every situation that I have used this routine, I started seeing beneficial results in 1-2 weeks. So, do not be discouraged! This routine should be done EVERY night before bed. After a week or so you should see the benefits and your baby sleeping longer and consistently!

Baby Bedtime Routine

Download my Miracle Bedtime Routine!

If you’re totally convinced that you need to start a baby bedtime routine but don’t know how to actually start or what do- I’m here for you! I want to give you my very own baby bedtime routine so you don’t have to go through trial and errors and guess what will work. I went through a whole month of hard days and nights trying to figure out the best bedtime routine and once I did it was magic!

Not only did my daughter start falling asleep faster, but she also started sleeping through the night!

Sooo I wanted to share my baby bedtime routine with you so you can print it out and have! Be sure to download the Sample Baby Bedtime Routine now!

So, there you have it! Here are 5 super amazing reasons why a baby bedtime routine is so important. Starting a bedtime routine for your baby will make nighttime sleeps feel like a breeze and will ultimately improve your baby’s overall sleep. What do you have to lose??

Be sure to start your baby on a bedtime routine today and start seeing these awesome benefits!

Already have your baby on a bedtime routine that works?? That’s great! Feel free to share your tips in the comments below!

Pin this post to pinterest

Always With Love, Brianna

Wait!! Do You Love Free Printables??

Free Mastering Mom Life Resource Library

Become part of the Mastering Mom Life Insider tribe and get instant, FREE, private access to my resource library filled with printables + worksheets to make mom life easier!


5 Reasons Your baby needs a bedtime routine. Mom holding baby in bed with mobile.

How to get your baby to sleep better with a baby bedtime routine

January 30, 2019 · 10 Comments

  • « Go to Previous Page
  • Go to page 1
  • Go to page 2
  • Go to page 3
  • Go to page 4
  • Go to Next Page »
  • Privacy Policy
  • Cookie Policy
  • Terms, Disclosure & Disclaimer Policy
  • About Me
  • Contact

Copyright © 2022 · Glamour Theme by Restored 316